Elegant & Delicious: How to Make a Swedish Princess Torte Cake

Have you ever scrolled through Instagram and spotted that gorgeous green dome cake that looks like it came from a fancy European bakery? That’s Princess Torte Cake (or “Princesstårta” if you want to impress your friends with your Swedish pronunciation skills). With its layers of sponge cake, jam, custard, and whipped cream all wrapped in a marzipan blanket, it looks like something that would get you Star Baker on a baking show—but I promise it’s doable in your home kitchen!

This cake might look intimidating, but think of it as a layer cake that went to finishing school—elegant, refined, and ready to make you look like a baking genius. So please put on your favorite playlist, clear some counter space, and let’s bring a slice of Sweden into your kitchen!
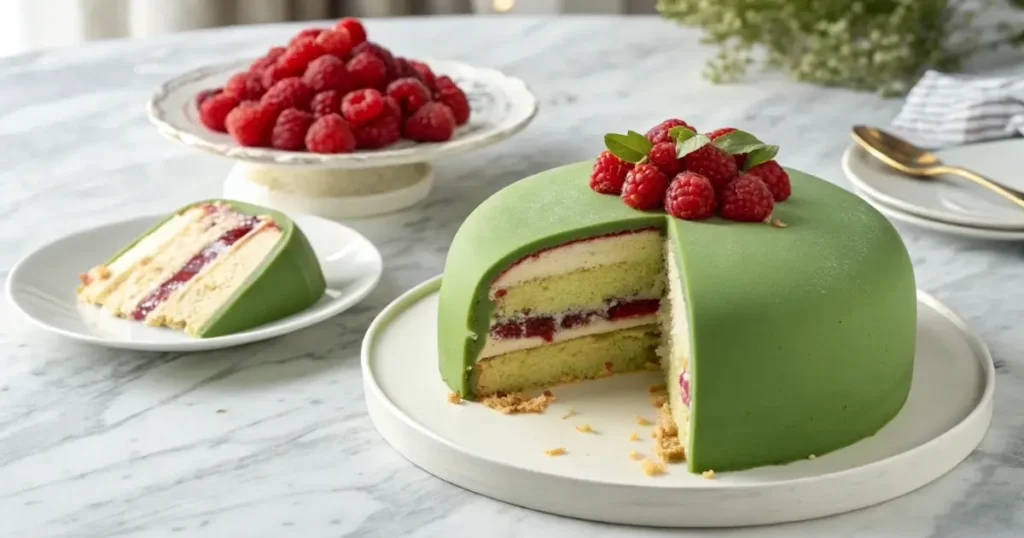
Princess Torte Cake

The Royal Backstory (The 30-Second Version)

In the early 1900s, a Swedish cooking teacher created this cake for three Swedish princesses: Margaretha, Martha, and Astrid. These royal ladies apparently couldn’t get enough of it (honestly, same), and it became so popular that it’s now Sweden’s national dessert.

Swedes love this cake so much that they even celebrate Princess Torte Cake Week every September. Yes, an ENTIRE WEEK dedicated to cake. I don’t know what will if that doesn’t convince you that Swedes have life figured out.

What You’ll Need for Your Princess Torte Cake

For the Sponge Cake (The Foundation):

  • 4 large eggs (room temperature works best)
  • 1 cup (200g) granulated sugar
  • ½ cup (120ml) whole milk (2% works in a pinch)
  • ½ cup (115g) unsalted butter, melted and slightly cooled
  • 1½ cups (180g) all-purpose flour (just the regular stuff)
  • 1½ tsp baking powder (check that expiration date!)
  • 1 tsp vanilla extract (the real stuff makes a difference)
  • Pinch of salt (just a little!)

For the Custard Filling (The Creamy Dream):

  • 2 cups (480ml) whole milk
  • 4 egg yolks (save those whites for an omelet tomorrow)
  • ½ cup (100g) granulated sugar
  • ¼ cup (30g) cornstarch (this is the magic thickener)
  • 1 tsp vanilla extract
  • ½ cup (120ml) heavy cream (for folding in later)

For the Whipped Cream (The Fluffy Cloud):

  • 2 cups (480ml) heavy cream (cold from the fridge)
  • 2 tbsp powdered sugar
  • 1 tsp vanilla extract

The Final Touches:

  • ½ cup (120g) raspberry jam (seedless is best unless you enjoy the crunch)
  • 12 oz (340g) marzipan (traditionally green, but you do you)
  • Powdered sugar for dusting (and covering any mistakes!)
  • Fresh raspberries (optional but pretty)

Let’s Get Baking!: how to make a princess cake

Step 1: Bake Those Cake Layers

  1. Preheat your oven to 350°F (175°C) and grease two 8-inch round cake pans. If you have parchment paper, line the bottoms—trust me, it makes life easier.
  2. Beat the eggs and sugar until fluffy and almost triple in volume. This might take 5-7 minutes with an electric mixer. Don’t rush this step—it makes your cake light and airy instead of dense and sad.
  3. Stir in the milk, melted butter, and vanilla extract. The mixture might look a little weird at this point—like it’s separating—but don’t panic! It’ll all come together.
  4. Sift in the flour, baking powder, and salt and fold them in gently. Think of it like tucking the flour into a blanket of egg fluff—gentle, gentle. Overmixing is the enemy here!
  5. Divide the batter between your pans and bake for 25-30 minutes. They’re done when they’re golden on top and a toothpick comes out clean.
  6. Let them cool completely. Don’t rush this, or your cream layers will melt faster than a snowman in Florida.

Step 2: Make the Custard (While Your Cakes Are Cooling)

  1. Heat the milk until it’s warm but not boiling. Think hot tub temperature, not lobster pot.
  2. Whisk egg yolks, sugar, and cornstarch in a separate bowl until smooth and slightly lighter in color.
  3. Gradually add the warm milk to the egg mixture while whisking constantly. This is called tempering the eggs, and it prevents you from making accidental scrambled eggs (not what we’re going for).
  4. Return everything to the saucepan and cook over low heat, stirring constantly, until it thickens enough to coat the back of a spoon. This might take 5-7 minutes—patience is key!
  5. Remove from heat, add vanilla, and let it cool completely. Pro tip: cover with plastic wrap touching the surface to prevent that weird skin from forming.
  6. Once cool, whip that ½ cup of heavy cream to soft peaks and fold it into the custard. This makes it lighter and more mousse-like. Game changer!

Step 3: Assembly Time (Where the Magic Happens)

  1. Place one cake layer on your serving plate. Pro tip: put strips of parchment paper under the edges to keep your plate clean during decorating. Remove them before serving, and everyone will think you’re a neat freak.
  2. Spread raspberry jam over the cake. Don’t go all the way to the edge—leave about a ½-inch border to prevent jam escape.
  3. Layer on that gorgeous custard, about ½-inch thick. Smooth it out, but again, leave a small border.
  4. Top with the second cake layer, pressing down very gently. You’re not trying to squish filling out the sides—just making sure everything’s secure.
  5. Whip the heavy cream with powdered sugar and vanilla until it forms stiff peaks. It should be firm enough to hold its shape but not so stiff that it looks chunky.
  6. Pile that whipped cream on top of the cake, creating a dome shape. Use an offset spatula or the back of a spoon to smooth it out. Don’t worry about perfection—the marzipan will cover any bumps.

Step 4: The Marzipan Moment (Deep Breaths!)

  1. Dust your work surface with powdered sugar and roll out the marzipan into a circle about 14-15 inches wide and ⅛-inch thick.
  2. Gently lift the marzipan (a rolling pin helps here) and drape it over your cake. This is like putting a blanket over a sleeping baby—do it with confidence but be gentle!
  3. Smooth the marzipan over the dome, working from the top down. Small wrinkles can be smoothed out with warm hands.
  4. Trim the excess from the bottom with a sharp knife or pizza cutter.
  5. Dust lightly with powdered sugar for that classic Princess Cake finish.
  6. Optional: Add a small marzipan rose or fresh raspberries on top. Or both! You’re the royalty here—do what makes you happy!

When Things Go Wrong (Because Sometimes They Do)

  • Custard too runny? Pop it back on the stove for a few more minutes of cooking, or add an extra teaspoon of cornstarch mixed with cold milk.
  • Marzipan tearing? Patch it up with scraps and cover the evidence with extra powdered sugar. It’s like a concealer but for cakes!
  • Whipped cream won’t hold its shape? Your cream might be too warm. Chill the bowl and cream in the freezer for 10 minutes, then try again.
  • Cake layers uneven? That’s what the custard and whipped cream are for—they’re like edible spackling paste!
  • No time for all these steps? Buy a plain white cake, slice it in half, add store-bought custard and whipped cream, and cover with marzipan. We won’t tell!

Serving Your Masterpiece

Refrigerate your Princess Torte Cake for at least an hour before serving—this helps everything set and makes it easier to slice. When it’s time to serve, use a sharp knife dipped in hot water and wiped dry between cuts for clean slices.

Bring the cake to room temperature for about 20 minutes before serving for the best flavor and texture. Cold cake is sad cake!

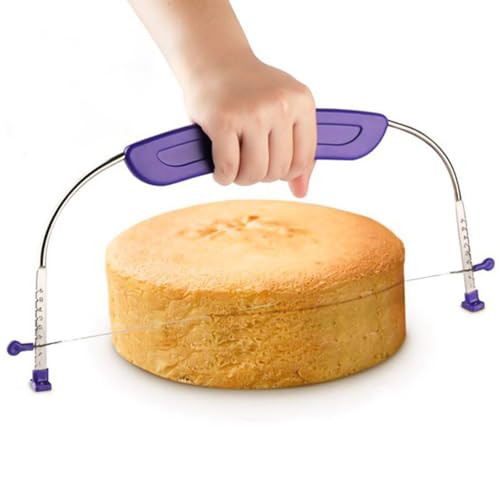
  • Well Design: Thickened and widened handle, smooth and rounded edges, elegant and modern silver appearance, brings better…
  • Premium Material: Made of high quality stainless steel, no rust, no corrosion, no bending; the standard material can be …
  • Good Practicality: The extended knife head and the uniform serrated blades make cutting larger cakes faster. The widened…

Why is it called a princess torte?

The princess torte is named for its elegant, layered design and soft pink hues that evoke the grace and charm of a princess, making it a perfect treat for regal celebrations.

What is the difference between a torte and a cake?

The main difference is that a torte is typically denser and more layered, using little flour and often including ground nuts or breadcrumbs, while a cake is lighter and fluffier, relying on more flour and leavening agents.

Where to buy Swedish Princess cake

Swedish princess cake, or prinsesstårta, is typically available at Swedish bakeries and patisseries. If you’re in Sweden, popular spots in cities like Stockholm and Gothenburg—such as Gateau or Vete‑Katten—offer this classic treat. Outside of Sweden, check Scandinavian bakeries or specialty dessert shops, or ask your local bakery if they can make one by request.

How to bake a princess cake

To bake a princess cake, begin by baking your cake layers—often a light sponge or a rich chocolate cake—until they are perfectly risen and fully cooled. While your cake rests, prepare a silky cream filling (like Bavarian cream) by gently heating milk, whisking egg yolks with sugar and cornstarch, and then folding in whipped heavy cream for a light texture. For an extra layer of decadence, create a smooth chocolate ganache by melting chopped dark chocolate in warm heavy cream. Assemble the cake by layering your cake slices with the cream and ganache, then apply a thin crumb coat and chill to set the layers. Finally, cover the cake with a thick, smooth buttercream—often tinted in a soft, princess-pink—and top it off with decorative piping or elegant garnishes, such as small buttercream roses or sugar pearls, for that regal finish.

What is in a princess cake?

A princess cake is a layered dessert featuring soft, moist cake layers paired with smooth, creamy fillings—commonly a custard or Bavarian cream, sometimes accented with chocolate ganache or a hint of jam. It’s usually enveloped in a beautifully tinted buttercream or marzipan icing and finished with elegant decorations like piped rosettes or sugar pearls to give it a regal, delicate appearance.

You Did It! (Yes, YOU!)

Look at what you just created! A gorgeous Swedish Princess Torte Cake that looks like it came from a fancy European bakery. This isn’t just dessert—it’s a conversation starter, a centerpiece, and definitive proof that you’ve got skills!

Whether you’re celebrating a birthday, or anniversary, or just surviving another Tuesday, this Swedish classic brings a touch of European elegance to your table. And when someone asks where you bought it, the look on their face when you say “I made it” is sweeter than any dessert could ever be.

So grab your mixing bowls, channel your inner Swedish baker, and get ready to feel like royalty. Crown optional, but highly recommended!

The Visual Evolution of Vintage Birthday Cakes: From Simple to Spectacular

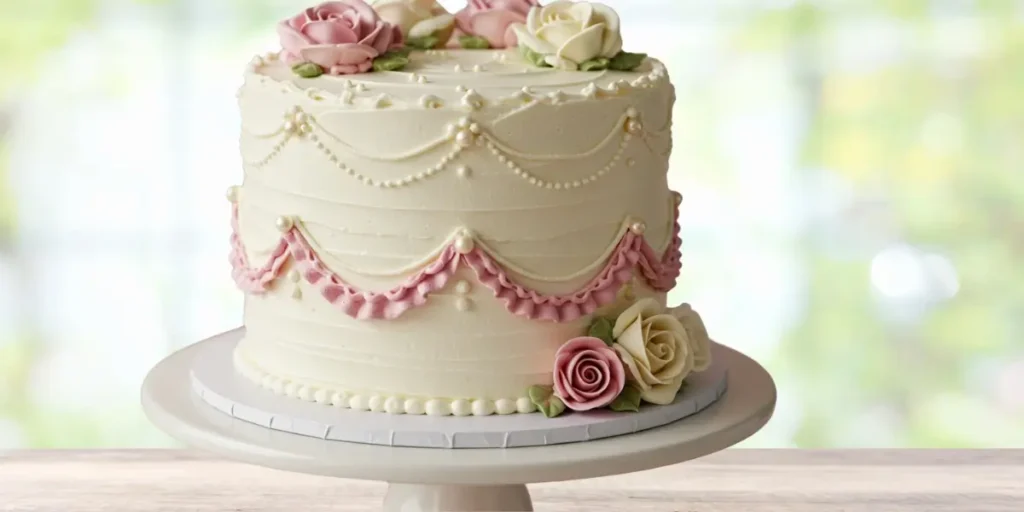
Hey there, fellow bakers! Have you ever scrolled through Instagram drooling over those fancy cakes that look like they belong in a royal palace? Well, guess what – you can make one yourself! Today we’re diving into the Vintage Birthday Cakes, a total showstopper that combines rich chocolate layers with dreamy Bavarian cream and gorgeous buttercream decorations. Don’t let the elegant look intimidate you – I’m breaking this down step by step so you can create this beauty in your kitchen. Whether you’re celebrating a birthday or anniversary, or just want to flex your baking muscles, this cake is guaranteed to make everyone say “WOW!” Let’s get started!
Vintage birthday cakes

Chocolate Cake

Chocolate Cake Ingredients:

For that perfect chocolate base, round up:

  • 2 cups (250g) all-purpose flour
  • 3/4 cup (75g) unsweetened cocoa powder
  • 2 cups (400g) sugar
  • 1/2 cup (120ml) vegetable oil
  • 1 cup (240ml) milk
  • 3 eggs
  • 1 tsp vanilla extract
  • 2 tsp baking powder
  • 1 tsp baking soda
  • 1 cup (240ml) hot water

Chocolate Cake Preparation:

Time to get baking!

  • Preheat your oven to 350°F (175°C) and prep your cake pans with a little butter and flour – this prevents that heartbreaking moment when your cake refuses to come out of the pan!
  • Mix the flour, cocoa powder, sugar, baking powder, and baking soda in a large bowl.
  • Add the eggs, milk, oil, and vanilla extract, then beat until everything’s combined.
  • Here’s the secret to super-moist chocolate cake: slowly pour in the hot water while mixing. The batter will look thin – that’s exactly what you want!
  • Pour the batter into your prepared pans and bake for 30-35 minutes. You’ll know it’s done when a toothpick comes out clean.
  • Let those layers cool completely before slicing them evenly – patience pays off here!

Bavarian Cream

Bavarian Cream Ingredients:

For that cloud-like filling, gather:

  • 2 cups (480ml) milk
  • 1/2 cup (100g) sugar
  • 4 egg yolks
  • 2 tbsp cornstarch
  • 1 tsp vanilla extract
  • 1 cup (240ml) heavy cream

Bavarian Cream Preparation:

Let’s make that dreamy filling:

  • Heat the milk in a saucepan over medium heat until warm but not boiling (we’re making cream, not coffee!).
  • In another bowl, whisk together the egg yolks, sugar, and cornstarch until smooth.
  • Slowly pour the warm milk into the egg mixture while whisking constantly – this is called tempering and keeps your eggs from scrambling. Nobody wants scrambled egg cake!
  • Return the mixture to the stove and stir until it thickens.
  • Add the vanilla extract and let it cool completely.
  • Whip the heavy cream until stiff peaks form, then gently fold it into your cooled mixture for that perfect light-air texture.

Chocolate Ganache

Chocolate Ganache Ingredients:

Because more chocolate is always better:

  • 200g dark chocolate
  • 1/2 cup (120ml) warm heavy cream

Chocolate Ganache Preparation:

Easy peasy ganache:

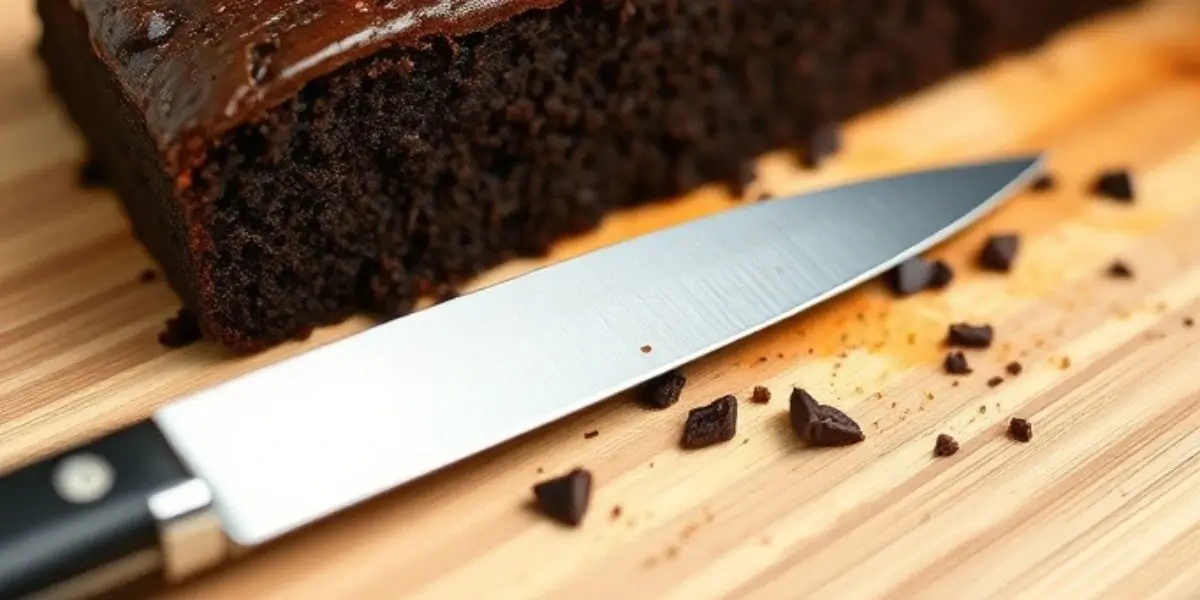
  • Chop the chocolate into small pieces (think chocolate confetti).
  • Heat the heavy cream until warm, then pour it over the chocolate.
  • Let it sit for a minute, then stir until smooth and glossy.
  • Allow it to cool slightly before using – you want it pourable but not runny.

Buttercream Decoration

Buttercream Decoration Ingredients:

For those gorgeous decorations:

  • 1 cup (200g) softened butter
  • 4 cups (500g) powdered sugar
  • 1/4 cup (60ml) milk or heavy cream
  • 1 tsp vanilla extract
  • A pinch of salt
  • Pink food coloring (various shades)

Buttercream Preparation:

Time for the fun part:

  • Beat the butter until super creamy – this is your foundation for smooth frosting!
  • Gradually add the powdered sugar while mixing. Pro tip: start your mixer on low unless you want to look like you’ve been in a snowstorm!
  • Add the milk, vanilla extract, and salt, and mix until smooth.
  • Divide the buttercream and create different shades of pink – from barely-there blush to statement hot pink for a gorgeous gradient effect.

Vintage Princess Cake Decorating Tutorial

1. Preparing the Cake Before Decorating

  1. Cutting the Cake:
    • Once the cake has cooled completely, slice it into three even layers using a long knife or dental floss.
  2. Filling the Cake:
    • Place the first cake layer on a serving plate.
    • Spread an even layer of Bavarian cream using an offset spatula.
    • Add a thin layer of chocolate ganache on top and spread gently.
    • Repeat the process with the second layer, then place the final cake layer on top.
  3. Chilling the Cake:
    • Refrigerate the cake for 30 minutes to firm up before decorating.

2. Covering the Cake with Buttercream

  1. Preparing the Buttercream:
    • Use smooth white buttercream as the base.
  2. Crumb Coat:
    • Apply a very thin layer of buttercream to trap any crumbs.
    • Use an offset spatula to smooth the top and sides.
    • Chill the cake for 15 minutes to set.
  3. Final Coating:
    • Spread another layer of buttercream evenly over the cake.
    • Use a cake scraper to smooth the surface.

3. Step-by-Step Vintage Decorating

  1. Coloring the Buttercream:
    • Divide the buttercream into three pink shades for a gradient effect.
    • Place each color in a separate piping bag with a star tip (like 1M or 2D).
  2. Creating Side Ruffles:
    • Use the darkest pink shade for the bottom ruffles.
    • Pipe wavy lines along the sides using an up-and-down motion.
    • Repeat with lighter pink shades as you move upward.
  3. Adding Borders & Swirls:
    • Use a fine piping tip to draw delicate swirl patterns along the cake’s edges.
    • Pipe small circular details along the upper rim for an elegant touch.
  4. Adding Frozen Buttercream Flowers:
    • Pipe buttercream flowers on parchment paper and freeze them for 15 minutes.
    • Once firm, gently place them on the cake in decorative clusters.
  5. Finishing Touches:
    • Add pearl sprinkles around the design for a luxurious look.
    • Drizzle a bit of ganache over some flowers for a glossy finish.

Final Step:

Refrigerate the cake for 15 minutes to maintain its shape, then serve and enjoy!

Vintage birthday cakes

The Lost Art of Vintage Birthday Cakes: Recreating Grandma’s Best Recipes

Jasper wellspring
Prep Time 1 hour
Cook Time 1 hour
Total Time 2 hours
Course Dessert
Cuisine American
Servings 12
Calories 450 kcal

Ingredients
  

Chocolate Cake Ingredients:

  • 2 cups 250g all-purpose flour
  • 3/4 cup 75g unsweetened cocoa powder
  • 2 cups 400g sugar
  • 1/2 cup 120ml vegetable oil
  • 1 cup 240ml milk
  • 3 eggs
  • 1 tsp vanilla extract
  • 2 tsp baking powder
  • 1 tsp baking soda
  • 1 cup 240ml hot water

Bavarian Cream Ingredients:

  • 2 cups 480ml milk
  • 1/2 cup 100g sugar
  • 4 egg yolks
  • 2 tbsp cornstarch
  • 1 tsp vanilla extract
  • 1 cup 240ml heavy cream

Chocolate Ganache Ingredients:

  • 200 g dark chocolate
  • 1/2 cup 120ml warm heavy cream

Buttercream Decoration Ingredients:

  • 1 cup 200g softened butter
  • 4 cups 500g powdered sugar
  • 1/4 cup 60ml milk or heavy cream
  • 1 tsp vanilla extract
  • A pinch of salt
  • Pink food coloring various shades

Instructions
 

Chocolate Cake Instructions:

  • Preheat your oven to 350°F (175°C) and grease and flour your cake pans.
  • In a large bowl, mix the flour, cocoa powder, sugar, baking powder, and baking soda.
  • Add the eggs, milk, oil, and vanilla extract. Beat until smooth.
  • Gradually add the hot water while mixing to form a thin batter.
  • Pour the batter into prepared pans and bake for 30-35 minutes.
  • Let the layers cool completely before slicing them evenly.

Bavarian Cream Instructions:

  • Heat the milk in a saucepan over medium heat until warm (not boiling).
  • In a separate bowl, whisk the egg yolks, sugar, and cornstarch until smooth.
  • Gradually add the warm milk to the egg mixture, whisking constantly to avoid scrambling the eggs.
  • Return the mixture to the heat and stir until it thickens.
  • Add vanilla extract and let the mixture cool completely.
  • Whip the heavy cream until stiff peaks form, then gently fold it into the cooled mixture.

Chocolate Ganache Instructions:

  • Chop the chocolate into small pieces.
  • Heat the heavy cream until warm, then pour it over the chopped chocolate.
  • Let the mixture sit for a minute, then stir until smooth and glossy.
  • Let the ganache cool slightly before using.

Buttercream Instructions:

  • Beat the butter until smooth and creamy.
  • Gradually add the powdered sugar while mixing to avoid a sugar storm!
  • Add milk, vanilla extract, and salt. Mix until smooth and well-combined.
  • Divide the buttercream into different bowls and add food coloring to create shades of pink.

Cake Assembly and Decoration:

  • Place the first cake layer on a serving plate.
    Vintage birthday cakes
  • Spread a layer of Bavarian cream, followed by a drizzle of chocolate ganache.
  • Repeat the process with the remaining layers of cake, Bavarian cream, and ganache.
  • Chill the cake in the fridge for 30 minutes to set the layers.
  • Cover the entire cake with buttercream, smoothing the surface with a spatula.
  • Decorate the cake with piping patterns using buttercream and arrange frozen rose decorations on top.
    Vintage birthday cakes
  • Add sugar pearls for an elegant touch.

Video

Notes

  • The cake layers can be baked a day in advance to save time.
  • Store leftover cake in the fridge for up to 3 days.

FAQs: Everything You Need to Know

What makes a cake vintage?

A vintage cake draws on classic, old-fashioned recipes and designs. It usually features:
Traditional ingredients and baking techniques
Nostalgic flavors and textures
Retro-style decorations that evoke a bygone era

How to make a flat birthday cake?

To make a flat birthday cake quickly and easily:
Preheat your oven to 350°F (175°C) and grease a round, flat cake pan.
In a bowl, combine dry ingredients like 2 cups flour, 1 1/2 cups sugar, and 2 teaspoons of baking powder.
In another bowl, mix wet ingredients such as 1/2 cup softened butter, 3 eggs, 1 cup milk, and 1 teaspoon vanilla extract.
Gradually add the dry mix to the wet mix until you achieve a smooth batter.
Pour the batter into the prepared pan, smoothing the top with a spatula to ensure even thickness.
Bake for about 25–30 minutes or until a toothpick inserted in the center comes out clean.
Allow the cake to cool before frosting and decorating.

Are vintage cakes hard to make?

Not necessarily, but they can require a bit more attention to traditional techniques and decorative details. If you enjoy classic recipes and a touch of nostalgia, practicing precise measurements and classic decoration methods will help make the process enjoyable.

What makes a cake look professional?

A cake looks professional when it showcases clean execution and attention to detail. Key elements include:
Uniform layers that are well-leveled, ensuring a balanced structure.
Smooth, even frosting achieved by using techniques like a crumb coat and proper icing tools.
Neat edges and sharp lines, often enhanced by using turntables and proper tools.
Thoughtful decorative touches that complement the overall design without overcrowding the cake.

Why are vintage cakes popular?

Vintage Cakes Popularity:
Vintage cakes are often beloved because they evoke a sense of nostalgia and comfort. They remind people of cherished memories and simpler times by using classic recipes and traditional decorations. Their authentic, time-honored appearance and flavor make them a favorite choice for both celebrations and everyday enjoyment.

Vintage Birthday Cakes

Ta-da! You’ve just created a Vintage Princess Cake that looks like it came straight from a fancy bakery! Don’t be surprised if your friends start asking you to make their birthday cakes from now on. The best part about this cake isn’t just how gorgeous it looks – it’s the amazing combination of moist chocolate cake, silky Bavarian cream, rich ganache, and those beautiful buttercream decorations that make every bite a royal experience.

Whether you nailed it on the first try or your roses look more like blobs (hey, they’re “artistic” blobs!), be proud of yourself for taking on this baking adventure. The more you practice those piping skills, the better you’ll get! So grab your fork, take a picture for the ‘gram, and enjoy every delicious bite of your princess-worthy creation. Happy baking, friends!

Don’t miss out—follow us on social media for updates:

Your Go-To Guide: 6 Easy Fruit Platter Ideas for Beginners

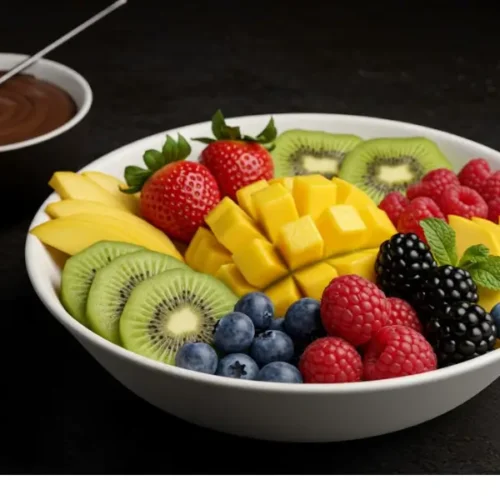
In Seattle, I was hosting my first garden party and wanted to impress my friends. Armed with “Easy Fruit Platter Ideas for Beginners,” I shopped for vibrant fruits like strawberries, pineapple, and grapes. At home, I arranged the fruits into a colorful masterpiece, adding a bowl of melted chocolate for flair. My friends admired the beautiful display, and my confidence soared. The party was a success, showing me that with a little creativity, even beginners can create stunning platters.

Easy Fruit Platter Ideas for Beginners

Why Fruit Platters Are Perfect for Every Occasion

Fruit platters are a crowd-pleaser. They are healthy, colorful, and refreshing. Perfect for any event, from holidays to casual get-togethers.

They suit all diets—vegan, gluten-free, and kid-friendly. Plus, they’re easy to customize for any theme or season.

Fruit platters also save time. You can prepare them ahead and focus on hosting. Whether it’s a Fresh Fruits Platter Idea for a wedding or a simple Fruit Platter Catering Idea for a party, they always impress.

Versatile, delicious, and beautiful—fruit platters are the ultimate choice for every occasion!

Easy Fruit Platter Ideas for Beginners

Essential Tools and Ingredients for Easy Fruit Platter Ideas for Beginners

Creating a stunning fruit platter is easy with the right tools. You’ll need a sharp knife, a cutting board, and a large platter. Skewers or toothpicks can add a fun touch.

Choose fresh, seasonal fruits for the best flavor and color. Mix sweet and tangy fruits like berries, melons, and citrus. For convenience, shop at places like Smart and Final Fruit Platter for affordable options.

Don’t forget garnishes! Mint leaves or edible flowers make your platter pop. With these basics, you’re ready to create a Best Sliced Fruit Platter or an Easy Platter of Fruit in no time.

Festive Fruit Platter Ideas for Specific Occasions

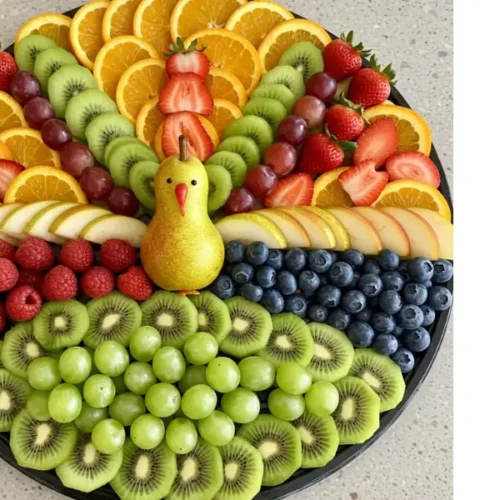
Festive Thanksgiving Turkey Fruit Platter Recipe

Festive Thanksgiving Turkey Fruit Platter Recipe

Jasper wellspring
Creating a Thanksgiving turkey fruit platter is a fun and festive way to add a healthy option to your holiday spread. This platter can be both a centerpiece and a delicious snack that your guests will enjoy. Here's a step-by-step guide to help you craft a beautiful turkey-themed fruit platter
Prep Time 30 minutes
Total Time 30 minutes
Course Appetizer, Dessert
Cuisine American
Servings 8 people
Calories 120 kcal

Ingredients
  

For the Turkey Body:

  • 1 small cantaloupe or a pear for the body
  • 1 small apple for the head
  • 1 carrot for the beak and feet
  • 2 raisins or blueberries for the eyes

For the Feathers:

  • 1 cup strawberries hulled and halved
  • 1 cup green grapes
  • 1 cup red grapes
  • 1 cup pineapple chunks or sliced kiwi
  • 1 cup blueberries
  • Optional: other colorful fruits like mango slices oranges, or raspberries

Instructions
 

Prepare the Turkey Body:

  • Slice a small section off the bottom of the cantaloupe or pear to allow it to sit flat on the platter. This will be the body of the turkey.
  • Place the apple on top of the cantaloupe or pear for the turkey’s head. You can secure it with a toothpick if necessary.

Create the Turkey's Face:

  • Cut a small triangle from the carrot for the turkey’s beak and attach it to the apple using a toothpick.
  • Use two small raisins or blueberries as eyes. You can attach them with small toothpicks or edible glue.
  • Slice the remaining carrot into thin strips to create the turkey’s feet and position them at the base of the cantaloupe or pear.

Arrange the Feathers:

  • Start with the strawberries, arranging them in a fan shape around the turkey body to form the outer layer of feathers.
  • Follow with a layer of green grapes, slightly overlapping the strawberries.
  • Continue layering with red grapes, pineapple chunks or kiwi slices, and blueberries, creating a vibrant, colorful display that resembles turkey feathers.

Final Touches:

  • Ensure all fruit is fresh and clean before arranging.
  • Adjust the fruit to balance the color and texture.
  • Optionally, add a few sprigs of mint for added color and freshness.

Notes

Serving Tips:
  • Serve the fruit platter with a side of yogurt or chocolate dip to enhance the flavors.
  • To keep the fruit fresh throughout the meal, cover it with plastic wrap and refrigerate until serving time.
This Thanksgiving turkey fruit platter is not only visually appealing but also a healthy addition to your holiday menu. Enjoy crafting this delightful centerpiece and sharing it with family and friends!
Keyword Fruit Display, Healthy Appetizer, Holiday Entertaining, No-Cook Recipe, Turkey Fruit Platter, Vegetarian, Gluten-Free.

Nutritional of Thanksgiving Turkey Fruit Platter Recipe

Nutritional Information (Per Serving)

  • Serving Size: Approximately 1/10th of the platter
  • Calories: 80-120 kcal
  • Sugar: 15-25 grams
  • Sodium: 0-10 mg
  • Fat: 0.5-1 gram
    • Saturated Fat: 0-0.2 grams
    • Unsaturated Fat: 0.3-0.8 grams
    • Trans Fat: 0 grams
  • Carbohydrates: 20-30 grams
  • Fiber: 3-5 grams
  • Protein: 1-2 grams
  • Cholesterol: 0 mg

Notes:

  • Calories and Macronutrients: The calorie count and macronutrient distribution can vary significantly based on the specific fruits and any dips or additional ingredients used. For instance, adding a yogurt dip might increase the calories and protein slightly.
  • Sugar Content: Naturally occurring sugars in fruits contribute to the sugar content. This is generally considered healthy due to the presence of vitamins and fiber.
  • Fat Content: Fruits are typically low in fat, but any added dips can increase the fat content.
  • Fiber and Vitamins: Fruits are an excellent source of dietary fiber, as well as essential vitamins and minerals, contributing to their health benefits.

For precise nutritional information, you could use a nutritional analysis tool like Nutrifox, where you input specific amounts and types of each ingredient to get a detailed report. However, this general estimate should help you understand the nutritional profile of your fruit platter.

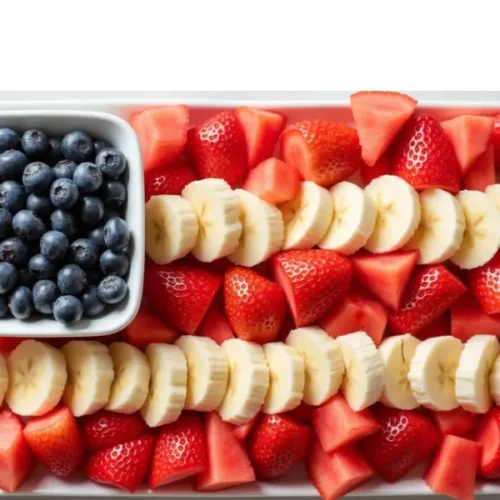
4th of july fruit platter ideas

4th of july fruit platter ideas

Jasper wellspring
Creating a 4th of July patriotic fruit platter is a festive and healthy way to celebrate Independence Day. This platter typically features fruits in red, white, and blue colors to match the theme of the holiday. Here's a step-by-step guide to designing a beautiful and delicious patriotic fruit platter
Prep Time 30 minutes
Total Time 30 minutes
Course Appetizer, Dessert, Snack
Cuisine American
Servings 7 people
Calories 120 kcal

Ingredients
  

Red Fruits:

  • 1 cup strawberries hulled and sliced
  • 1 cup watermelon cut into star shapes or cubes
  • 1 cup raspberries

White Fruits:

  • 1 cup bananas sliced (add just before serving to prevent browning)
  • 1 cup apples sliced (optional: dip in lemon juice to prevent browning)
  • 1 cup white melon or jicama cut into cubes for added crunch

Blue Fruits:

  • 1 cup blueberries
  • 1 cup blackberries

Optional Extras:

  • Small American flags or themed toothpicks
  • Yogurt or honey dip on the side

Instructions
 

Prepare the Fruits:

  • Wash all fruits thoroughly.
  • Slice strawberries and bananas.
  • Use a small star-shaped cookie cutter to cut watermelon into stars for added visual appeal.
  • Cut apples or white melon into slices or cubes.

Arrange the Platter:

  • On a large platter or tray, begin by placing the blueberries and blackberries to form the blue section of the American flag in the top left corner.
  • Create red and white stripes using strawberries, watermelon, raspberries, bananas, apples, or white melon. Alternate each row to resemble the stripes on the flag.
  • Ensure the arrangement is tight and visually appealing, filling in any gaps with additional fruit.

Add Final Touches:

  • Insert small American flags or themed toothpicks to enhance the patriotic theme.
  • Place a bowl with yogurt or honey dip on the side for guests to enjoy with their fruit.

Notes

Serving Tips:
  • Timing: Prepare and assemble the platter close to serving time to ensure the freshness of the fruits, especially the bananas and apples.
  • Portion Control: If serving a large crowd, consider making multiple platters or refilling as needed.
  • Alternative Options: For added variety, consider incorporating red cherries or pomegranate seeds.
This patriotic fruit platter makes for a vibrant and healthy addition to your 4th of July celebration, offering a delightful combination of flavors and colors that everyone will enjoy. Happy Independence Day!
Keyword 4th of July, Fruit Display, Independence Day, No-Cook Recipe, Patriotic Fruit Platter, Red, White, and Blue

Nutritional of 4th of July fruit platter ideas

Determining the exact caloric content of a 4th of July patriotic fruit platter depends on the specific quantities and types of fruits used. However, I can provide a general estimate of the caloric content per serving, assuming a mix of the fruits mentioned:

Estimated Nutritional Information (Per Serving):

  • Serving Size: Approximately 1/10th of the platter
  • Calories: 80-120 kcal

Caloric Breakdown by Fruit:

  • Strawberries (1 cup): Approximately 50 calories
  • Watermelon (1 cup): Approximately 45 calories
  • Raspberries (1 cup): Approximately 65 calories
  • Bananas (1 cup, sliced): Approximately 130 calories
  • Apples (1 cup, sliced): Approximately 65 calories
  • White Melon/Jicama (1 cup): Approximately 50 calories
  • Blueberries (1 cup): Approximately 85 calories
  • Blackberries (1 cup): Approximately 65 calories

Notes:

  • Total Calories: The total caloric content of the platter will depend on the exact amount of each fruit used. The estimate provided assumes a balanced mix of all fruits listed.
  • Variations: Adding a yogurt or honey dip will increase the calorie count. For example, a serving of yogurt dip might add 30-50 calories per serving.
  • Freshness: Serving fresh, whole fruits ensures that the platter remains a healthy option, rich in vitamins, fiber, and antioxidants.

This caloric estimate is intended to give you a rough idea of what to expect. For precise nutritional information, you could weigh the fruits and use a nutritional calculator to input the exact quantities used.

A tropical fruit platter is an enticing and vibrant addition to any gathering, offering a burst of colors and flavors that transport your taste buds to a sunny paradise. Here's a guide to creating a beautiful and delicious tropical fruit platter

Nutritional of Tropical Fruit Platter

Calculating the exact caloric content of a tropical fruit platter depends on the types and amounts of fruits. Here’s a rough estimate based on a typical assortment:

Estimated Nutritional Information (Per Serving):

  • Serving Size: About 1/10th to 1/12th of the platter
  • Calories: 100-150 kcal

Caloric Breakdown:

  • Pineapple (1 cup): ~80 calories
  • Mango (1 cup): ~100 calories
  • Kiwi (1 cup): ~110 calories
  • Papaya (1 cup): ~60 calories
  • Dragon Fruit (1 cup): ~60 calories
  • Strawberries (1 cup): ~50 calories
  • Grapes (1 cup): ~60-70 calories
  • Watermelon (1 cup): ~45 calories
  • Banana (1 medium): ~90 calories

Notes:

  • Total Calories: Varies with the specific mix and amount of fruits.
  • Variations: Adding a dip like honey-lime yogurt can add 30-50 calories per serving.
  • Benefits: Fresh fruits are rich in vitamins, fiber, and antioxidants.

For precise nutritional info, weigh the fruits and use a nutritional calculator.

1
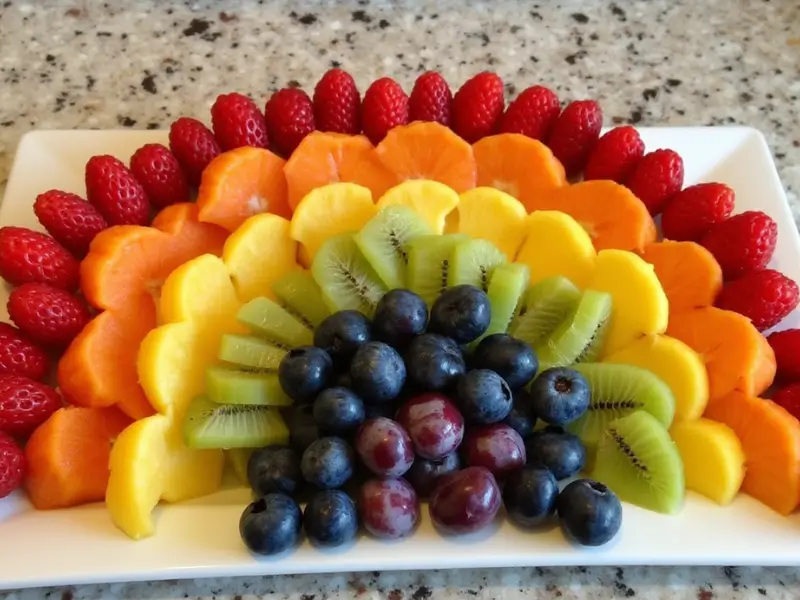
rainbow fruit platter ideas
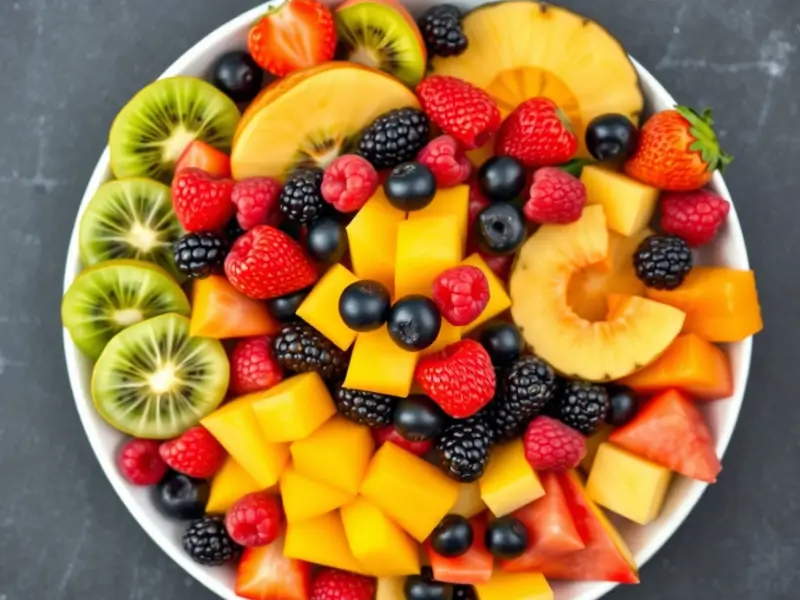
A rainbow fruit platter is a vibrant and visually stunning addition to any gathering, offering a colorful array of fruits arranged to resemble a rainbow. This platter not only looks impressive but also provides a delightful mix of flavors and nutrients. Here's how to create a beautiful rainbow fruit platter
Check out this recipe

Nutritional of rainbow fruit platter

For a rainbow fruit platter, the nutritional content per serving (approximately 1/10th of the platter) is roughly:

  • Calories: 100-150 kcal
  • Carbohydrates: 25-35 grams
  • Fiber: 3-5 grams
  • Sugars: 20-30 grams
  • Protein: 1-2 grams
  • Fat: 0-1 gram

This platter is rich in vitamins, antioxidants, and fiber, making it a healthy and nutritious choice.

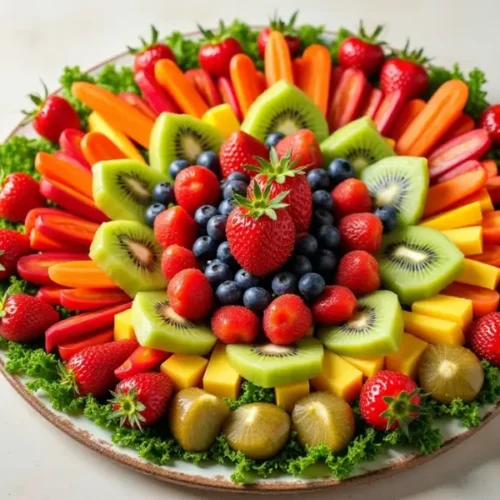
Easy Fruit and Veggie Platter

Easy Fruit and Veggie Platter

Jasper wellspring
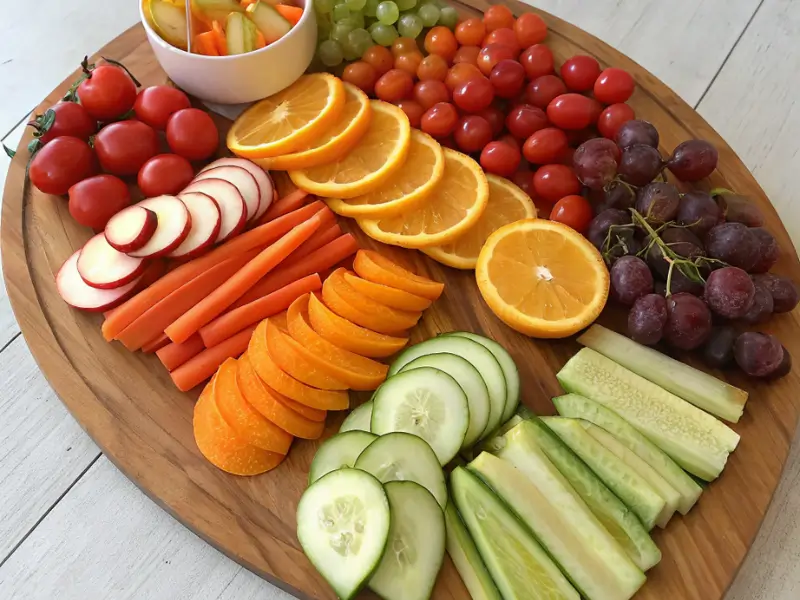
Creating a fruit and veggie platter is a fantastic way to offer a healthy, colorful, and refreshing option for any occasion. This platter combines the sweetness of fruits with the crispness of vegetables, making it both visually appealing and nutritious
Prep Time 20 minutes
Total Time 20 minutes
Course Appetizer, Dessert, Snack
Cuisine American
Servings 7 people

Ingredients
  

Fruits:

  • Strawberries hulled
  • Grapes red and green
  • Pineapple sliced or cubed
  • Blueberries
  • Watermelon cubed or cut into shapes

Vegetables:

  • Baby carrots
  • Cherry tomatoes
  • Cucumber sliced or cut into sticks
  • Bell peppers red, yellow, green, sliced
  • Broccoli florets
  • Snap peas

Optional Extras:

  • Fresh herbs like mint or parsley for garnish
  • Small bowls of hummus ranch, or yogurt dip

Instructions
 

Prepare the Fruits and Vegetables:

  • Wash all fruits and vegetables thoroughly.
  • Hull the strawberries and cut larger fruits like pineapple and watermelon into bite-sized pieces.
  • Slice cucumbers and bell peppers into sticks or rounds.
  • Break broccoli into small florets.

Arrange the Platter:

  • Begin by placing small bowls of dip on the platter to anchor the arrangement.
  • Arrange the fruits and vegetables around the dips, organizing them by color to create a visually appealing display.
  • Group similar colors together, or alternate fruits and vegetables for contrast.

Add Final Touches:

  • Garnish the platter with fresh herbs for added color and aroma.
  • Ensure there are plenty of serving utensils or toothpicks for easy grabbing.
Keyword Colorful Fruit Display, fruit vegetable platter​ ideas, Rainbow Fruit Platter

Nutritional of Fruit and Veggie Platter

For a fruit and veggie platter, the nutritional content per serving (approximately 1/10th of the platter) is roughly:

  • Calories: 50-100 kcal
  • Carbohydrates: 10-20 grams
  • Fiber: 3-5 grams
  • Sugars: 5-10 grams
  • Protein: 1-3 grams
  • Fat: 0-1 gram

This platter is rich in vitamins, minerals, and fiber, making it a healthy and nutritious choice for any occasion.

chocolate fruit platter ideas

chocolate fruit platter ideas

Jasper wellspring
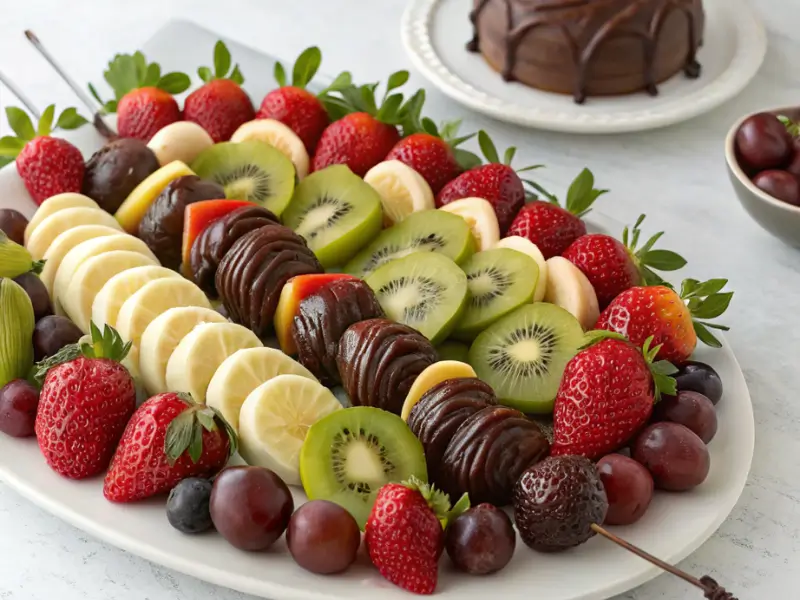
A chocolate fruit platter combines the natural sweetness of fresh fruits with the rich, indulgent flavor of chocolate, creating a delightful treat for any occasion
Prep Time 30 minutes
Total Time 30 minutes
Course Appetizer, Dessert, Salad
Cuisine American
Servings 6 people
Calories 150 kcal

Ingredients
  

Fruits:

  • Strawberries hulled
  • Bananas sliced (add just before serving to prevent browning)
  • Pineapple sliced or cubed
  • Apples sliced (optional: dip in lemon juice to prevent browning)
  • Grapes red or green
  • Kiwi peeled and sliced
  • Orange segments

Chocolate:

  • 1 cup semisweet or dark chocolate chips
  • 1 tablespoon coconut oil or butter optional, for a smooth melt

Optional Extras:

  • Nuts such as almonds or walnuts, for garnish
  • Shredded coconut or sea salt for sprinkling

Instructions
 

Prepare the Chocolate:

  • In a microwave-safe bowl, combine the chocolate chips and coconut oil or butter.
  • Microwave in 30-second intervals, stirring after each, until the chocolate is fully melted and smooth. Alternatively, you can use a double boiler on the stove to melt the chocolate gently.

Prepare the Fruits:

  • Wash all the fruits thoroughly.
  • Hull the strawberries, slice the bananas, and prepare other fruits like pineapple, apples, and kiwi into bite-sized pieces or slices.
  • Arrange the grapes and orange segments in small clusters.

Arrange the Platter:

  • On a large platter, arrange the fruits in groups, leaving some space for the chocolate.
  • Pour the melted chocolate into a small bowl and place it in the center or side of the platter for dipping.

Add Final Touches:

  • Sprinkle nuts, shredded coconut, or sea salt over the chocolate if desired for added texture and flavor.
  • Garnish the platter with fresh mint leaves for a pop of color and aroma.

Notes

Serving Tips:
  • Presentation: Use a large, flat platter to display the fruits and chocolate elegantly.
  • Timing: Prepare the bananas and apples just before serving to keep them fresh and prevent browning.
  • Chill Before Serving: You can chill the platter briefly in the refrigerator to keep the fruits fresh but avoid chilling the chocolate, as it might harden.
The chocolate fruit platter is perfect for any gathering, offering a delicious combination of fresh, juicy fruits and rich chocolate that guests can enjoy dipping and savoring. Enjoy creating and sharing this delightful treat!
Keyword chocolate fruit platter ideas, easy fruit platter catering, Easy fruit platter ideas for beginners, fruit platter catering ideas

Nutritional of chocolate fruit platter

For a chocolate fruit platter, the nutritional content per serving (approximately 1/10th of the platter) is roughly:

  • Calories: 150-200 kcal
  • Carbohydrates: 25-35 grams
  • Fiber: 3-5 grams
  • Sugars: 20-30 grams
  • Protein: 1-3 grams
  • Fat: 5-10 grams

This platter combines the natural nutrients of fruits with the indulgent richness of chocolate, offering a delicious and balanced treat.

Easy Fruit Platter Ideas for Beginners

Quick Answers

Is it cheaper to buy a fruit tray or make your own?

It’s generally cheaper to make your fruit tray. By purchasing fruits in bulk and selecting seasonal options, you can reduce costs compared to buying pre-made trays, which often include additional charges for preparation and packaging.

What goes well on a fruit platter?

A fruit platter can feature a variety of fresh, colorful fruits. Here are some popular choices:
Berries: Strawberries, blueberries, raspberries, and blackberries
Melons: Watermelon, cantaloupe, and honeydew
Citrus: Oranges and kiwi
Grapes: Red or green
Tropical Fruits: Pineapple, mango, and papaya
Extras: Apples, pears, and bananas (add just before serving to avoid browning)

What fruit can you cut the night before?

You can cut several fruits the night before, as long as you store them properly to maintain their freshness. Here are some fruits that hold up well:
Melons: Watermelon, cantaloupe, and honeydew can be sliced and stored in airtight containers.
Pineapple: Peel, core, and slice, then refrigerate in an airtight container.
Grapes: Wash and remove from stems, then store in the refrigerator.
Berries: Wash and dry thoroughly, then refrigerate in a covered container.
To prevent browning, avoid cutting fruits like apples, bananas, and pears until just before serving. If necessary, you can dip them in lemon juice to slow the browning process.

What fruit pairs well with chocolate?

Many fruits pair wonderfully with chocolate, offering a delightful contrast of flavors and textures. Here are some popular choices:
Strawberries: A classic pairing, strawberries’ sweetness complements the richness of chocolate.
Bananas: Their creamy texture and mild flavor work well with both milk and dark chocolate.
Pineapple: The tangy flavor of pineapple contrasts nicely with chocolate’s sweetness.
Oranges: Citrus notes add a refreshing twist to chocolate.
Apples: Crisp apple slices dipped in chocolate offer a satisfying crunch.
Raspberries: Their tartness pairs beautifully with the smoothness of chocolate.
Cherries: Whether fresh or dried, cherries and chocolate are a decadent combination.

What fruits go well with chocolate cake?

Strawberries: Their sweetness and vibrant color make them a classic topping or filling.
Raspberries: Their tartness balances the richness of the chocolate.
Cherries: Fresh or maraschino cherries add a delightful burst of flavor.
Bananas: Sliced bananas offer a creamy texture that pairs well with chocolate.
Oranges: Citrus zest or slices add a refreshing and aromatic touch.
Pears: Poached or fresh pear slices provide a delicate sweetness.
Blackberries: These add a juicy and slightly tart element to the cake.

What is a rainbow fruit?

Rainbow fruit” isn’t a specific type of fruit; rather, it refers to an assortment of different fruits arranged to represent the colors of the rainbow. A rainbow fruit platter is a popular way to present a variety of fruits in a visually appealing manner. Here’s how you can create a rainbow fruit platter using various fruits:
Red: Strawberries, watermelon, or raspberries
Orange: Oranges, mango, or cantaloupe
Yellow: Pineapple, bananas, or yellow apples
Green: Kiwi, green grapes, or honeydew melon
Blue: Blueberries
Purple: Blackberries, purple grapes, or plums
This colorful arrangement not only looks beautiful but also offers a range of flavors and nutrients, making it a healthy and attractive option for any occasion

Creating an impressive fruit platter can transform any gathering into a festive occasion. Explore ideas from Festive Fruit Arrangements to 4th of July fruit platter ideas to suit any theme. Beginners can start with Easy Fruit and Veggie Platters and Easy Fruit Platter Ideas for Beginners for simple yet stunning results. Whether crafting a Smart and Final Fruit Platter or a Delicious Rainbow Fruit Platter, balance flavors and colors creatively. Enhance your spread with chocolate fruit platter ideas or cater with fruit platter catering ideas. Experiment with tropical fruit platter ideas and fruit platter DIY for delightful variety. For more dishes to complement your spread, explore Lunch Break Bliss.

Don’t miss out—follow us on social media for updates:

the Best 3 Sugar Cookie Flavors at Home

Sugar cookies are a timeless treat that brings joy to any occasion. Whether you’re searching for the best sugar cookie icing recipe, experimenting with unique flavors like sugar cookies flavored with cotton candy, or exploring creative Decorated Sugar cookie ideas, this guide has it all. We’ve got you covered from the classic Royal Icing Sugar Cookies recipe to easy alternatives like simple Glazed Sugar Cookies. Plus, we’ll share tips for Vegan Sugar Cookies cut-outs, an easy, simple Gluten-Free Sugar Cookies recipe, and even a quick No-Chill Sugar Cookies cut-out option for when you’re short on time. Dive in and discover how to make the best sugar cookie flavors and create stunning cookies that are as delicious as beautiful! 

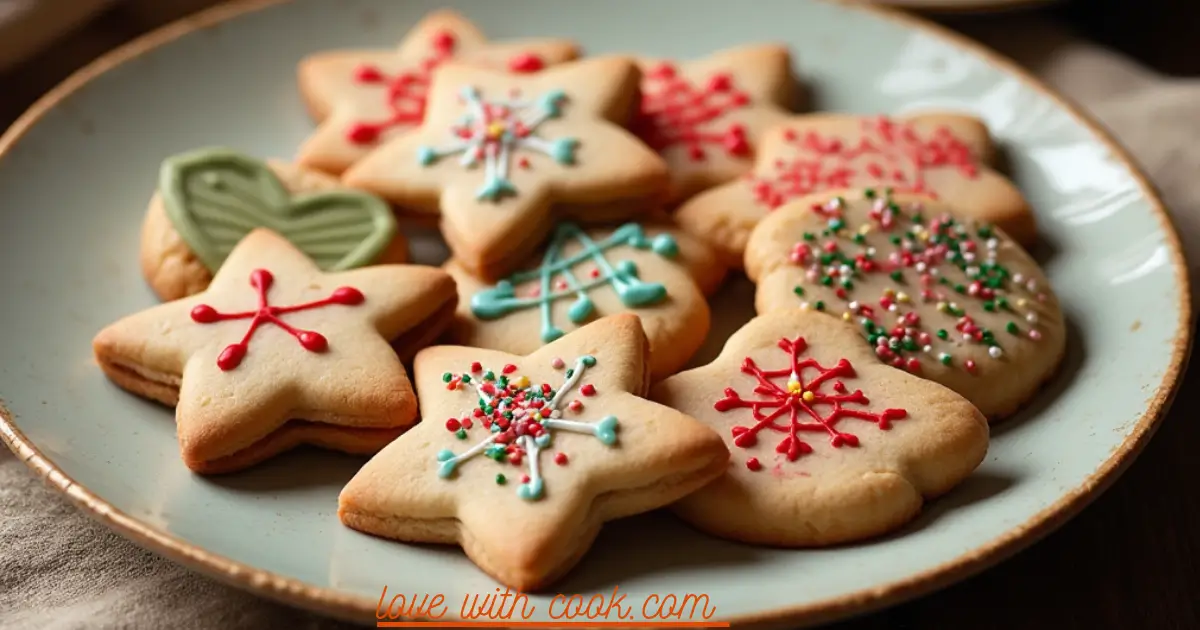
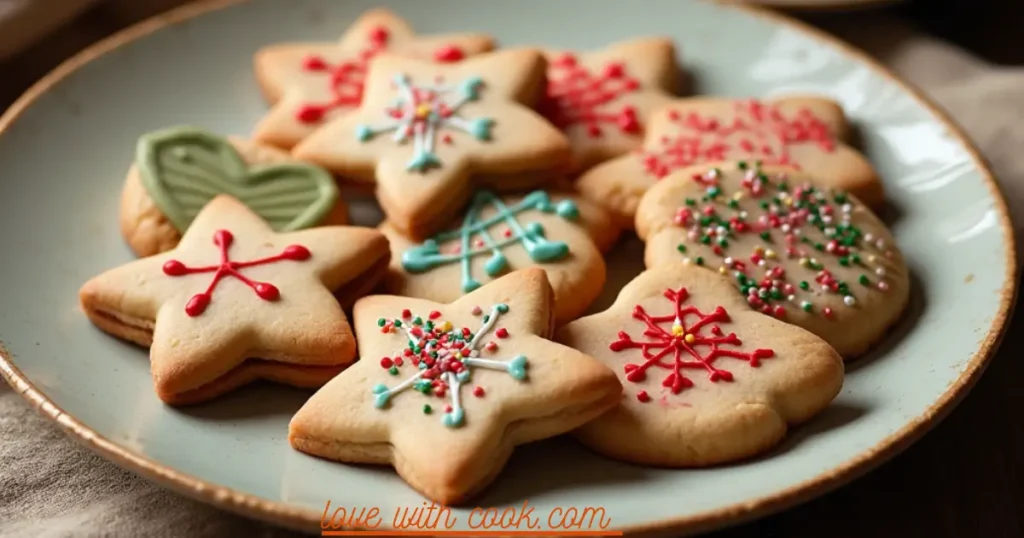
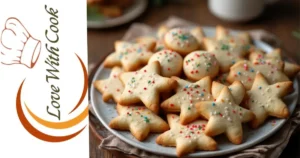
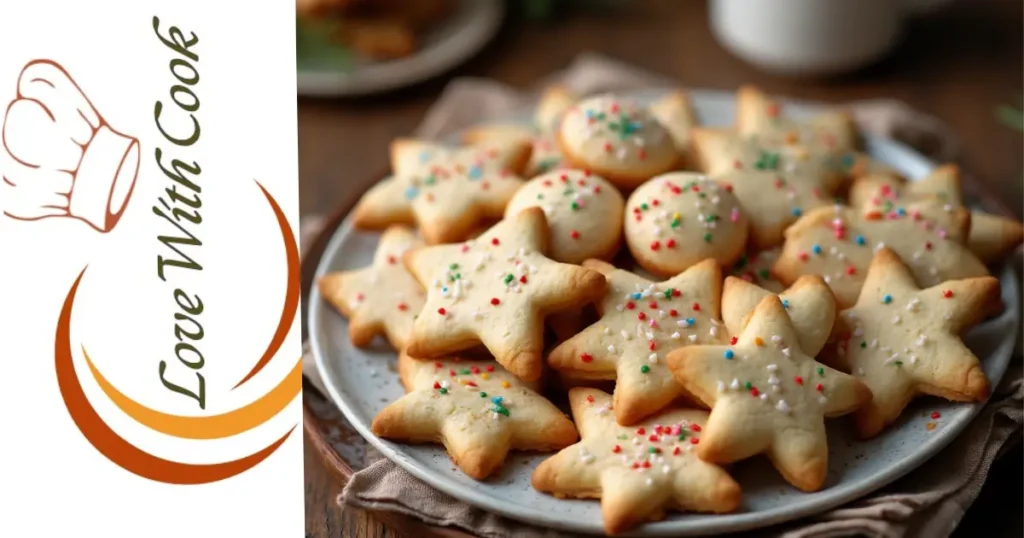
A plate of decorated sugar cookies with colorful icing and sprinkles, placed on a wooden table with a cup of hot cocoa nearby.
The sweetest reward! Perfectly baked sugar cookies, beautifully decorated and ready to enjoy.
Sugar cookies are a blank canvas for creativity, and their flavor can be just as exciting as their decorations. Whether you’re a fan of classic tastes or want to experiment with unique twists, here are the best sugar cookie flavors to try:

1. Classic Vanilla

The timeless favorite! A buttery, sweet base with a hint of vanilla is perfect for any occasion. It’s simple, versatile, and pairs well with any icing or topping.
2. Lemon Zest

Add a refreshing twist to your sugar cookies by incorporating lemon zest into the dough. The bright, tangy flavor balances the sweetness and adds a delightful zing.

3. Almond Extract

Swap vanilla extract for almond extract to create a nutty, aromatic flavor. This subtle change gives your cookies a sophisticated taste that’s perfect for holidays or special occasions.

4. Chocolate

For chocolate lovers, mix cocoa powder into your dough for a rich, decadent treat. Chocolate sugar cookies are especially great for holidays like Valentine’s Day or Christmas.

5. Cinnamon Spice

Add warmth and coziness to your cookies with ground cinnamon or pumpkin spice. This flavor is ideal for fall and winter baking, bringing a comforting aroma and taste.

6. Cotton Candy

For a fun and playful twist, try sugar cookie flavored with cotton candy. Use cotton candy flavoring (available online or in baking stores) and a touch of pink or blue food coloring for a whimsical treat that kids and adults will love.

7. Brown Sugar

Replace granulated sugar with brown sugar for a deeper, caramel-like flavor. Brown sugar cookies are slightly chewier and have a rich, molasses-like taste.

8. Coconut

Add shredded coconut or coconut extract to your dough for a tropical twist. These cookies pair beautifully with a simple glaze or white chocolate drizzle.

9. Peppermint

Perfect for the holidays, add a dash of peppermint extract to your dough for a cool, minty flavor. Decorate with crushed candy canes for a festive touch.

10. Matcha Green Tea

For a unique and trendy flavor, mix matcha powder into your dough. The earthy, slightly bitter taste of matcha pairs wonderfully with the sweetness of sugar cookies.

Tips for Flavorful Cookies

  • Use Quality Extracts: High-quality vanilla, almond, or other extracts make a big difference in flavor.
  • Balance Sweetness: Adjust sugar levels to complement stronger flavors like lemon or matcha.
  • Experiment: Don’t be afraid to mix and match flavors for your own signature cookie!

With these best sugar cookie flavors, you can create cookies that are as delicious as they are beautiful. Happy baking!

A plate of decorated sugar cookies with colorful icing and sprinkles, placed on a wooden table with a cup of hot cocoa nearby.

How to Make the Best Sugar Cookie Flavors at Home

Discover the best sugar cookie flavors! From classic to cotton candy-flavored, plus the best royal icing recipes, no-chill cut-outs, and gluten-free options. Bake delicious cookies today!
Prep Time 10 minutes
30 minutes
Course Appetizer, Breakfast, Dessert, Side Dish
Cuisine American
Servings 4 people

Ingredients
  

  • 2 ½ cups 315g all-purpose flour
  • 1 cup 230g unsalted butter, softened
  • 1 cup 200g granulated sugar
  • 1 large egg
  • 1 tsp vanilla extract
  • ½ tsp baking powder
  • ¼ tsp salt

Instructions
 

Prepare the Dough

  • In a large mixing bowl, cream the softened butter and sugar together until light and fluffy (about 2-3 minutes).
    A plate of decorated sugar cookies with colorful icing and sprinkles, placed on a wooden table with a cup of hot cocoa nearby.
  • Add the egg and vanilla extract, mixing until fully combined.
  • In a separate bowl, whisk together the flour, baking powder, and salt.
  • Gradually add the dry ingredients to the wet ingredients, mixing until a soft dough forms.

Chill the Dough

  • Divide the dough into two equal portions, flatten into discs, and wrap in plastic wrap.
  • Chill in the refrigerator for at least 1 hour (or up to 2 days). Chilling helps the dough hold its shape when baking.
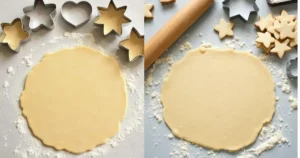
    Time to roll and cut! Use your favorite cookie cutters to create fun and festive shapes.

Roll and Cut the Cookies

  • Preheat your oven to 350°F (175°C) and line baking sheets with parchment paper.
  • On a lightly floured surface, roll out the dough to about ¼-inch thickness.
  • Use cookie cutters to cut out your desired shapes. Transfer the cut-outs to the prepared baking sheets, spacing them about 1 inch apart.

Bake

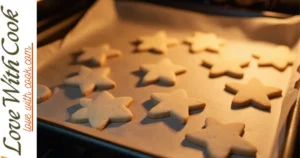
  • Bake for 8-10 minutes, or until the edges are lightly golden. Avoid overbaking to keep the cookies soft.
  • Let the cookies cool on the baking sheet for 5 minutes, then transfer them to a cooling rack to cool completely before decorating.
    Fresh from the oven! Golden edges and soft centers make these cookies irresistible

Notes

Tips for Success

  • Don’t Overmix: Overmixing the dough can make the cookies tough. Mix just until the ingredients are combined.
  • Flour Your Tools: Lightly flour your rolling pin and cookie cutters to prevent sticking.
  • Uniform Thickness: Roll the dough evenly to ensure all cookies bake at the same rate.
  • Decorating: Once cooled, decorate with royal icing, glaze, or sprinkles.
Keyword best sugar cookie flavors, best sugar cookies icing recipe, Decorated Sugar Cookies ideas, kpop cake​, simple Gluten-Free Sugar Cookies recipe, sugar cookie flavoured with cotton candy, Vegan Sugar Cookies cut out

Vegan Sugar Cookies Cut-Outs: Easy and Delicious Recipe

These Vegan Sugar Cookies are perfect for cut-outs and hold their shape beautifully. They’re buttery, sweet, and completely plant-based, making them ideal for anyone following a vegan diet or looking for a dairy-free and egg-free option. Plus, they’re just as fun to decorate as traditional sugar cookies!

Ingredient

  • 2 ½ cups (315g) all-purpose flour
  • 1 cup (230g) vegan butter, softened
  • ¾ cup (150g) granulated sugar
  • 2 tbsp plant-based milk (e.g., almond, soy, or oat)
  • 1 tsp vanilla extract
  • ½ tsp baking powder
  • ¼ tsp salt

Instructions

1. Prepare the Dough

  1. In a large mixing bowl, cream the softened vegan butter and sugar together until light and fluffy (about 2-3 minutes).
  2. Add the plant-based milk and vanilla extract, mixing until fully combined.
  3. In a separate bowl, whisk together the flour, baking powder, and salt.
  4. Gradually add the dry ingredients to the wet ingredients, mixing until a soft dough forms.

2. Chill the Dough

  1. Divide the dough into two equal portions, flatten into discs, and wrap in plastic wrap or parchment paper.
  2. Chill in the refrigerator for at least 1 hour (or up to 2 days). Chilling helps the dough hold its shape when cutting and baking.

3. Roll and Cut the Cookies

  1. Preheat your oven to 350°F (175°C) and line baking sheets with parchment paper.
  2. On a lightly floured surface, roll out the dough to about ¼-inch thickness.
  3. Use cookie cutters to cut out your desired shapes. Transfer the cut-outs to the prepared baking sheets, spacing them about 1 inch apart.

4. Bake

  1. Bake for 8-10 minutes, or until the edges are lightly golden. Avoid overbaking to keep the cookies soft.
  2. Let the cookies cool on the baking sheet for 5 minutes, then transfer them to a cooling rack to cool completely before decorating.

Tips for Success

  • Use Quality Vegan Butter: Choose a high-quality vegan butter for the best flavor and texture.
  • Don’t Overmix: Overmixing the dough can make the cookies tough. Mix just until the ingredients are combined.
  • Flour Your Tools: Flour your rolling pin and cookie cutters to prevent sticking.
  • Decorating: Once cooled, decorate with vegan royal icing, glaze, or sprinkles.

Vegan Icing Options

  • Vegan Royal Icing: Use aquafaba (chickpea water) instead of egg whites.
  • Simple Glaze: Mix powdered sugar with plant-based milk and vanilla extract for a quick and easy topping.
best sugar cookie flavors

Everything You Need to Know

What is the best sugar for cookies?

The best sugar for cookies depends on the texture and flavor you want:
Granulated Sugar – Best for classic sugar cookies with a light, crisp texture.
Brown Sugar – Adds moisture and chewiness with a hint of caramel flavor.
Powdered Sugar – Used in shortbread-style cookies for a delicate, melt-in-your-mouth texture.

What are the 10 most popular cookies in America?

Here are the 10 most popular cookies in America:
Chocolate Chip Cookies – A classic favorite with a perfect mix of crispy edges and gooey centers. 🍪
Peanut Butter Cookies – Rich, nutty, and often topped with a crisscross fork pattern. 🥜
Sugar Cookies – Simple, sweet, and perfect for decorating. 🎨
Oatmeal Raisin Cookies – Chewy, hearty, and packed with oats and raisins. 🌾
Snickerdoodles – Soft cookies rolled in cinnamon sugar for a warm, spiced flavor. 🍂
Gingerbread Cookies – A holiday staple with a delicious blend of spices. 🎄
Shortbread Cookies – Buttery, crumbly, and melt-in-your-mouth delicious. 🧈
Macarons – French-inspired, delicate, and filled with flavorful cream. 🇫🇷
Molasses Cookies – Soft and spiced with a deep, rich molasses flavor. 🍯
Whoopie Pies – Cookie sandwiches with a creamy filling, often chocolate-flavored. 🎂

What is the secret to the best cookies?

Use High-Quality Ingredients – Fresh butter, pure vanilla, and high-quality chocolate make a big difference. 🧈🍫
Measure Accurately – Use a kitchen scale or the spoon-and-level method for flour to avoid dry cookies. ⚖️
Chill the Dough – Resting the dough enhances flavor and prevents spreading. ❄️
Don’t Overmix – Mixing too much develops gluten, making cookies tough. Stir just until combined. 🍪
Use Room Temperature Ingredients – Butter and eggs blend better, creating a smooth dough. 🥚
Bake at the Right Temperature – An oven thermometer ensures accurate baking. 🔥
Line Baking Sheets – Use parchment paper or silicone mats for even baking. 📜
Don’t Overbake – Cookies continue cooking on the tray after baking, so remove them slightly underdone. ⏳
Let Them Cool – Cooling on a wire rack prevents soggy bottoms. 🌬️
Experiment with Flavors – Try brown butter, sea salt, or different sugars for unique taste variations. 🌟

What type of sugar is best for baking?

The best type of sugar for baking depends on the texture and flavor you want:
Granulated Sugar – Best for most baking recipes, including cakes, cookies, and muffins. It provides structure and crispness.
Brown Sugar (Light or Dark) – Adds moisture, chewiness, and a rich caramel flavor, perfect for cookies and brownies.
Powdered Sugar – Used in icings, frostings, and shortbread for a smooth texture.
Turbinado & Demerara Sugar – Coarse sugars that add crunch, often used as a topping.
Caster Sugar (Superfine Sugar) – Dissolves quickly, great for delicate baked goods like meringues.

Sugar cookies are a delightful treat for any occasion, and with the right flavors and decorations, they can become truly special. Whether you’re making Valentine fortune cookies, experimenting with the best sugar cookie icing recipe, or trying unique flavors like cotton candy-infused sugar cookies, there are endless ways to elevate your baking. From beautifully decorated sugar cookies to the best royal icing sugar cookies, there’s a recipe for everyone, including simple glazed sugar cookies, vegan sugar cookie cut-outs, and easy gluten-free sugar cookies. If you’re looking for a quick option, no-chill sugar cookie cut-outs are perfect for effortless baking.

For more delicious cookie ideas, check out our collection of traditional cookies and get inspired to create even more sweet treats!

Don’t miss out—follow us on social media for updates:

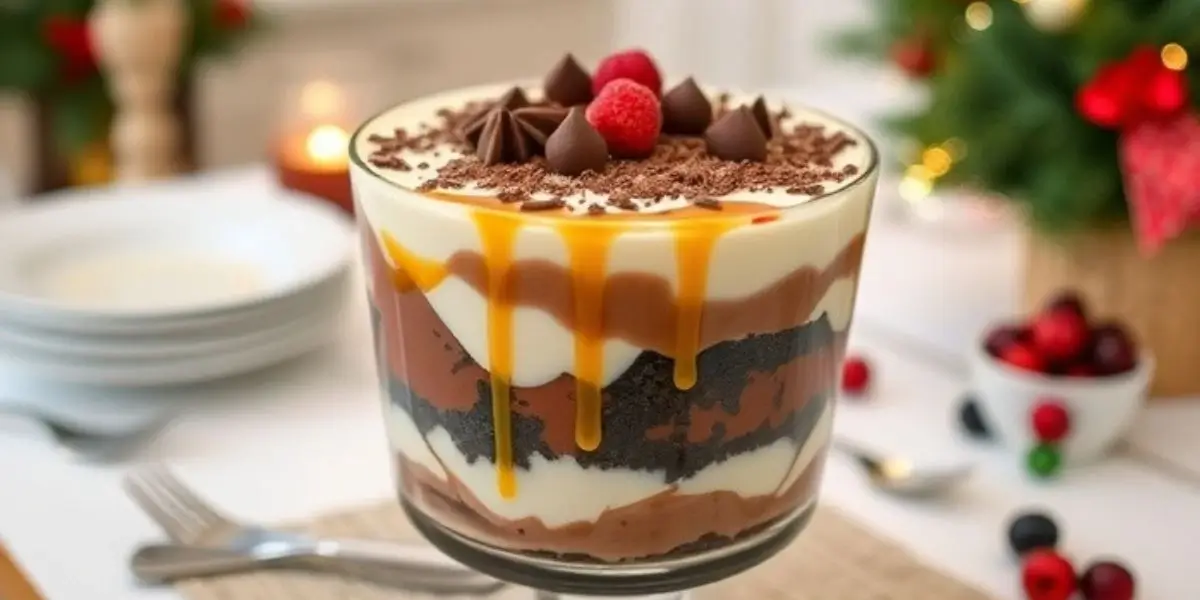
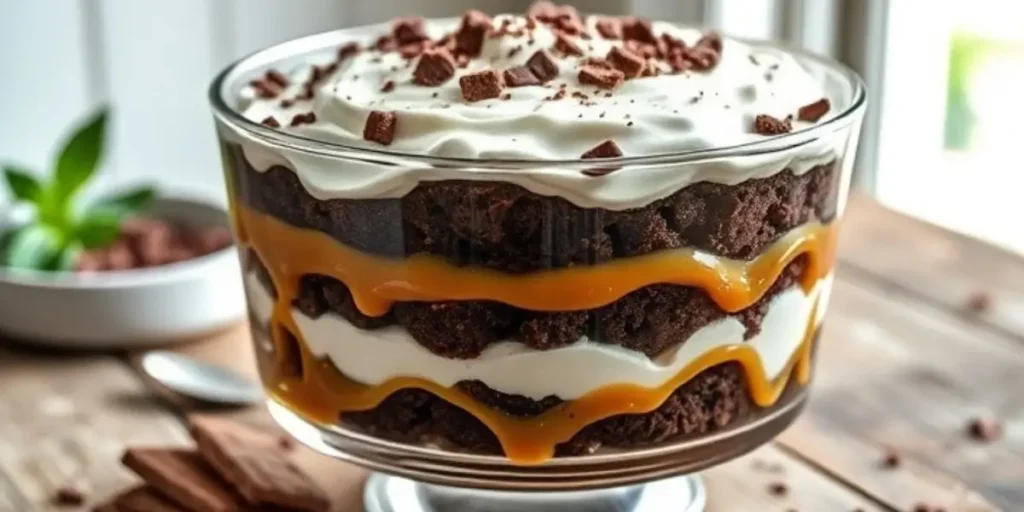
Chocolate Caramel Trifle Recipe

Chocolate Caramel Trifle

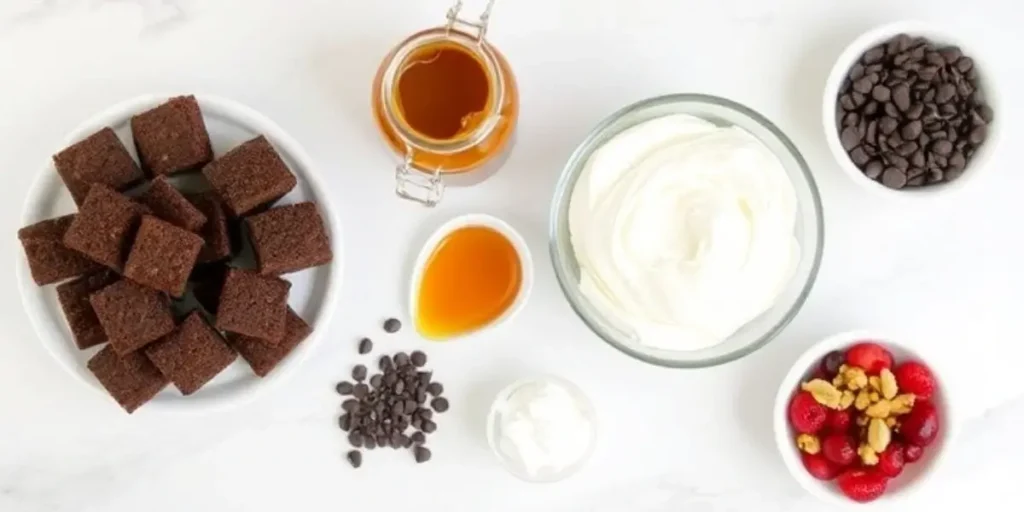
Ingredients for the Chocolate Caramel Trifle

Creating the perfect Chocolate Caramel Trifle Recipe starts with gathering the right ingredients. Luckily, this dessert doesn’t require any hard-to-find items, so you can get everything you need from your local grocery store. Each layer brings something special to the table, from the rich chocolate cake to the silky caramel sauce. Let’s dive into the essentials that will make your trifle truly unforgettable.

Essential Ingredients

  1. Chocolate Cake (or Brownies)
    The base of any great trifle is a delicious cake, and for this Chocolate Caramel Trifle Recipe, a moist chocolate cake works wonders. You can either bake it from scratch using your favorite chocolate cake recipe or grab a box mix for a quicker option. If you love a denser texture, brownies can also make a fantastic alternative. The key is to make sure the cake is soft enough to soak up the caramel and cream layers without falling apart.
  2. Caramel Sauce
    Caramel is the star ingredient in this trifle, adding a smooth, buttery sweetness that perfectly complements the rich chocolate. You can either use store-bought caramel sauce for convenience or make your own from scratch for an extra touch of homemade flavor. If you opt for homemade, a simple recipe using sugar, butter, and cream will give you a silky, luscious sauce that’s ideal for drizzling over each layer.
  3. Whipped Cream or Vanilla Pudding
    To bring some lightness and creaminess to your trifle, you’ll need whipped cream or a smooth vanilla pudding. Whipped cream is the more traditional choice, but if you prefer a thicker, custard-like layer, vanilla pudding works beautifully. Both options add a rich, indulgent texture that balances out the density of the cake and the sweetness of the caramel.
  4. Chocolate Chips or Shavings
    A trifle isn’t complete without some chocolate garnish. For this Chocolate Caramel Trifle Recipe, chocolate chips or shaved chocolate are perfect. They not only add a touch of texture but also enhance the chocolate flavor, making every bite feel like a chocolate lover’s dream. Feel free to choose dark, milk, or white chocolate to suit your taste.
  5. Optional Toppings (e.g., Crushed Nuts, Berries)
    The beauty of this dessert is its versatility. Don’t hesitate to experiment and add your unique touch with the toppings! Crushed nuts, like pecans or walnuts, bring a crunchy contrast to the soft layers. Fresh berries, such as raspberries or strawberries, can offer a burst of color and a hint of tartness that cuts through the sweetness. Whether you keep it simple or go all out with toppings, the final result will be a dessert everyone will love.
Chocolate Caramel Trifle

Ingredient Variations

While the classic ingredients for this Chocolate Caramel Trifle Recipe are irresistible on their own, there’s plenty of room for variation based on dietary preferences or simply for fun! Here are a few ideas to make this trifle your own:

  • Gluten-Free Options: If you’re baking for someone with dietary restrictions, consider using gluten-free cake or brownies. There are plenty of gluten-free mixes available that don’t compromise on flavor or texture.
  • Vegan Alternatives: To make this dessert vegan-friendly, swap out the whipped cream for coconut cream or a plant-based whipped topping. You can also use dairy-free chocolate and caramel made from coconut milk or almond milk for a rich and creamy result.
  • Homemade Caramel: If you’re feeling adventurous, try making your caramel from scratch. The process is easy, and the result is a rich, buttery sauce that takes this Chocolate Caramel Trifle Recipe to the next level.

With these ingredients, you’re well on your way to creating a showstopping dessert that will have everyone asking for the recipe. Now, let’s get into how to assemble this delicious trifle step by step!

Ingredients Table for Chocolate Caramel Trifle

IngredientAmountNotes
Chocolate Cake (or Brownies)1 large cake or 8-10 browniesStore-bought or homemade; cut into cubes
Caramel Sauce1 cupStore-bought or homemade
Whipped Cream or Vanilla Pudding2 cupsUse whipped cream or thick vanilla pudding
Chocolate Chips or Shavings1/2 cupDark, milk, or white chocolate
Optional ToppingsAs desiredCrushed nuts (pecans, walnuts), fresh berries (strawberries, raspberries)

This table provides a clear overview of the ingredients for the Chocolate Caramel Trifle Recipe. You can adjust quantities based on the size of your trifle bowl or individual servings.

How to Make Chocolate Caramel Trifle

Making a Chocolate Caramel Trifle is easier than you might think, and the result is a dessert that will impress everyone at your gathering. With just a few steps, you can create a decadent layered treat that’s as beautiful as it is delicious. Follow this guide to master the art of trifle-making and create a dessert that everyone will love.

Step 1 – Prepare the Chocolate Cake

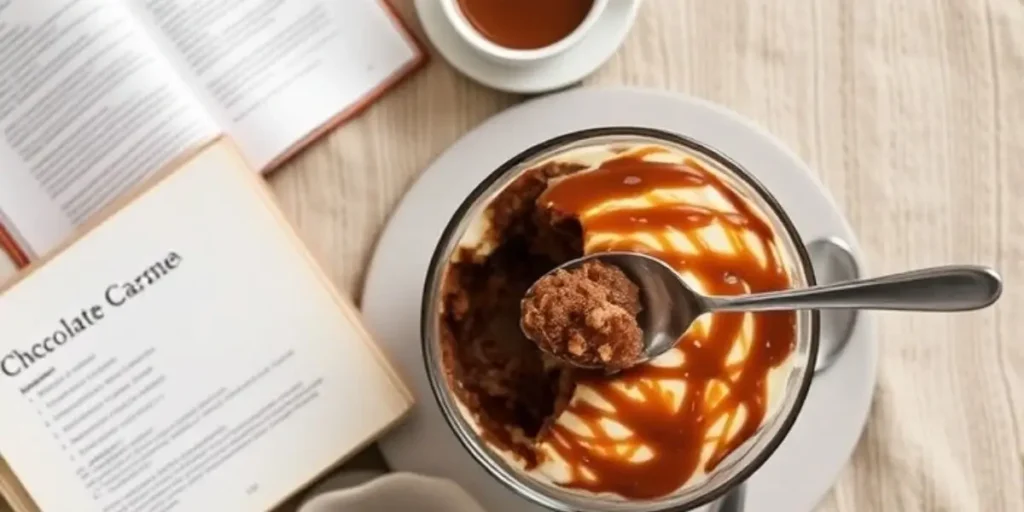
Chocolate Caramel Trifle

The first step in making your Chocolate Caramel Trifle Recipe is to prepare the chocolate cake (or brownies, depending on your preference). If you’re using a store-bought mix, follow the instructions on the package for baking, and let the cake cool completely before cutting it into cubes. If you’re going the homemade route, bake your cake from scratch and allow it to cool for a few hours before slicing.
For an added boost of flavor, you can soak the cake cubes in a simple syrup or even a bit of coffee if you want to enhance the chocolate flavor. The moist cake will absorb the caramel sauce and whipped cream, creating a rich base for your trifle layers.

Step 2 – Layering the Trifle

Now comes the fun part—layering your Chocolate Caramel Trifle Recipe. In a large trifle bowl or individual serving cups, start by placing a layer of the chocolate cake cubes at the bottom. Be sure to cover the entire surface for a solid base.
Next, drizzle a generous amount of caramel sauce over the cake cubes. The caramel will seep into the cake, infusing it with rich, buttery flavor. Follow the caramel layer with a thick layer of whipped cream or vanilla pudding—this will provide the creamy texture that balances the cake and caramel.
Repeat this layering process, making sure each layer is evenly spread. You’ll want at least two or three layers, depending on the size of your trifle bowl. Each layer should be visually distinct so the finished dessert is not only delicious but visually appealing as well.

Step 3 – Final Touches

Chocolate Caramel Trifle Recipe

To complete your Chocolate Caramel Trifle Recipe, top the final layer with chocolate chips or shaved chocolate for an extra touch of decadence. You can also add optional toppings like crushed nuts, berries, or a sprinkle of cocoa powder for added flavor and visual appeal.
Once assembled, refrigerate the trifle for at least 2 hours, or preferably overnight. This allows the layers to set and for the flavors to meld together. When it’s time to serve, your trifle will be a beautiful, creamy dessert with distinct layers that will have everyone asking for more.
By following these simple steps, you’ll create a show-stopping dessert that perfectly balances the sweetness of caramel, the richness of chocolate, and the smoothness of whipped cream. The best part? You can customize the Chocolate Caramel Trifle Recipe with your favorite ingredients to make it your own!

Tips and Tricks for the Perfect Chocolate Caramel Trifle

Creating the perfect Chocolate Caramel Trifle Recipe isn’t just about following the steps—it’s also about knowing a few tricks that will elevate your dessert to the next level. Whether you’re a beginner or a seasoned baker, these tips will help you create a trifle that’s as delicious as it is beautiful.

Choosing the Right Cake

The cake you choose for your Chocolate Caramel Trifle Recipe plays a big role in the outcome. While any chocolate cake works, it’s important to choose one that’s moist enough to absorb the caramel and whipped cream without falling apart. If you’re using store-bought cake, look for one with a rich, dense texture, or go with brownies for a more fudgy base. For the best results, bake your cake a day ahead to allow it to cool and set. This will prevent it from becoming soggy when combined with the caramel sauce.

Making the Best Caramel Sauce

Caramel sauce is the heart of a Chocolate Caramel Trifle Recipe, and making it from scratch can take your dessert to the next level. For the smoothest, most flavorful caramel, melt the sugar over medium heat, stirring constantly until it turns a deep amber color. Once the sugar has melted, carefully add the butter and cream, stirring until smooth. The key is to not overcook the caramel; it should be silky and not too thick. If you’re short on time, store-bought caramel sauce will work fine, but homemade caramel adds an unbeatable depth of flavor.

Trifle Presentation Ideas

The beauty of the Chocolate Caramel Trifle Recipe is in the presentation. To really show off those luscious layers, opt for a clear trifle dish or individual glass cups. This allows your guests to see the chocolate, caramel, and whipped cream layers, making the dessert even more enticing. For a more elegant touch, you can garnish the top with additional chocolate shavings, a drizzle of extra caramel, or fresh berries. Be creative! The more visually appealing your trifle is, the more your guests will be eager to dive in.

Don’t Rush the Chilling Time

Patience is key when making a Chocolate Caramel Trifle Recipe. After assembling the trifle, let it chill in the fridge for at least 2 hours, but overnight is even better. This allows the layers to set properly, making each spoonful a perfect combination of textures and flavors. If you’re short on time, a quick chill will still work, but the trifle will be at its best after resting for a longer period.

Customize the Layers

One of the best things about this Chocolate Caramel Trifle Recipe is how easily it can be customized. If you love a bit of crunch, sprinkle crushed nuts, like pecans or walnuts, between the layers for added texture. Want a burst of freshness? Add fresh berries, such as raspberries or strawberries, to complement the richness of the chocolate and caramel. If you’re feeling adventurous, you can even add a layer of your favorite flavored liqueur, such as Bailey’s Irish Cream, to give the dessert an adult twist.

By following these simple tips, you’ll ensure that your Chocolate Caramel Trifle Recipe turns out perfectly every time. Whether you’re making it for a special occasion or simply indulging in a sweet treat, these little tricks will help you create a dessert that’s sure to impress.

Chocolate Caramel Trifle

Why Chocolate Caramel Trifle is Perfect for Every Occasion

The Chocolate Caramel Trifle Recipe is a versatile dessert that shines at any event. Whether it’s a cozy family dinner, a festive holiday celebration, or a casual gathering with friends, this indulgent treat fits every occasion. Its rich, layered textures and decadent flavors make it a dessert that appeals to a wide range of tastes. Let’s explore why the Chocolate Caramel Trifle is a must-have for any special moment.

Ideal for Holidays and Gatherings

One of the key reasons the Chocolate Caramel Trifle Recipe is perfect for every occasion is its ability to wow guests at holidays and gatherings. The layers of fluffy chocolate cake, creamy caramel, and light whipped cream create a dessert that looks as impressive as it tastes. Whether it’s a Christmas dinner, Thanksgiving feast, or a birthday bash, this trifle is guaranteed to steal the show. The beauty of a trifle is in its size—it can be easily scaled to serve large groups, making it an ideal choice for big family gatherings or parties. The visual appeal of this dessert, with its stunning layers on display, makes it perfect for showcasing at any celebration.

Customizing Your Trifle for Various Tastes

What makes the Chocolate Caramel Trifle Recipe even more perfect for every occasion is its adaptability. The beauty of this dessert lies in how easily it can be customized to fit different preferences and dietary needs. For example, you can add fresh fruits like berries, bananas, or even citrus zest to bring out a refreshing contrast against the richness of the chocolate and caramel. Want to make it gluten-free? Simply swap out the cake for a gluten-free version. If you’re catering to vegan guests, use plant-based whipped cream and dairy-free chocolate. The possibilities for customization ensure that this trifle can be enjoyed by everyone, no matter their dietary restrictions or taste preferences.

A Showstopper for Every Season

The Chocolate Caramel Trifle Recipe is incredibly versatile, making it suitable for any season. During the colder months, the rich chocolate and caramel layers provide the perfect comfort food to warm up a chilly evening. It’s a perfect dessert for winter holidays like Christmas or New Year’s. In contrast, during the warmer months, you can lighten it up by incorporating fresh fruits or even adding a splash of flavored liqueur to give it a summer twist. Whether you’re making it for a spring picnic or a cozy winter dinner, the Chocolate Caramel Trifle adapts seamlessly to the season, ensuring it’s always the right choice.

A Stress-Free, Make-Ahead Option

Another reason the Chocolate Caramel Trifle Recipe is so perfect for every occasion is its make-ahead nature. This dessert is not only simple to prepare but also incredibly convenient. You can assemble the trifle hours, or even a day, in advance. Allowing the trifle to chill gives the layers time to set, ensuring the flavors meld together beautifully. The ability to make it ahead of time takes the pressure off you on the day of your event, leaving you free to enjoy the festivities without worrying about last-minute preparation. It’s a stress-free way to guarantee that your guests will be served a delicious, show-stopping dessert.

Whether you’re hosting a holiday dinner, a family gathering, or just want a simple indulgence, the Chocolate Caramel Trifle Recipe is the perfect dessert for any occasion. With its stunning presentation, customizable options, and effortless preparation, this trifle is guaranteed to impress and satisfy your guests.


The Chocolate Caramel Trifle Recipe is an indulgent, versatile dessert that’s perfect for any occasion. Its rich layers of chocolate, smooth caramel, and creamy whipped topping create a delightful treat that will impress your guests and satisfy your sweet tooth. Whether you’re celebrating a holiday, hosting a gathering, or simply craving a delicious dessert, this trifle is easy to make, customizable, and sure to be the star of your table.

We hope this recipe inspires you to try making your chocolate caramel trifle! Feel free to get creative with different ingredients and toppings to make it your own. If you’re looking for more chocolate inspiration, check out this easy chocolate cake recipe for another delicious treat.

For more breakfast ideas that pair perfectly with your trifle, don’t miss our collection of delicious breakfast recipes. From savory to sweet, we’ve got you covered!

Happy baking, and don’t forget to share your trifle creations with us in the comments or on social media!

Unique Christmas Cookie Ideas: Red Velvet to Peppermint!

Unique Christmas Cookie

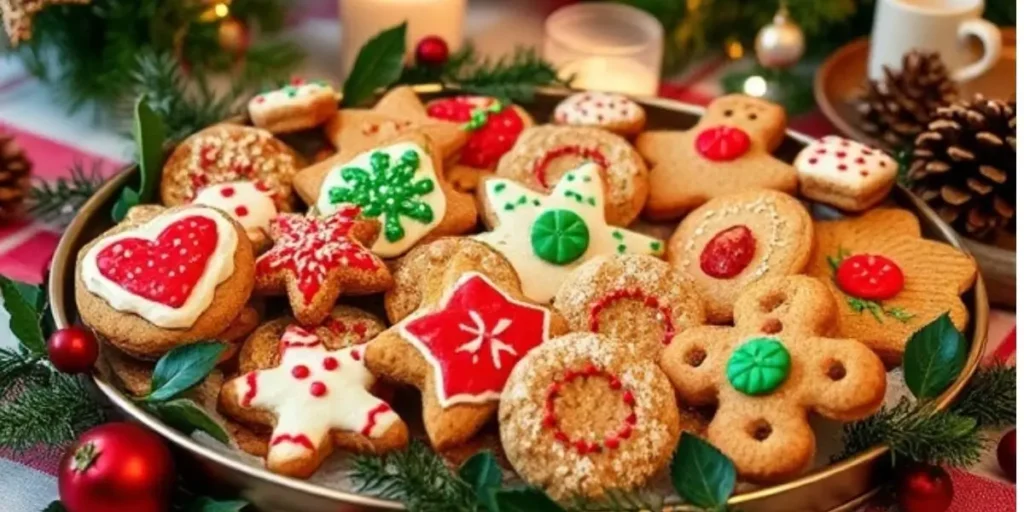
The holiday season is the perfect time to get creative in the kitchen, and there’s no better way to spread festive cheer than with unique Christmas cookie ideas. Whether you’re baking for family gatherings, gifting homemade treats, or simply indulging in the holiday spirit, these cookies are sure to be a hit. From rich red velvet crinkle cookies to cool peppermint delights, unique Christmas cookie ideas bring a fresh twist to traditional flavors. Each bite offers a new experience, making your cookie tray stand out and delighting everyone who tastes it.

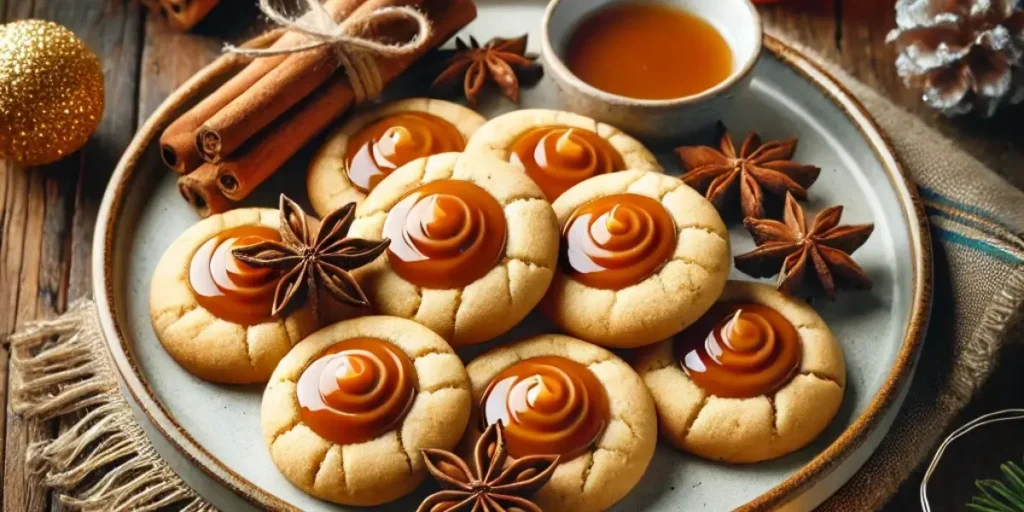
In this guide, we’ll explore a variety of unique Christmas cookie ideas that go beyond the usual gingerbread and sugar cookies. You’ll learn how to create showstopping treats like matcha shortbread cookies, salted caramel thumbprints, and cranberry orange biscotti. These cookies are not only delicious but also fun to make and share. Get ready to add a touch of creativity to your holiday baking with these distinctive recipes that will surely impress your friends and family.

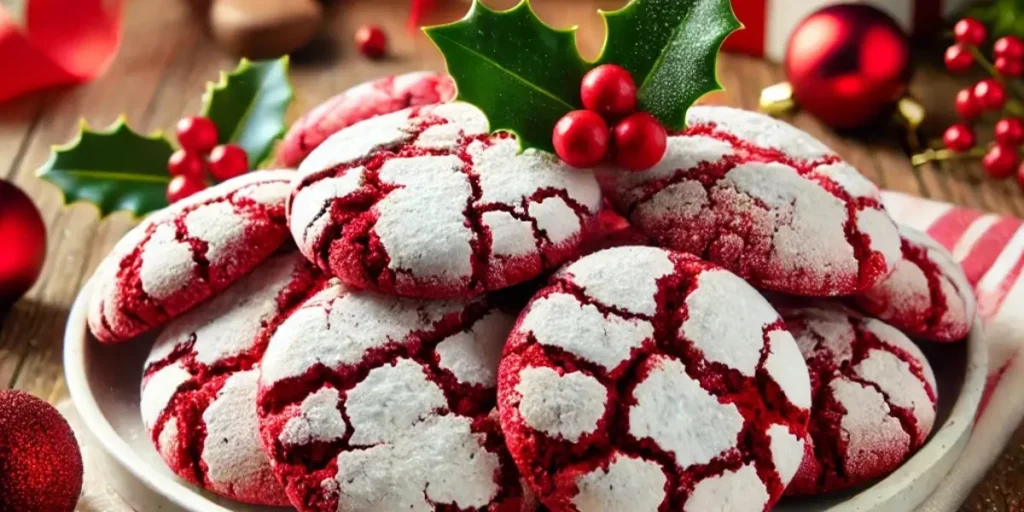
Red Velvet Crinkle Cookies

Red velvet crinkle cookies are the perfect blend of festive color and rich flavor, making them a standout addition to any holiday spread. These cookies take the beloved red velvet cake flavor and transform it into a chewy, irresistible treat with a delicate, crinkled texture. The vibrant red color, paired with a dusting of powdered sugar, creates a visually stunning cookie that’s sure to wow your guests. Whether you’re baking for a family gathering, a cookie swap, or simply indulging in holiday traditions, red velvet crinkle cookies bring something special to your holiday table.

What makes red velvet crinkle cookies such a favorite is the perfect combination of cocoa and sweetness, which results in a soft, melt-in-your-mouth experience with every bite. Achieving that signature crinkle is all about the right balance of ingredients and baking technique. When you roll the dough in powdered sugar, it not only adds a festive touch but also helps create those irresistible cracks as the cookies bake. For an extra holiday twist, consider topping them with a dollop of cream cheese frosting for a velvety finish. Red velvet is a perfect color and flavor for Christmas, adding both beauty and taste to your cookie tray. If you’re looking for more festive treats, be sure to check out our Traditional Christmas Cookie Recipes or explore Vegan & Gluten-Free Christmas Cookies for even more delicious options.

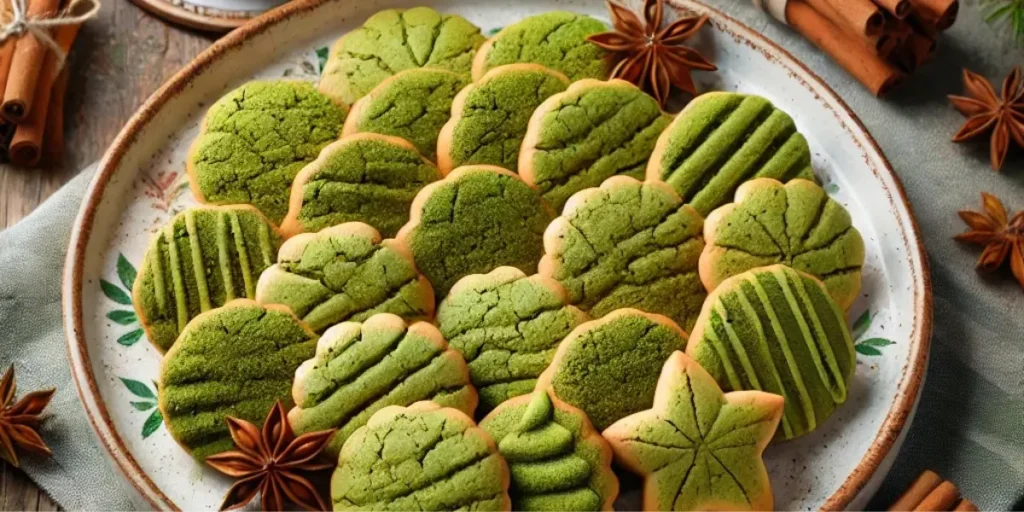
Matcha Shortbread Cookies

Matcha shortbread cookies offer a refreshing and unique twist on the traditional buttery treat, making them a perfect addition to your holiday cookie collection. The subtle, earthy flavor of matcha paired with the crisp, melt-in-your-mouth texture of shortbread creates a delightful balance that’s both comforting and unexpected. These cookies add a pop of green to your festive cookie tray, making them not only delicious but also visually striking. If you’re looking for a cookie that combines a touch of elegance with the charm of the holiday season, matcha shortbread cookies are the way to go.

The beauty of matcha shortbread cookies lies in their simplicity and versatility. The rich, green tea flavor blends beautifully with the buttery base of shortbread, creating a cookie that’s slightly sweet with a hint of earthiness. To achieve the perfect texture, it’s important to use high-quality matcha and carefully mix the dough until it’s just right. After baking, these cookies take on a crisp texture that pairs wonderfully with a cup of tea or coffee, making them an ideal treat for both relaxing moments and festive gatherings.

Matcha Shortbread Cookies

Salted Caramel Thumbprint Cookies

Salted caramel thumbprint cookies are a perfect example of how sweet and salty flavors can come together to create a truly irresistible treat. These cookies feature a buttery, soft base that’s topped with homemade salted caramel, creating a balance of flavors that’s both indulgent and surprising. The thumbprint shape makes them fun to prepare, and their rich, gooey centers are the ideal contrast to the crisp, tender cookies around them. If you’re looking to add a little extra flair to your holiday baking, these salted caramel thumbprint cookies are a must-try.

The magic of salted caramel thumbprint cookies lies in their ability to satisfy multiple cravings at once. The cookie itself is delicate and buttery, while the salted caramel filling adds a rich, velvety sweetness that’s perfectly complemented by a pinch of salt. Making the salted caramel from scratch adds an extra layer of indulgence, but it’s simple enough to do and ensures the freshest, most flavorful result. Once the cookies are assembled, they are a delightful combination of textures and flavors that will have everyone coming back for more. Looking for more festive inspiration? Be sure to check out our Traditional Christmas Cookie Recipes or explore Vegan & Gluten-Free Christmas Cookies for even more delicious ideas.

Lemon Snowball Cookies

Lemon snowball cookies are a refreshing and tangy twist on the classic holiday treat, perfect for adding a burst of citrus to your cookie tray. These buttery, melt-in-your-mouth cookies are coated in powdered sugar, giving them the signature “snowball” appearance that’s both festive and delicious. The bright, zesty flavor of lemon shines through, making these cookies a light and cheerful addition to any holiday spread. If you’re looking for a cookie that’s a little different from the usual heavy, spiced options, lemon snowball cookies bring a perfect balance of sweetness and citrus.

What makes lemon snowball cookies so special is their delightful contrast of flavors and textures. The buttery, crumbly cookie melts on your tongue, while the tangy lemon zest adds a refreshing burst of flavor. Coating the cookies in powdered sugar not only adds a beautiful snowy effect but also enhances the sweetness, creating the perfect balance with the tangy lemon. These cookies are ideal for all ages and are easy to make in large batches, making them perfect for holiday parties, cookie exchanges, or as a thoughtful homemade gift.

Cranberry Orange Biscotti

Cranberry orange biscotti offer a delightful combination of flavors that make them a perfect fit for the holiday season. The tartness of dried cranberries pairs wonderfully with the citrusy sweetness of orange, creating a vibrant, flavorful cookie that’s both satisfying and refreshing. Biscotti are a classic Italian treat known for their crunchy texture, and these cranberry-orange variations bring a seasonal twist that’s ideal for enjoying with a cup of coffee or tea. Their crispy texture and bold flavor make them a standout addition to any holiday cookie platter.

What makes cranberry orange biscotti so appealing is not only their taste but also their versatility. Biscotti can be dunked into hot beverages like coffee, tea, or even hot chocolate, making them a perfect companion for cozy winter moments. The bright, zesty orange flavor is complemented by chewy bits of dried cranberry, offering a satisfying bite with every dunk. These cookies are also easy to make ahead of time and store well, making them ideal for holiday gifting or preparing in advance for your holiday celebrations.

Chocolate Peppermint Sandwich Cookies

Chocolate peppermint sandwich cookies are the ultimate holiday treat, combining the rich, decadent flavor of chocolate with the cool, refreshing taste of peppermint. These cookies are a festive twist on the classic sandwich cookie, filled with a creamy peppermint-flavored filling that balances the deep chocolate flavor perfectly. With their dark, chocolatey cookies and bright, minty centers, they make for an indulgent, eye-catching addition to your holiday cookie tray. Whether you’re baking for a Christmas party or preparing homemade gifts, these cookies will delight everyone with their sweet, minty goodness.

The combination of chocolate and peppermint is a holiday favorite, and these sandwich cookies take it to the next level. The rich, chewy cookies pair perfectly with the cool peppermint filling. They’re easy to assemble and look stunning, making them ideal for sharing. For an extra festive touch, dip the edges in crushed candy canes. These cookies are a must for any chocolate and peppermint lover. If you’re craving more unique Christmas cookie ideas, there are plenty of festive treats to explore this holiday season.

Unique Christmas Cookie 3

Unique Christmas cookies bring a delightful twist to your holiday celebrations, adding creativity and flavor to your cookie tray. From the vibrant red velvet crinkle cookies to the refreshing cranberry orange biscotti, these festive treats offer something for every taste and occasion. By incorporating new flavors and fun designs into your baking, you can make this holiday season even more special with cookies that stand out. Whether you’re hosting a holiday party, exchanging cookies with friends, or simply treating your family to something new, these cookies are sure to impress.

Don’t be afraid to experiment with your baking this season—mixing traditional flavors with unique twists is the key to creating memorable holiday treats. For more creative cookie ideas, be sure to explore a variety of unique Christmas cookie recipes that are perfect for all your festive needs. Happy baking, and enjoy the delicious results!

Vegan & Gluten-Free Christmas Cookies Everyone Will Love

Gluten-Free Christmas Cookies

The holiday season is a time for joy, celebration, and, of course, indulging in delicious treats. However, for those with dietary restrictions or those following specific eating habits, it can be challenging to find festive cookies that suit everyone. Thankfully, vegan and gluten-free options are now easier than ever to make and just as delicious as their traditional counterparts. Vegan & gluten-free Christmas cookies offer a perfect way to share festive joy without compromising on flavor or inclusivity. These cookies are perfect for those with food allergies, intolerances, or simply those who choose a healthier lifestyle.

Whether you are hosting a holiday gathering, sharing with friends and family, or just craving a sweet treat, these cookies will ensure no one misses out on the holiday fun. In this guide, we’ll explore some of the best vegan and gluten-free Christmas cookies, from almond flour sugar cookies to quinoa ginger molasses delights, that will have everyone coming back for seconds.

Table of Contents

Why Vegan & Gluten-Free Christmas Cookies Are a Must-Try

The growing popularity of plant-based and gluten-free diets has transformed the way we approach holiday baking. These cookies cater not only to vegans and those with gluten sensitivities but to anyone who appreciates tasty, health-conscious alternatives. The benefits are undeniable: they are typically lighter, free from animal products and refined grains, and often made with wholesome, nutrient-rich ingredients. Moreover, they prove that it’s entirely possible to create indulgent holiday treats without the need for gluten, dairy, eggs, or refined sugars.

Many classic Christmas cookies are laden with gluten, dairy, and eggs, which can leave those with dietary restrictions feeling left out. By opting for vegan and gluten-free versions, you can ensure that everyone enjoys a sweet bite of holiday cheer. Whether you’re baking for yourself or sharing with others, these cookies are not just about avoiding ingredients—they’re about embracing new flavors and textures that everyone can enjoy. Let’s dive into these scrumptious, inclusive treats that are bound to become new holiday favorites.

Almond Flour Sugar Cookies

Almond flour has become a beloved ingredient in the world of gluten-free baking. With its nutty flavor and light texture, almond flour is a perfect base for sugar cookies. It’s naturally gluten-free, rich in healthy fats, and high in protein, making it an excellent substitute for traditional wheat flour. Almond flour sugar cookies have a delicate crumb and a subtly sweet flavor that pairs beautifully with festive decorations.

What Makes Almond Flour the Perfect Base for Sugar Cookies

Almond flour’s finely ground texture creates a soft, melt-in-your-mouth experience, which is exactly what you want in a sugar cookie. Unlike other gluten-free flours that can result in a dense or crumbly texture, almond flour provides a smooth and slightly chewy bite. Additionally, its subtle almond flavor enhances the natural sweetness of sugar cookies, making it a perfect choice for a holiday treat.

Ingredients You’ll Need for Perfect Almond Flour Sugar Cookies

  • 2 cups almond flour
  • 1/4 cup coconut flour (to help bind the dough)
  • 1/2 cup coconut oil, melted
  • 1/4 cup maple syrup or agave syrup
  • 1 tsp vanilla extract
  • 1/4 tsp salt
  • 1/2 tsp baking soda
  • 1-2 tbsp non-dairy milk (if the dough is too dry)
  • Sugar (for rolling)

Step-by-Step Instructions to Bake Almond Flour Sugar Cookies

  1. Set your oven to 350°F (175°C) and prepare a baking sheet with parchment paper for easy cleanup.
  2. In a mixing bowl, combine almond flour, coconut flour, baking soda, and salt.
  3. Stir in the melted coconut oil, maple syrup, and vanilla extract until the dough comes together.If the dough feels too dry, add a tablespoon of non-dairy milk at a time until it becomes smooth and easy to work with.
  4. Shape the dough into small balls and coat each one thoroughly in sugar.
  5. Arrange the dough balls on the baking sheet and press them lightly with the bottom of a glass to flatten.
  6. Bake for 8-10 minutes, or until the edges turn a light golden brown.
  7. Allow the cookies to cool on the baking sheet before moving them to a wire rack to finish cooling.

Decorating Ideas for Almond Flour Sugar Cookies

These cookies are perfect for decorating! Use royal icing, vegan sprinkles, or a simple dusting of powdered sugar to create festive designs. For extra flair, try using cookie cutters in various holiday shapes like stars, trees, or snowflakes.

Tips for Storing and Freezing Almond Flour Sugar Cookies

Keep the cookies in an airtight container at room temperature, where they’ll stay fresh for up to a week. For extended freshness, freeze them after they’ve cooled completely. Simply place them in a freezer-safe bag or container, and they will stay fresh for up to 3 months.

Gluten-Free Christmas Cookies

Coconut Macaroons

Coconut macaroons are a staple in many holiday cookie collections, and they are incredibly easy to make gluten-free and vegan. These chewy, coconutty delights are naturally sweet and a joy to enjoy throughout the season.

Why Coconut Macaroons Are a Holiday Favorite

Coconut macaroons are known for their rich texture and satisfying chewiness. The flavor of coconut is beloved by many, and it pairs beautifully with the warmth of holiday spices or a drizzle of chocolate. The fact that coconut macaroons are naturally gluten-free and can be easily made vegan makes them an even more perfect choice for holiday baking.

How to Make Vegan & Gluten-Free Coconut Macaroons

  • 3 cups shredded unsweetened coconut
  • 1/4 cup maple syrup or agave syrup
  • 2 tbsp coconut flour
  • 1/2 tsp vanilla extract
  • 1/4 tsp salt
  • 2 tbsp melted coconut oil
  • 1/4 cup dairy-free chocolate chips (optional)

Sweet Variations: Adding Chocolate or Fruit to Your Macaroons

For added flavor, try mixing in vegan chocolate chips, dried cranberries, or citrus zest to your macaroons before baking. These variations add a refreshing twist and make these cookies even more festive.

Tips for Getting Perfectly Crispy Edges

To achieve beautifully crispy edges, be sure to bake the macaroons for the full time specified in the recipe. Avoid overcrowding them on the baking sheet, and allow some space for air to circulate. You can also brush the tops lightly with coconut oil before baking to encourage golden brown edges.

Storing and Enjoying Coconut Macaroons All Season Long

Coconut macaroons can be kept in an airtight container at room temperature for up to a week. For longer storage, freeze them for up to three months. To prevent the macaroons from becoming too dry, store them with a piece of parchment paper between layers.

Gluten-Free Christmas Cookies

Vegan Gingerbread Cookies

Gingerbread cookies are one of the quintessential flavors of the holiday season. With their warm blend of ginger, cinnamon, and molasses, these vegan and gluten-free gingerbread cookies are sure to be a hit at any celebration.

A Classic Holiday Favorite Made Vegan & Gluten-Free

Gingerbread cookies are an iconic holiday treat, and making them vegan and gluten-free doesn’t mean sacrificing flavor. This recipe combines rich spices with a smooth texture to create a delightful and satisfying holiday cookie.

Key Ingredients to Make the Best Vegan Gingerbread Cookies

  • 2 cups gluten-free all-purpose flour
  • 1/4 cup coconut flour
  • 1/4 cup coconut sugar
  • 1/4 cup molasses
  • 1/4 cup coconut oil, melted
  • 1 tsp ground ginger
  • 1/2 tsp cinnamon
  • 1/4 tsp cloves
  • 1/4 tsp baking soda
  • 1/4 tsp salt
  • 2 tbsp non-dairy milk

Easy Instructions for Making Soft and Flavorful Gingerbread Cookies

  1. Preheat your oven to 350°F (175°C) and line a baking sheet with parchment paper for easy cleanup.
  2. In a mixing bowl, whisk together the gluten-free flour, coconut flour, baking soda, spices, and salt.
  3. Add the molasses, coconut oil, coconut sugar, and non-dairy milk to the dry ingredients. Stir until a dough forms.
  4. Roll the dough between two pieces of parchment paper to about 1/4-inch thickness, then use cookie cutters to shape your cookies.
  5. Bake for 8-10 minutes or until firm. Let cool completely before decorating.

Decorating Tips for Vegan Gingerbread Cookies

Use vegan royal icing to decorate your gingerbread cookies. You can also add dried fruit, nuts, or candy for a fun, colorful touch.

How to Store Your Gingerbread Cookies to Keep Them Fresh

Store your gingerbread cookies in an airtight container for up to a week. These cookies also make great gifts—just package them in cute holiday tins.

Gluten-Free Christmas Cookies

Gluten-Free Shortbread Cookies

Shortbread cookies are a holiday classic, known for their buttery richness. These gluten-free shortbread cookies will melt in your mouth while maintaining the delicate texture of traditional shortbread.

The Secret to Light, Buttery Gluten-Free Shortbread Cookies

The key to gluten-free shortbread is using a blend of gluten-free flours that mimic the texture of wheat flour. The result is a crisp, buttery cookie that doesn’t crumble.

Ingredients You Need to Make Perfect Gluten-Free Shortbread

  • 1 cup gluten-free all-purpose flour
  • 1/4 cup coconut flour
  • 1/2 cup coconut oil, softened
  • 1/4 cup maple syrup or agave syrup
  • 1 tsp vanilla extract
  • 1/4 tsp salt

Step-by-Step Process for Gluten-Free Shortbread Cookies

  1. Preheat your oven to 325°F (160°C) and line a baking sheet with parchment paper.
  2. In a mixing bowl, combine the gluten-free all-purpose flour, coconut flour, and salt.
  3. Mix in the coconut oil, maple syrup, and vanilla extract until the dough comes together.
  4. Roll the dough between two sheets of parchment paper to a thickness of about 1/4 inch.
  5. Use a cookie cutter to shape the shortbread and bake for 10-12 minutes until the edges are golden.

Fun Twists: Adding Flavor Variations to Your Shortbread

For added variety, consider infusing your shortbread dough with zest from citrus fruits like lemon or orange. A dash of cinnamon or cardamom can also elevate the flavor.

How to Make Gluten-Free Shortbread Cookies Crispy and Flaky

To achieve the perfect texture, ensure that your coconut oil is softened but not too melted. This helps create that signature flakiness. Baking them until golden ensures a crispy edge.

Gluten-Free Christmas Cookies

Oatmeal Cranberry Cookies

Oatmeal cranberry cookies are a holiday staple for many reasons: the chewy oats, tart cranberries, and warm spices make them a delightful treat. These vegan and gluten-free cookies are simple to make and satisfy every craving.

Why Oatmeal Cranberry Cookies Are a Holiday Must

Oatmeal cranberry cookies are a perfect balance of texture and flavor. The oats provide a hearty chew, while the cranberries offer a refreshing tartness, making them a wonderful option for the holidays.

Ingredients for Vegan & Gluten-Free Oatmeal Cranberry Cookies

  • 2 cups gluten-free rolled oats
  • 1/2 cup almond flour
  • 1/2 cup dried cranberries
  • 1/4 cup coconut sugar
  • 1/4 cup coconut oil, melted
  • 1 tsp cinnamon
  • 1/2 tsp vanilla extract
  • 1/4 tsp salt

How to Make the Perfect Chewy Oatmeal Cranberry Cookies

  1. Set your oven to 350°F (175°C) and prepare a baking sheet with parchment paper.
  2. In a large bowl, combine oats, almond flour, cinnamon, and salt.
  3. Mix in the coconut sugar, coconut oil, and vanilla extract until everything is well combined.
  4. Fold in dried cranberries.
  5. Spoon the dough onto the prepared baking sheet and gently flatten each mound.
  6. Bake for 10-12 minutes, or until the edges turn golden brown.

Adding Extra Flavors and Textures: Nuts, Seeds, and Spices

Add some chopped walnuts, chia seeds, or flaxseeds for added texture and nutrients. A dash of nutmeg or cardamom can further enhance the flavor profile.

Tips for Storing and Freezing Oatmeal Cranberry Cookies

Keep these cookies in an airtight container for up to a week to maintain freshness. For long-term storage, freeze the cookies once cooled and reheat them when needed.

Gluten-Free Christmas Cookies

Quinoa Ginger Molasses Cookies

Quinoa ginger molasses cookies are a deliciously unique twist on the classic gingerbread. The addition of quinoa flour adds an interesting texture and nutritional value, making these cookies as healthy as they are tasty.

Quinoa flour gives the cookies a slightly nutty flavor and chewy texture, while molasses adds deep sweetness and warmth, making this cookie a true holiday standout.

The Health Benefits of Quinoa in Your Ginger Molasses Cookies

Quinoa is a protein-packed, gluten-free grain that adds fiber, iron, and essential vitamins. It’s the perfect addition to a holiday cookie, giving it an extra boost of nutrition without compromising flavor.

Simple Ingredients for Delicious Quinoa Ginger Molasses Cookies

  • 1 cup quinoa flour
  • 1/2 cup almond flour
  • 1/4 cup molasses
  • 1/4 cup coconut oil, melted
  • 1 tsp ground ginger
  • 1/2 tsp cinnamon
  • 1/4 tsp cloves
  • 1/4 tsp baking soda
  • 1/4 tsp salt

How to Perfect the Texture of Quinoa Ginger Molasses Cookies

To get the perfect texture, ensure the dough is not too wet or too dry. You may need to adjust the amount of coconut oil or molasses based on the consistency of the dough.

Creative Decorating Ideas for Your Quinoa Ginger Molasses Cookies

These cookies look great with a simple glaze of icing or a sprinkling of chopped candied ginger. You can also dip half of each cookie in vegan chocolate for a festive touch.

Gluten-Free Christmas Cookies

Gluten-Free Christmas Cookies for Every Diet

How to Ensure Your Gluten-Free Christmas Cookies Are Safe for All Diets

It’s crucial to double-check your ingredients for hidden sources of gluten or animal products. Always choose certified gluten-free oats, flour, and dairy alternatives to avoid cross-contamination.

Common Mistakes to Avoid When Making Gluten-Free Christmas Cookies

Avoid using just one gluten-free flour. A blend of flours (such as almond flour and coconut flour) often yields better results. Overmixing the dough or baking at too high a temperature can also lead to undesirable textures.

Tips for Baking Vegan & Gluten-Free Christmas Cookies in Bulk

When making cookies in large batches, it’s best to freeze the dough in portions and bake fresh batches as needed. This ensures you can enjoy fresh cookies throughout the holiday season.

Gluten-Free Christmas Cookies

Vegan & gluten-free Christmas cookies are not just a great alternative for those with dietary restrictions—they’re an opportunity to explore new flavors, textures, and festive creativity. With options like almond flour sugar cookies, quinoa ginger molasses treats, and oatmeal cranberry delights, there’s no need to compromise on taste or tradition. Whether you’re baking for yourself or sharing with loved ones, these cookies are sure to be a hit at your next holiday gathering. Embrace the season with these healthy, indulgent, and allergen-friendly cookies that everyone will love. Happy baking!

For more inspiration, check out Traditional Christmas Cookie Recipes and Unique Christmas Cookie Ideas for a mix of classic and creative treats. If you’re looking to elevate your presentation, explore Christmas Cookie Decorating Tips.

Looking for more resources? Visit external sources like AllRecipes for worldwide Christmas cookie inspiration or Food Network for classic holiday baking ideas.

Delicious Desserts

Tropical Fruit Platter Ideas

Your Go-To Guide: 6 Easy Fruit Platter Ideas for Beginners

In Seattle, I was hosting my first garden party and wanted to impress my friends…
Gluten-Free Christmas Cookies

Vegan & Gluten-Free Christmas Cookies Everyone Will Love

The holiday season is a time for joy, celebration, and, of course, indulging in delicious…
Matcha Shortbread Cookies

Unique Christmas Cookie Ideas: Red Velvet to Peppermint!

Unique Christmas Cookie Recipe The holiday season is the perfect time to get creative in…
Vintage Birthday Cakes: Create our stunning Princess Cake with chocolate layers, Bavarian cream & elegant buttercream for perfect celebrations!

The Visual Evolution of Vintage Birthday Cakes: From Simple to Spectacular

Hey there, fellow bakers! Have you ever scrolled through Instagram drooling over those fancy cakes…
A plate of decorated sugar cookies with colorful icing and sprinkles, placed on a wooden table with a cup of hot cocoa nearby.

the Best 3 Sugar Cookie Flavors at Home

Sugar cookies are a timeless treat that brings joy to any occasion. Whether you’re searching…
Princess Torte Cake

Elegant & Delicious: How to Make a Swedish Princess Torte Cake

Have you ever scrolled through Instagram and spotted that gorgeous green dome cake that looks…
orange cranberry bundt cake​

Cranberry and Orange Bundt Cake Recipe

(And yes, those sugared cranberries are worth the extra 5 minutes) Let’s be real, holiday…
Christmas Cookies

Christmas Cookies Recipes Ideas You’ll Love to Try

The Heartwarming World of Christmas Cookies The holiday season is a magical time of year…
https://damndelicious.net/category/breakfast/

Chocolate Caramel Trifle Recipe

Ingredients for the Chocolate Caramel Trifle Creating the perfect Chocolate Caramel Trifle Recipe starts with…