Orange Chicken Broccoli With Rice Stir Fry​

I get it. That neon-orange takeout box calls to you at 7 pm when you’re starving. But what if I told you this one-pan wonder tastes BETTER than delivery, skips the mystery grease, and gets done before the Uber Eats driver would’ve even arrived? (Chicken Fried Rice).

orange chicken broccoli with rice stir fry​, Chicken Fried Rice

Why This Recipe is My Weeknight Hero

  • The sauce: sticky-sweet with a sneaky Sriracha kick (adjust to your cowardice level)
  • The chicken is crispy outside and juicy inside (no deep fryer required!).
  • The broccoli still has actual crunch (unlike sad takeout mush)
  • The time: 30 minutes flat (faster than arguing over the menu)

How to Make Chicken Fried Rice

What You Need

(Pantry raid edition)

  • Chicken: Breast (for gym rats) or thighs (for flavor chasers)
  • Sauce squad: Orange juice (yes, from the carton!), soy sauce, brown sugar
  • Heat: Sriracha (1 tsp for “ooh”, 2 tsp for “ahh”, 3 tsp for “call the fire department”)
  • Broccoli: Fresh is best (frozen turns to sad green pudding)

Shortcuts That Won’t Get You Judged:

  • Pre-minced garlic/ginger (we’re tired, not chefs)
  • Bottled orange juice (just don’t use mimosa leftovers)

How To Make It (Between Kids Screaming & Emails Pinging)

  1. Whisk the magic sauce – Dump everything in a bowl (even that half-used soy sauce packet).
  2. Sear the chicken – Don’t touch it! Let it get crispy like it offended you.
  3. Broccoli time – Toss in florets until they’re bright green (not army fatigue green).
  4. Glaze glory – Pour sauce over everything and watch it turn shiny and irresistible.

Pro Tip: If your sauce looks too thin, add another cornstarch slurry (1 tsp cornstarch + 1 tsp water) and glare at it until it thickens.

Serving Ideas for Maximum Wow

  • Over rice: Jasmine, brown, or that questionable quinoa in your pantry
  • With flair: Toasted sesame seeds (fancy!) or crushed peanuts (lazy fancy)
  • For kids: Serve sauce on the side for “deconstructed orange chicken” (aka chicken nuggets)

Final Thought: This recipe is for anyone who’s ever stared into a lukewarm takeout box and thought, “I paid $18 for this?” Save the cash (and dignity) and make this instead.

Tag your recreations #FakeoutTakeout – I wanna see your saucy wins.

(P.S. The leftovers? Even better, the next day. Fight me.)

orange chicken broccoli with rice stir fry​

Perfect Chicken, Rice & Broccoli: Easy Balanced Meal Guide

Jasper wellspring
Why chicken, rice & broccoli is the ultimate healthy meal, complete nutrition, easy prep & flavorful twists. Get pro cooking tips & meal-prep hacks
Prep Time 10 minutes
Cook Time 20 minutes
Total Time 30 minutes
Course Main Course, Snack
Cuisine American, Chinese
Servings 4
Calories 369 kcal

Ingredients
  

Ingredients:

For the Chicken & Broccoli:

  • 1.5 lbs chicken breast or thighs cut into bite-sized pieces
  • 2 cups fresh broccoli florets
  • 2 tbsp vegetable oil
  • Salt & pepper to taste

For the Sauce (aka the real MVP):

  • ¾ cup orange juice yes, from the carton
  • 3 tbsp soy sauce
  • 2 tbsp brown sugar
  • 1 –3 tsp Sriracha adjust based on your bravery
  • 1 tsp cornstarch + 1 tsp water slurry for thickness
  • 1 tsp garlic pre-minced is fine
  • 1 tsp ginger fresh or from a tube—no judgment

Instructions
 

Instructions:

    Mix the Sauce:

    • In a small bowl, whisk together orange juice, soy sauce, brown sugar, Sriracha, garlic, and ginger. Set aside your glorious glaze.

    Sear the Chicken:

    • Heat oil in a large pan over medium-high heat. Add chicken pieces in a single layer and let them sit untouched until crispy and golden. Flip and cook through. Remove and set aside.

    Broccoli Time:

    • In the same pan, toss in the broccoli and stir-fry until bright green and still slightly crunchy—no soggy sadness allowed.

    Sauce It Up:

    • Add the chicken back to the pan, pour in the sauce, and stir to coat. Simmer for 3–5 minutes until the sauce begins to thicken.

    Thicken Like a Boss:

    • If the sauce is too thin, mix your cornstarch and water, pour it in, and let it bubble until glossy and thick enough to coat a spoon.

    Frequently Asked

    What is orange chicken​

    Orange Chicken is a popular Chinese-American dish featuring crispy fried chicken tossed in a sweet, tangy orange-flavored sauce. Key elements:
      Crispy chicken (usually thigh meat)
      Sticky orange sauce (zest, juice, sugar, vinegar)
      Signature citrusy-sweet flavor with optional spice

    How to make orange​

    How to Make Orange Chicken (Quick & Easy)
    Ingredients:
    1 lb chicken (thighs or breast), cubed
    ½ cup orange juice (fresh or bottled)
    2 tbsp soy sauce
    3 tbsp brown sugar
    1 tbsp rice vinegar
    1 tsp ginger (grated)
    2 garlic cloves (minced)
    1 tbsp cornstarch + 2 tbsp water (slurry)
    1 tsp Sriracha (optional for heat)
    Steps:
    Make Sauce: Whisk orange juice, soy sauce, sugar, vinegar, ginger, and garlic.
     Cook Chicken: Sear chicken in oil until golden (~5 min).
    Thicken Sauce: Pour the sauce into the pan, add the cornstarch slurry, and simmer until thick (~2 min).
     Toss & Serve: Coat chicken in sauce, top with sesame seeds.
    Done in 20 mins! Serve over rice.

    Is orange chicken spicy?​

    Orange Chicken is typically mildly sweet rather than spicy, but heat levels vary:
    American takeout versions = usually not spicy (focus on sweet-tangy orange flavor)
    Homemade recipes = often add Sriracha/chili flakes (1 tsp = subtle kick | 1 tbsp = noticeable heat)

    Is orange chicken Chinese​

    Orange Chicken is Chinese-American, not traditional Chinese cuisine.
     American Origin: Created in the 1980s in Hawaii by Chinese chefs adapting to local tastes
     Authentic Chinese Comparison: Similar to chenpi ji (tangerine peel chicken), but sweeter
     Key Differences:
    Uses orange zest/juice (rare in China)
    Deep-fried, sticky sauce (uncommon in traditional dishes)

    Can you put broccoli in Orange Chicken?

    Yes! Broccoli pairs perfectly with orange chicken – it adds freshness, texture, and balances the dish. Here’s how to do it right:
    Best Ways to Add Broccoli
    Stir-Fry Method
    Toss florets into the pan last 3-4 minutes to keep them crisp-tender.
    Steam-Sear Combo
    Blanch first, then quick-sear the chicken for charred edges.
    Meal-Prep Style
    Roast separately (400°F for 15 mins) and mix before serving.

    Should you cook broccoli before stir-frying?

    Yes, but only partially! For the crispiest, most flavorful broccoli in stir-fries:
    Best Methods
    Blanch First (2 mins in boiling water) → Crisp-tender base for stir-frying
    Quick Microwave (1 min with splash of water) → Fast prep
    Roast Briefly (400°F for 5 mins) → Deepens flavor
    Why? Raw broccoli takes too long to cook in a stir-fry, risking soggy chicken or burnt garlic.

    Why is chicken rice and broccoli a good meal?

    Chicken, Rice & Broccoli = The Ultimate Balanced Meal
    Why It Works:
    Complete Nutrition
    Chicken: Lean protein for muscle repair
    Rice: Easy-to-digest carbs for energy
    Broccoli: Fiber + vitamins (C, K, folate)
    Meal-Prep Superstar
    Stays fresh for days
    Easy to portion for weight goals
    Endless Customization
    Spice it (curry powder, chili flakes)
    Sauce it (teriyaki, garlic butter, lemon tahini)

    What should you not do when stir-frying?

    Top Stir-Fry Mistakes to Avoid (And How to Fix Them!)
    1. DON’T Crowd the Pan
    Why? Steams food instead of searing.
    Fix: Cook in batches (especially meat/veggies with high water content).
    2. Don’t Use Wet Ingredients
    Why? Causes splatter and prevents browning.
    Fix: Pat meat/veggies dry before cooking.
    3. DON’T Over-Stir
    Why? Prevents caramelization (those tasty brown bits!).
    Fix: Let ingredients sit 30-60 seconds between stirs.
    4. DON’T Use Low Heat
    Why? Results in soggy, greasy stir-fry.
    Fix: High heat + preheated pan = perfect sear.
    5. DON’T Add Sauce Too Early
    Why? Makes everything soggy.
    Fix: Toss in sauce last, then cook 1-2 mins just to coat.
    Bonus Pro Tips:
    Skip olive oil (low smoke point), use peanut/avocado oil.
    Prep everything first (once cooking starts, it’s FAST!).
    Fix these mistakes, and your stir-fry will beat takeout every time!

    Do I need to boil broccoli before cooking?

    No, you don’t have to boil broccoli first—but here’s when you should:
    Skip Boiling If:
     Stir-frying/Roasting → High heat cooks it fast with crispy edges
     Steaming → Just 3-5 mins in a steamer basket
    Boil First If:
     Meal prepping → Blanch 2 mins to stop overcooking later
     Soups/Casseroles → Softens texture evenly
     Freezing → Blanching preserves color/nutrients

    Don’t miss out—follow us on social media for updates:

    Chicken Fajita Salad: The 30-Minute Dinner

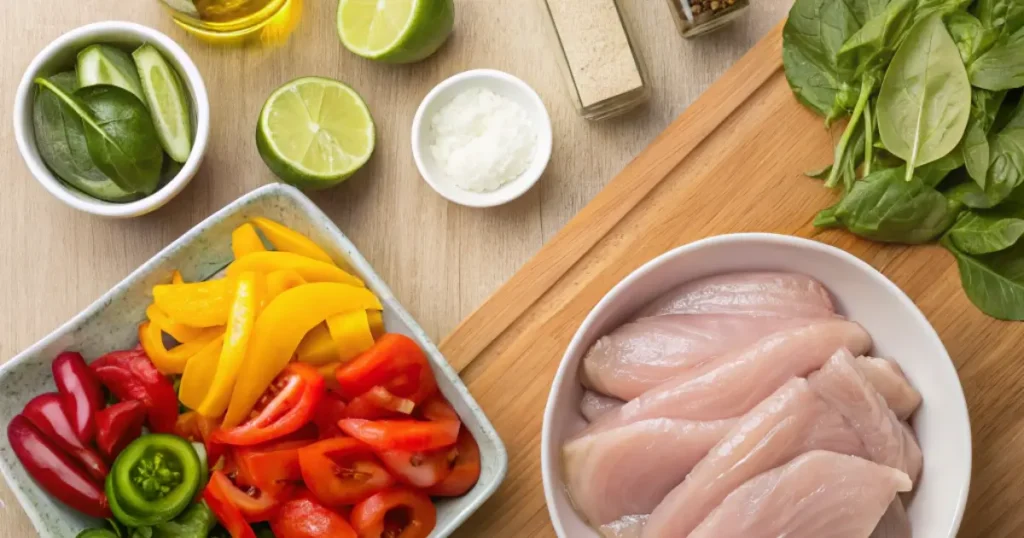
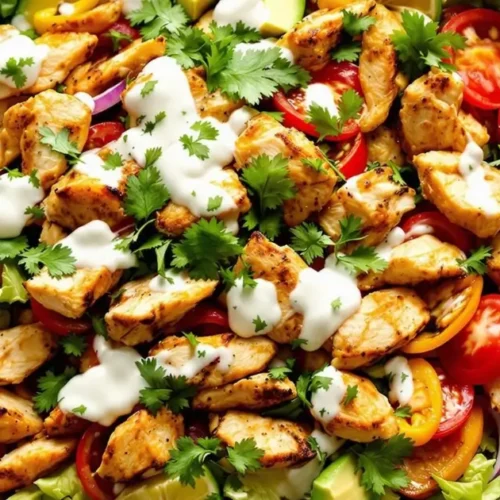
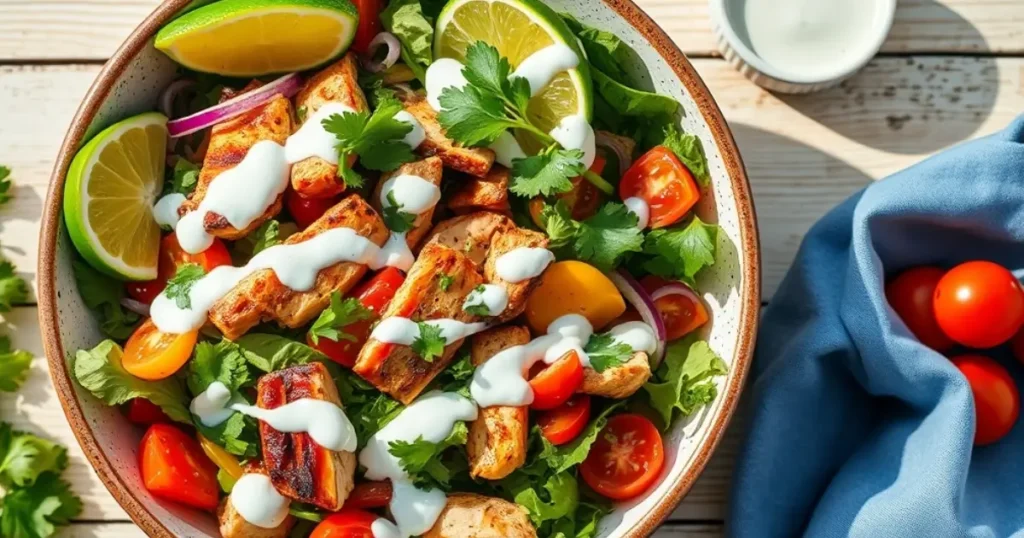
    Look, I wasn’t expecting my picky feline to approve my dinner, but here we are—J the Cat will faceplant into this bowl if I turn my back. Meanwhile, I’m thrilled to have a gluten-free Mexican salad that doesn’t taste like a sacrifice. (Chicken Fajita Salad)

    Chicken Fajita Salad

    Why This Salad Hits Different

    • Juicy chicken thighs: (because dry breast is a crime)
    • Zero marinating: (Who has time? Not this cat servant)
    • All the crunch: charred peppers, creamy avocado, crispy lettuce
    • Ranch dressing loophole: (makes veggies suddenly irresistible)

    How to make chicken fajita salad​

    What You Need

    (Serves 2 humans or 1 very determined cat)

    • The Chicken: 2 thighs or 1 breast (sliced thin if using breast)
    • The Flavor: 1 tbsp fajita seasoning (homemade or stolen from a packet)
    • The Veg: 1 bell pepper (red/yellow for sweetness), ½ onion
    • The Fun: Avocado, cherry tomatoes, cilantro, lime
    • The Lifesaver: Bottled ranch (or whisk together mayo + lime juice in desperation)
    Chicken Fajita Salad

    How To Make It (Between Cat Interruptions)

    1. Season & Sear
    • Pat chicken dry, rub with seasoning like you’re giving it a massage.
    • Cook in screaming-hot skillet 3-4 mins per side (J will come running at the sizzle).
    1. Char the Veggies
    • Use the same pan (fewer dishes!) and toss in peppers and onion with a pinch of salt.
    • Leave them alone to get those sexy blackened bits.
    1. Assemble Like a Taco Bar
    • Pile greens in bowls (I use spinach to pretend it’s healthy).
    • Top with sliced chicken, veggies, avocado chunks, and tomatoes.
    • Drown in ranch (or drizzle artfully if you’re fancy).

    How many calories are in a chicken fajita salad

    Une salade fajita au poulet contient environ 228 à 640 calories par portion, selon la recette et les ingrédients utilisés.

    La valeur moyenne est d’environ 400-500 calories pour une portion standard.

    Les variations principales dépendent :

    • De la quantité de poulet
    • De la présence d’avocat, fromage ou crème sure
    • De l’utilisation ou non d’un bol de tortilla

    Serving Ideas for Maximum Joy

    • With: Frozen mango margaritas (because adulthood)
    • As Lettuce Tacos: When carbs feel like too much
    • For Cat Tax: Serve J plain chicken in his bowl (then watch him ignore it)

    Final Thought: This salad is fast enough for weeknights, fancy enough for guests, and bizarrely intriguing to feline overlords. Win-win-win.

    Made it? Tag #FajitaCatDad for solidarity.

    Chicken Fajita Salad

    easy chicken fajita salad​ recipe

    Jasper wellspring
    Easy Chicken Fajita Salad with avocado & ranch—gluten-free, ready in 30 mins! Perfect for summer dinners or Cinco de Mayo. Get the step-by-step recipe
    Prep Time 10 minutes
    Cook Time 15 minutes
    Total Time 25 minutes
    Course Salad
    Cuisine Tex-Mex
    Servings 2
    Calories 420 kcal

    Ingredients
      

    Ingredients:

    Chicken:

    • 2 boneless skinless chicken thighs or 1 breast, thinly sliced
    • 1 tbsp fajita seasoning store-bought or homemade

    Veggies:

    • 1 sweet bell pepper red or yellow, sliced
    • ½ white or yellow onion sliced
    • Pinch of kosher salt

    Greens + Toppings:

    • 2 cups spinach or mixed greens
    • ½ avocado diced
    • ½ cup cherry tomatoes halved
    • Handful of fresh cilantro chopped
    • 1 lime cut into wedges

    Dressing:

    • 2 –3 tbsp bottled ranch dressing or mix mayo + lime juice in a pinch

    Instructions
     

    Instructions:

      Season the Chicken:

      • Pat chicken dry and rub with fajita seasoning like it owes you money.
      • Sear to Sizzle
      • Heat a skillet over medium-high heat. Add oil, then sear chicken for 3–4 minutes per side until golden and cooked through. Remove and rest.

      Char the Veggies:

      • In the same skillet, toss in sliced peppers and onions. Add a pinch of salt and cook until charred and softened (don’t stir too often!).

      Assemble the Salad:

      • In serving bowls, layer your greens. Add sliced chicken, cooked veggies, avocado, tomatoes, and cilantro.

      Add the Sauce:

      • Drizzle with ranch dressing (or drench it, we’re not judging). Serve with lime wedges on the side.

      Notes

      • Make it vegetarian: Sub in grilled portobello mushrooms or tofu with the same seasoning.
      • For crunch: Add crushed tortilla chips or roasted pepitas on top.
      • Cat version: Serve plain cooked chicken in a separate bowl. No seasoning, no drama.
      • Meal prep tip: Keep all components separate in containers and dress just before serving.

      Frequently Asked Questions

      What are the ingredients of taco salad?

      Taco Salad Ingredients (Easy Version):
      Ground beef (or chicken/turkey)
      Lettuce (romaine or iceberg)
      Tomatoes
      Cheese (cheddar or Mexican blend)
      Beans (black or pinto)
      Crushed tortilla chips
      Avocado or guacamole
      Sour cream & salsa
      Shortcut: Use store-bought taco seasoning & ranch dressing.

      What can I use instead of lettuce in tacos?

      Best Lettuce Substitutes for Tacos:
      Cabbage (crunchy & sturdy)
      Spinach (tender & nutrient-packed)
      Kale (heartier texture)
      Zucchini ribbons (low-carb)
      Jicama slices (crisp & slightly sweet)
      Pro Tip: For taco salads, try chopped romaine or butter lettuce for better texture.

      What is the proper way to eat a taco salad?

      The Right Way to Eat Taco Salad:
      Mix gently: Combine ingredients without crushing chips.
      Scoop with chips: Use sturdy tortilla chips as edible utensils.
      Layer bites: Get a bit of each ingredient in every forkful.
      Dress last: Add salsa/sour cream just before eating to avoid sogginess.

      Is taco salad an American thing?

      Yes, taco salad is an Americanized dish inspired by Mexican flavors. While traditional Mexican cuisine features tacos, this deconstructed version—with lettuce, ground beef, and crunchy tortilla shells—was popularized in 1960s U.S. restaurants. Key differences from authentic Mexican food:
      Heavy use of lettuce (rare in Mexican salads)
      Common inclusions: Ranch dressing, cheddar cheese
      Often served in fried tortilla bowls (a U.S. twist)

      Roots: Combines Tex-Mex ingredients with American salad trends

      How are you supposed to eat a taco?

      How to Eat a Taco Like a Pro:
      Hold at 45°: Tilt slightly to prevent fillings from falling.
      Two-Bite Rule: Start from one end, not the middle.
      Push & Lift: Gently push toppings forward as you take each bite.
      Leak Prep: Keep a napkin under the taco’s “belly” to catch drips.

      Do you put lettuce on fajitas?​

      Traditional fajitas don’t include lettuce – they’re served sizzling with onions, peppers, and meat on tortillas. But in American-style fajita salads, lettuce is common.
        Authentic Mexican: No lettuce (just tortillas, meat, veggies)
        Tex-Mex twist: Often added for crunch in salads or bowls

      Don’t miss out—follow us on social media for updates:

      Lunch Break Bliss

      No post found

      Cap’n Crunch French Toast: The Breakfast That’ll Make You Feel Like a Kid Again (But Way More Fancy)

      (Simple and Easy French Toast for Breakfast)

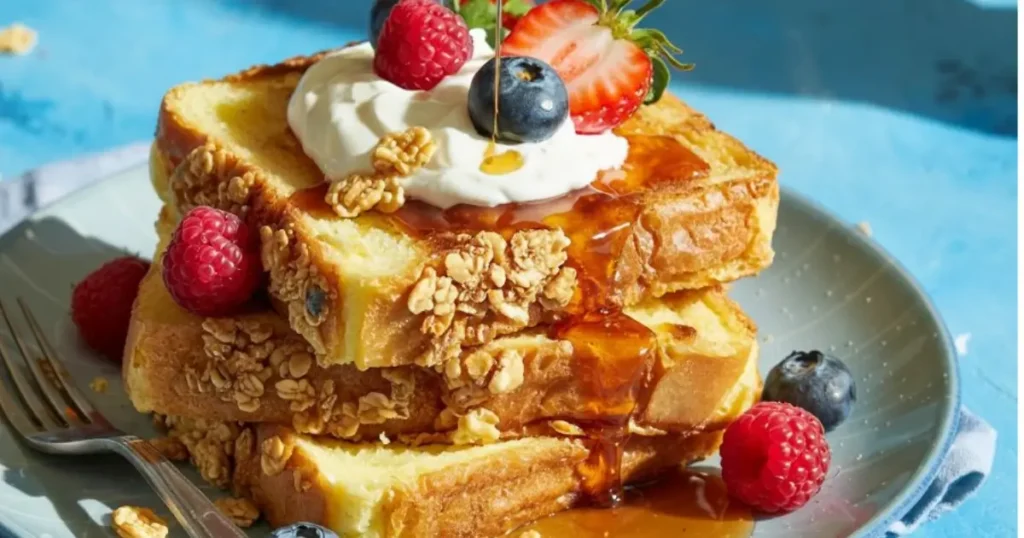
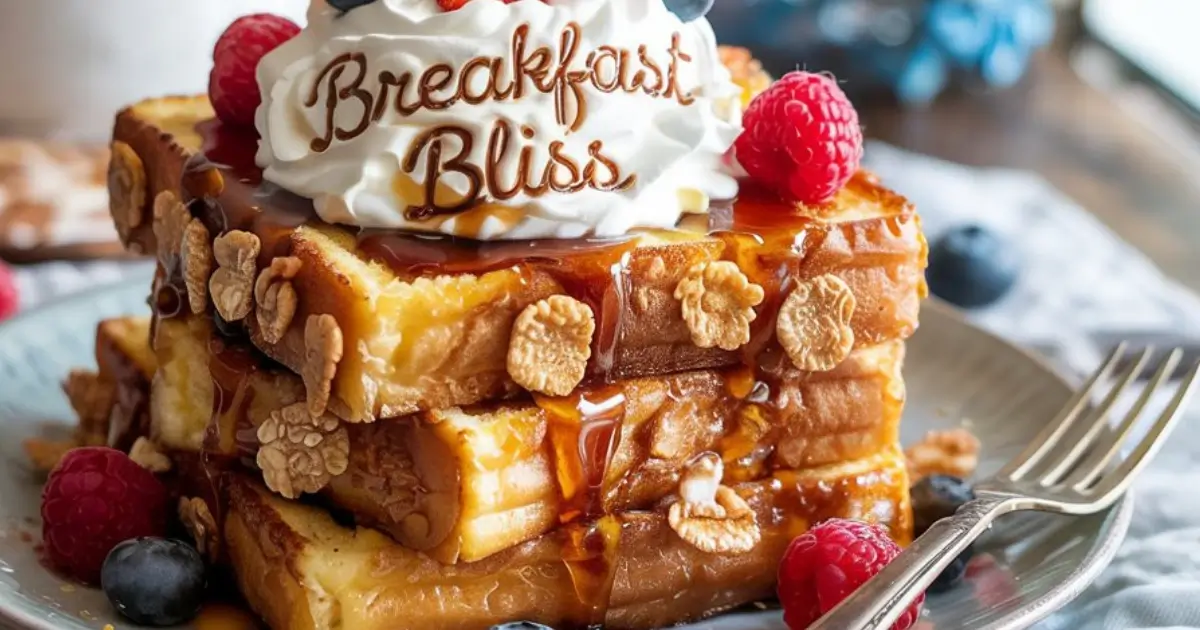
      Look, we all know French toast is basically dessert pretending to be breakfast. But when you coat it in crushed Cap’n Crunch and top it with cereal-flavored whipped cream? That’s when magic happens. This is the breakfast of your childhood dreams – just upgraded with adult-level deliciousness.

      Simple and Easy French Toast for Breakfast

      Why You Need This in Your Life

      • Tastes like Saturday morning cartoons – but with actual nutrition (sort of)
      • Foolproof cooking method – even if you burn toast regularly
      • Major wow factor – impress guests without trying hard
      • Uses pantry staples – no fancy ingredients required

      How to Make Simple and Easy French Toast for Breakfast

      The Secret Weapon: Cereal-Infused Whipped Cream

      (Yes, this is as genius as it sounds)

      1. Let Cap’n Crunch soak in heavy cream – 10 minutes or overnight
      2. Strain out the soggy bits (they did their job)
      3. Whip into clouds of nostalgia – sweetened just enough

      Pro tip: Make extra. You’ll want to eat it by the spoonful.

      How to Make French Toast

      Step 1: The Custard Bath

      • Whisk together eggs, milk, vanilla, and cinnamon
      • Secret weapon: A pinch of nutmeg (trust me)

      Step 2: The Crunch Factor

      • Smash Cap’n Crunch in a bag (therapeutic!)
      • Want extra texture? Mix in some cornflakes

      Step 3: The Perfect Cook

      • Medium-low heat is key – no burnt outsides/raw insides
      • Butter that pan like you mean it
      • Flip when it smells amazing (about 3-4 minutes)

      Serving Suggestions (Because Presentation Matters)

      Basic: Just syrup and whipped cream
      Fancy: Fresh berries + mint sprig

      Real Talk: Common Mistakes

      Using flimsy bread – Go thick or go home
      Skipping the strain – Nobody wants crunchy whipped cream bits
      High heat impatience – This isn’t a race

      Leftover Hack

      Wrap extras in foil – next morning, crisp them up in a dry skillet. Almost better than fresh!

      Made it? Tag your creations #GrownUpKidFood – because adulting is overrated.

      dekadenter french toast mit karamellisierten pekannussen

      Make perfect French toast with this easy recipe! Crispy outside, custardy inside, ready in 15 mins. Best bread, custard tips & toppings included. Breakfast just got better!

      Make the Cereal Whipped Cream

      captain crunch french toast​

      Soak 1/2 cup Cap’n Crunch in the heavy cream for 10 minutes (or overnight for more flavor).
      Strain out the soggy cereal and discard.
      Whip the cream with powdered sugar and vanilla until soft peaks form. Chill until serving.

      Prep the French Toast Custard

      In a shallow dish, whisk together eggs, milk, vanilla, cinnamon, and nutmeg.

      Crush the Cereal

      Put Cap’n Crunch (and optional cornflakes) in a zip-top bag and crush until coarse crumbs.

      Coat the Bread

      captain-crunch-french-toast​

      Dip each bread slice into the custard, allowing it to soak for a few seconds per side.
      Press both sides into the crushed cereal, coating evenly.

      Cook to Golden Perfection

      Heat butter over medium-low heat in a non-stick skillet.
      Cook each slice for 3–4 minutes per side, until golden brown and cooked through

      can you make french toast without milk​

      Yes! 4 Easy Milk-Free French Toast Swaps:
      Creamy Option:
      Half-and-half or heavy cream (richer flavor)
       Dairy-Free:
      Almond milk, oat milk, or coconut milk 
        Extra-Rich:
      All eggs (3 eggs + 1 yolk for 4 slices)
        Light & Fluffy:
      Orange juice + cinnamon (sweet, tangy twist)
      Pro Tip: Add 1 tsp cornstarch to egg mix for crispier edges.

      can you make french toast with egg whites​

      Yes! Egg White French Toast (Lighter & Fluffier)
      How to Make It:
        Whisk 3 egg whites + ½ cup milk (or almond milk)
        Add ½ tsp cinnamon + 1 tsp vanilla (for flavor)
        Soak whole-grain bread 30 sec/side
       Cook on medium heat with butter/oil until golden
      Why It Works:
        Lower calories, higher protein
        Still crispy outside, soft inside
        Great for keto/low-cholesterol diets
      Pro Tip: Add 1 tsp sugar or maple syrup to the custard for caramelization

      can french toast be frozen​

      Yes! Freeze French Toast Perfectly in 3 Steps:
        Cool Completely – Avoid ice crystals by letting it reach room temp first.
        Wrap Tightly – Use foil or freezer bags (remove air to prevent freezer burn).
        Label & Freeze – Stores for 1-2 months at 0°F (-18°C).
      Best Reheating Methods:
      Oven: 350°F (175°C) for 10-12 mins (keeps crispy texture)
      Toaster: Straight from freezer (for single slices)
      Air Fryer: 320°F (160°C) for 5-6 mins

      how do you say french toast in spanish​

      French Toast” in Spanish
      Most Common Translations:
      “Torrija” (Spain)
      Used for traditional Spanish-style French toast, often served during Lent
      “Pan Francés” (Latin America)
      Literal translation, widely understood in Mexico, Argentina….
      “Tostada Francesa” (Some regions)
      Fun Fact: In Spain, “torrijas” are often flavored with cinnamon, honey, a delicious cousin of classic French toast!

      how long does french toast last in the fridge​

       Refrigerator:
      3–4 days in an airtight container
      Best reheated in a skillet or toaster oven (not microwave – gets soggy)
       Freezer (for longer storage):
      1–2 months wrapped tightly in foil or freezer bags
      Reheat from frozen in oven at 350°F (175°C) for 10–12 mins
      Pro Tip: Store without syrup or toppings to prevent sogginess.

      where to buy thick bread for french toast​

      Best Places to Buy Thick Bread for French Toast
      Grocery Stores (Nationwide)
      Whole Foods: Fresh-baked brioche or challah (look in bakery section)
      Trader Joe’s: Brioche Loaf (pre-sliced, perfect thickness)
      Costco: Giant brioche loaves (freeze half for later)
      Local Bakeries: Ask for unsliced challah or Texas toast
      Online Options
      Goldbelly (gourmet brioche shipped nationwide)
      Williams Sonoma (frozen brioche, just thaw & use)

      can you reheat french toast​

      Yes! Reheat French toast perfectly in 3 ways:
       Skillet (Best Crispiness)
      Medium heat + butter, 2 mins/side
       Oven (For Batch Reheating)
      350°F (175°C) on rack, 5-8 mins
       Air Fryer (Fast & Crispy)
      350°F, 3-4 mins
      Pro Tip: Avoid microwave (makes it soggy!).

      how to make the best french toast​

      The Best French Toast in 4 Simple Steps
       Pick Thick Bread:
      Brioche or challah (stale = better absorption)
      Cut 1-inch slices – no skinny toast!
       Make Rich Custard:
      Whisk: 2 eggs + ¾ cup milk + 1 tsp vanilla + ½ tsp cinnamon
      Secret: Add 1 tbsp sugar for caramelized edges
       Soak Smart:
      Dip 30 seconds per side (no sogginess!)
       Cook Like a Pro:
      Medium-low heat + butter
      Cook 3-4 mins/side until golden
      Chef’s trick: Baste with butter while cooking
      Serve With: 
      Maple syrup, fresh berries, or whipped cream

      Why It Works:
      Thick bread = custardy center
      Low heat = crispy outside, tender inside
      Sugar in custard = restaurant-style caramelization

      What is the secret to best French toast?

      The Secret to Perfect French Toast (Like a Pro Chef!)
      5 Game-Changing Tips:
      Bread Choice: Stale brioche or challah (thick-cut!) soaks up custard without falling apart.
      Custard ChemistryWhole eggs + yolk for richness, vanilla + cinnamon for depth.
      Soak Smart: 30 sec/side max (soggy toast = sad toast).
      Cook Low & Slow – Medium-low heat for crispy outside, creamy inside.
      Butter Basting: Spoon melted butter over toast while cooking for extra flavor.
      Pro Hack: Add 1 tbsp cornstarch to custard for extra crispiness

      Why does restaurant French toast taste so good?

      Why Restaurant French Toast Tastes So Good (The 5 Secrets):
      They Use Brioche or Challah: Eggy, buttery bread = richer flavor + custardy texture.
      Double-Dip Custard: Soaks bread twice for maximum absorption.
      Clarified Butter: High-heat cooking without burning (no milk solids).
      Vanilla + Spice Infusion: Real vanilla bean and cinnamon sticks steeped in custard.
      Griddle Cooking: Even heat distribution for perfect golden crust.
      Bonus Hack: Restaurants often add a splash of heavy cream or orange zest to the batter!

      What’s the Best Bread for healthy French toast?

      Best Bread for Healthy French Toast, Top 3 Picks:
      Whole-grain bread: High in fiber, keeps you full
      Sourdough: Natural fermentation = easier digestion
      Sprouted grain: More protein, less sugar
      Avoid: White bread (spikes blood sugar).
      Stale bread absorbs better without getting soggy

      How to Make Healthy French Toast for Breakfast?

      Healthy French Toast in 3 Simple Steps:
      Pick Whole-Grain Bread: More fiber than white bread.
      Use Egg Whites + Almond Milk: Lower calories, same flavor.
      Cook in Coconut Oil: Healthy fats, no sticking.
      Bonus: Top with Greek yogurt & berries instead of syrup.

      Leftover Magic

      The Best Banana Bread with Walnuts and Raisins
      How to Make the Best Double Apple Baked Oatmeal: A Nutritious Twist on a Classic
      How to Make the Best Fluffy Pancakes for Breakfast

      Don’t miss out—follow us on social media for updates:

      Quick Fried Rice with Frozen Vegetables – Ready in 20 Minutes

      Look, I’m no superhero – but this fried rice with frozen vegetables​ makes me feel like one on weeknights when my toddler’s hangry and the fridge looks empty. Here’s my real-mom, no-judgment guide to turning freezer scraps into something everyone will eat.

      fried rice recipe frozen vegetables​

      Why This Works When You’re Drowning

      Uses frozen veggies (who has time to chop?)
      Comes together faster than DoorDash
      Sneaks in nutrition while tasting like takeout
      Adjustable for babies, picky eaters, and adults

      Making fried rice with frozen vegetables​

      What You Need

      (Serves 2 tired parents + 1 messy toddler)

      • That half-empty bag of frozen veggies (corn/peas/carrots saves the day.)
      • Microwave rice pouch (we see you, Trader Joe’s)
      • Eggs (the ultimate protein cheat code)
      • Soy sauce (low-sodium if baby’s eating)
      • Sesame oil (just a splash – makes it fancy)

      Optional upgrades when you’re feeling fancy:

      • Leftover chicken or tofu
      • That sad ginger nub in your fridge door
      • Crushed peanuts for crunch

      How To Make It Without Losing It

      1. “Sauté” the veggies
      Dump frozen veggies straight into a hot pan (no thawing!). Add a glug of oil if you remember. Let them sizzle while you locate a clean spatula.

      2. Rice to the rescue
      Tear open that microwave rice pouch. Dump it in. Stir like you mean it.

      3. The egg trick
      Make a hole in the middle, crack an egg (or two) in, and scramble right there in the pan. Toddler screaming? Distract them by letting them stir.

      4. Flavor Magic
      Drizzle soy sauce until it looks “right.” Taste. Add more. Burn tongue. Regret nothing.

      Real Mom Tips

      For babies under 1: Skip soy sauce or use coconut aminos
      Toddler hack: Serve with a spoon (game changer for my picky eater)
      Hangry emergency: Microwave the veggies first to save 3 minutes
      Cleanup cheat: Use the same bowl you’ll eat from for mixing

      Why It’s Healthier Than Takeout

      • Half the salt (you control the soy sauce)
      • Actual veggies (frozen = just as nutritious)
      • No mystery oil slick at the bottom of the container

      Nutrition win: Using brown rice adds fiber to survive the toddler years.

      Nutritional Value of Vegetable Fried Rice

      A standard 1-cup (150g) serving of vegetable fried rice typically contains the following nutrition facts:

      NutrientAmount% Daily Value (DV)
      Calories220-280
      Total Fat8-12g12-18%
      – Saturated Fat1.5-2.5g8-12%
      Cholesterol0-30mg0-10%
      Sodium500-800mg22-35%
      Carbohydrates35-45g13-16%
      – Dietary Fiber2-4g8-16%
      – Sugar2-4g
      Protein5-8g10-16%
      Vitamin A15-20% DV
      Vitamin C10-15% DV
      Iron8-10% DV

      What Affects Nutrition?

      Rice Type – Brown rice adds more fiber & protein than white rice.
       Oil Used – Less oil = fewer calories (1 tbsp ≈ 120 extra calories).
       Veggie Mix – More carrots, peas, and broccoli = more vitamins.
       Soy Sauce – Low-sodium soy sauce cuts salt by 30-40%.
       Eggs or Tofu? – Adding scrambled eggs boosts protein (up to 12g/serving).

      Is Vegetable Fried Rice Healthy?

       Pros:

      • Good source of quick energy (carbs)
      • Contains vitamins A & C from veggies
      • Low in saturated fat (if cooked lightly in oil)

       Cons:

      • Can be high in sodium (especially takeout versions)
      • White rice lacks fiber compared to brown rice
      • Restaurant versions often use more oil & salt

      How to Make It Healthier

      1. Swap white rice for brown or cauliflower rice (cuts carbs, adds fiber).
      2. Use less oil – A non-stick pan works great!
      3. Load up on veggies – Bell peppers, mushrooms, and snap peas add nutrients.
      4. Choose low-sodium soy sauce – Or use coconut aminos for less salt.
      5. Add protein – Tofu, edamame, or shrimp make it more filling.

      What to serve with chicken fried rice​

      The Perfect Partners for Chicken Fried Rice: 12 Can’t-Miss Combos

      Let’s face it – chicken fried rice is edible magic. But even wizards need a trusty wand (or, in this case, the perfect sidekick). Here’s how to take your fried rice from “meh” to “more please!” with sides that add crunch, freshness, and extra yum.

      1. The Dynamic Duos

      • Egg drop soup – The Batman to your fried rice, Robin
      • Steamy pork dumplings – Little flavor pockets of joy
      • Crispy spring rolls – For that satisfying crunch factor
      • Garlicky green beans – Your veggie quota, but make it tasty

      2. The Flavor Boosters

      • Spicy kimchi (trust us on this one)
      • Sweet chili cucumbers (just slice, splash, and serve)
      • Teriyaki-glazed anything (chicken, tofu, even pineapple)

      3. The Lazy Genius Picks
      ✓ Bagged Asian salad (doctor it up with sesame oil)
      ✓ Frozen edamame (5 minutes to salty goodness)
      ✓ Takeout egg rolls (because some days you just can’t)

      4. Next-Level Moves

      • Turn leftovers into fried rice tacos (thank us later)
      • Add crispy fried shallots like they’re going out of style
      • Drizzle with sriracha mayo in fancy zigzags

      Pro Tip: The perfect meal needs balance. If your fried rice is:

      • Super savory → pair with something tangy (like pickled veggies)
      • Extra spicy → cool it down with cucumber salad
      • On the bland side → amp it up with chili oil dumplings

      What’s your fried rice soulmate? A humble egg roll or something more adventurous?

      When Life Gives You…

      • Leftovers? Breakfast fried rice with a fried egg on top
      • Extra time? Add garlic and ginger from the tube in your fridge
      • A vegetarian kid? Toss in edamame for protein

      Bottom line: This isn’t gourmet. It’s real-life dinner magic – imperfect, adaptable, and guaranteed to get food on the table before the meltdowns begin.

      Pro tip: Always keep frozen stir-fry veggies and microwave rice in stock. Your future exhausted self will thank you.

      Tag me when you make it! #FrozenVeggieHack #MomDinnerWin

      fried rice with frozen vegetables​

      frozen vegetable fried rice​

      Jasper wellspring
      A 15-minute weeknight dinner using frozen vegetables and microwave rice. Quick, healthy, and picky-eater approved!
      Prep Time 3 minutes
      Cook Time 12 minutes
      Total Time 15 minutes
      Course Main Course, Side Dish
      Cuisine American, International
      Servings 3
      Calories 300 kcal

      Ingredients
        

      Ingredients:

      • 1 bag frozen mixed vegetables like corn, peas, and carrots
      • 1 pouch microwaveable rice white or brown
      • 2 eggs
      • 2 tablespoons soy sauce low-sodium if preferred
      • 1 teaspoon sesame oil

      Optional Add-Ins:

      • Leftover chicken or tofu
      • Crushed peanuts
      • Minced garlic or ginger

      Instructions
       

      Instructions:

      • Heat a large pan over medium heat and add the frozen vegetables. No need to thaw.
      • Microwave the rice pouch according to the package instructions, then add it to the pan. Stir well.
      • Push the veggies and rice to one side, crack in the eggs, and scramble them in the empty space.
      • Mix the scrambled eggs into the rice and veggies.
      • Add soy sauce and sesame oil. Stir everything together and cook for 1–2 more minutes.
      • Serve hot. Enjoy!

      Notes

      • For babies under 1, skip soy sauce or use coconut aminos.
      • Brown rice adds fiber and a nutty flavor.
      • Keep frozen veggies and microwave rice stocked for easy dinners.

      Leftover Magic

      Best Roaster Oven Turkey Recipe

      How to Make the Best Chicken Fried Rice at Home

      Fish Tacos Recipe _ love with cook

      Delicious Peanut Lime Chicken Noodles Recipe You’ll Love

      Frequently Asked Questions (FAQs)

      1. Is fried rice with veggies healthy?

        Yes, veggie fried rice can be healthy if made right! Use brown rice, minimal oil, and load up on colorful veggies. Skip the excess soy sauce to control sodium. Healthier than takeout when homemade.

      2. What is the secret ingredient in fried rice?

        The secret ingredient in great fried rice is… day-old rice!
        Here’s why:
        Cold rice fries better (less mushy)
        Dries out slightly for perfect texture
        Absorbs flavors without getting soggy
        Runner-ups:
         Sesame oil (just a drizzle at the end)
         MSG (just a pinch – it’s what takeout uses!)

      3. Can I use frozen vegetables for fried rice?

        Yes! Frozen veggies work perfectly in fried rice – they’re fast, nutritious, and prevent food waste. Here’s how to nail it:
        Pro Tips for Best Results:
        No Need to Thaw – Toss straight into the wok (prevents mushiness)
        High Heat is Key – Cook on max heat to evaporate ice crystals fast
        Pat Dry First (if thawed) – Extra moisture makes rice soggy
        Best Frozen Veg Picks:
         –Classic Mix (peas/carrots/corn)
        – Stir-Fry Blend (broccoli/peppers/water chestnuts)
        – Edamame (for protein boost)
        Bonus Hack:
        • Microwave frozen veggies 1 min first for extra-quick cooking

      4. What is the right way to cook rice?

        Here’s the ultimate guide to cooking perfect rice every time, whether you’re using a pot, rice cooker, or Instant Pot:
        The Golden Rules of Rice Cooking
        Rinse First
        Always rinse white rice (2-3 times) until the water runs clear to remove excess starch
        Exception: Don’t rinse risotto or sticky rice
        Water Ratio
        White rice: 1:1.5 ratio (1 cup rice to 1.5 cups water)
        Brown rice: 1:2 ratio
        Basmati: 1:1.25 ratio for fluffier grains
        Cooking Methods
        Stovetop:
        Bring to boil → cover → simmer 15 min (white) / 40 min (brown) → rest 10 min
        Rice Cooker:
        Just press “Cook” (foolproof!)
        Instant Pot:
        1:1 ratio → High Pressure 3 min (white) / 22 min (brown) → 10 min natural release
        Pro Secrets
        Add 1 tsp oil/butter to prevent sticking
        Don’t peek while cooking (steam escape = ruined rice)
        Fluff with a fork after resting (never stir while hot)
        Types & Their Perfect Cook Times
        Rice Type
        Water Ratio
        Cook Time
        Jasmine
        1:1.25
        12 min
        Basmati
        1:1.5
        15 min
        Sushi
        1:1
        20 min
        Wild
        1:3
        45 min


        Troubleshooting
        Mushy rice? Too much water → reduce by ¼ cup next time
        Burnt bottom? Lower heat + add 1 tsp lemon juice
        Undercooked? Add 2 tbsp water, and steam 5 more minutes

        Fun Fact: The “knuckle method” (water level to first knuckle) works because it naturally adjusts for pot size!

      5. Should frozen vegetables be thawed before stir-frying?

        No – toss them in frozen! Here’s why:
        The Frozen Veggie Stir-Fry Hack
        No Thawing Needed
        Straight from freezer to wok
        Prevents soggy texture (thawing releases water)
        High Heat = Best Results
        Crank burner to max
        Ice evaporates fast → veggies stay crisp
        Smart Tweaks
        For extra-crunchy veggies: Microwave 1 min first to remove ice crystals
        For dense veggies (broccoli/cauliflower): Add 1-2 mins of cook time
        Best Frozen Picks for Stir-Fry:
        Mixed peppers
        Snap peas
        Corn/peas/carrots blend
        Edamame
        Pro Tip:
        Pat thawed veggies bone-dry with paper towels if you must thaw (e.g., for tempura)


      6. How do you keep frozen vegetables from getting soggy in stir-fry?

        Keep Frozen Veggies Crisp in Stir-Fry with These 5 Tricks:
        Skip the Thaw → Toss straight into a screaming-hot wok/pan (ice evaporates instantly)
        Dry Them Fast → Microwave 60 sec first if thawed, then pat bone-dry
        Oil Smart → Use high-smoke point oils (peanut/avocado) and wait until shimmering
        Work in Batches → Don’t overcrowd the pan (steam = sogginess)
        Sauce Last → Toss with sauce off the heat to prevent liquid absorption
        Best Veggies for Crunch:
        • Sugar snap peas
        • Water chestnuts (canned, drained)
        • Broccoli florets (frozen works!)

      7. How to make stir-fry veggies not soggy?

        Crispy Stir-Fry Veggies Every Time: 6 Can’t-Fail Tricks
        Blast the Heat
        Use max heat on your strongest burner
        Wok/pan should smoke slightly before adding oil
        Prep Like a Pro
        Fresh veggies: Cut uniform sizes (no thick chunks)
        Frozen veggies: Use straight from the freezer (no thawing!)
        Oil Wisely
        High smoke-point oils only (peanut, avocado, or grapeseed)
        Wait until the oil shimmers before adding veggies
        The Golden Rule
        Don’t overcrowd – cook in batches if needed
        Constant tossing = even cooking
        Sauce Strategy
        Mix sauces beforehand (no on-the-spot measuring)
        Add only during the last 30 seconds
        Crunch Boosters
        Splash of rice vinegar while cooking
        Finish with toasted sesame seeds or crushed peanuts
        Veggies That Stay Crunchiest:
        ✓ Snap peas
        ✓ Water chestnuts
        ✓ Broccoli florets
        ✓ Baby corn

      Don’t miss out—follow us on social media for updates:

      Easy French Onion Chicken Pasta (30-Minute One-Pan Meal!)

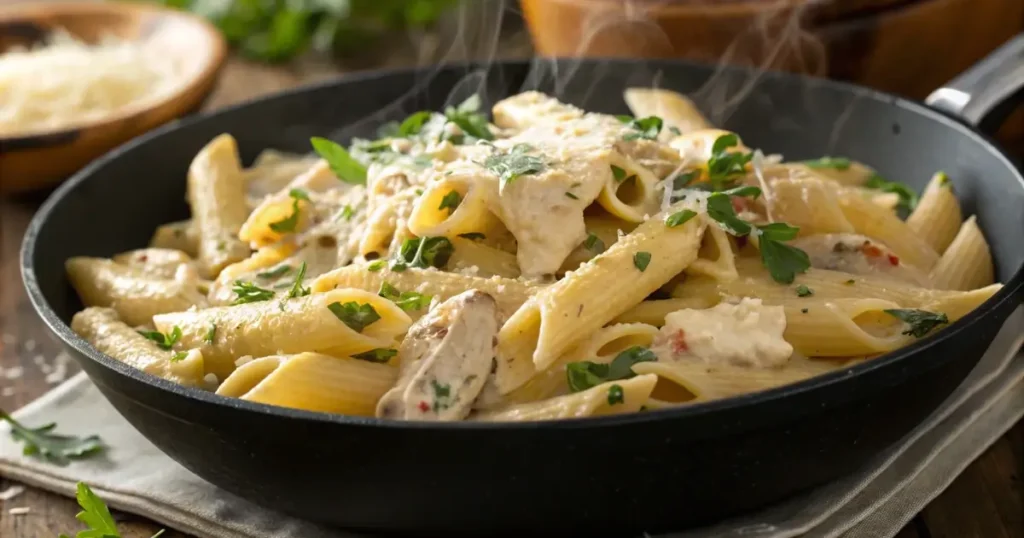
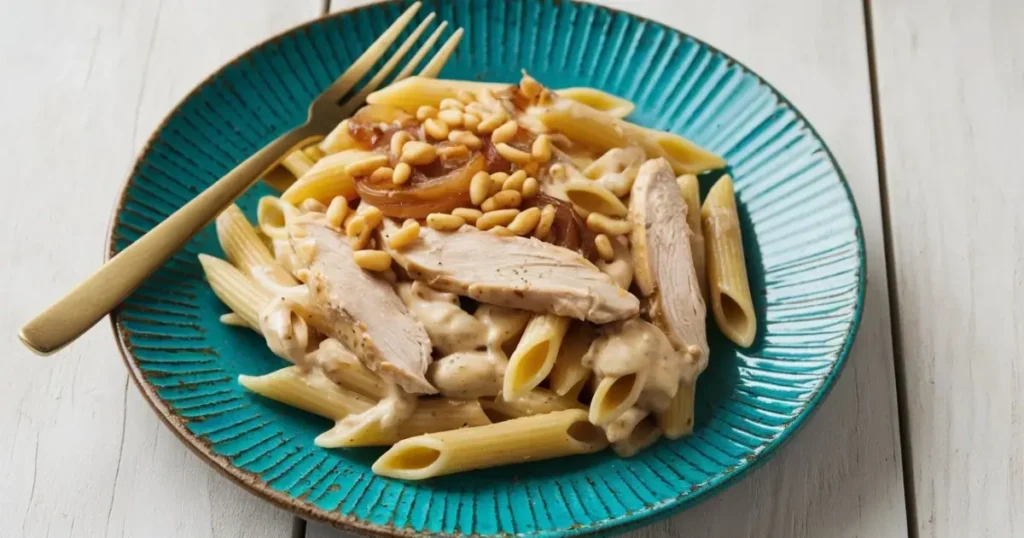
      Let’s be real, when you’re exhausted after work and the family’s hangry, the last thing you want is a sink full of dishes. That’s where this magical one-pan wonder comes in. Imagine all the cozy flavors of Creamy French Onion Chicken Pasta Bake: sweet caramelized onions, rich broth, melty cheese, but hugging tender chicken and pasta in one glorious skillet.

      Creamy French Onion Chicken Pasta Bake

      Why This Recipe Will Save Your Weeknights:

      • You probably have most ingredients already
      • That “cooked all day” taste in under an hour
      • Only ONE pan to wash (we see you, dishwasher avoiders)
      • Kids and picky eaters gobble it up
      • Leftovers taste even better the next day (packable lunch win!)

      How to make Creamy French Onion Chicken Pasta Bake: How to caramelize onions faster

      Grocery Shortcut:


      Grab pre-sliced onions from the salad bar to save 10 minutes. Nobody will know (and no tears!).

      Here’s How It Goes Down:

      1. The Onion Tango (15 mins)
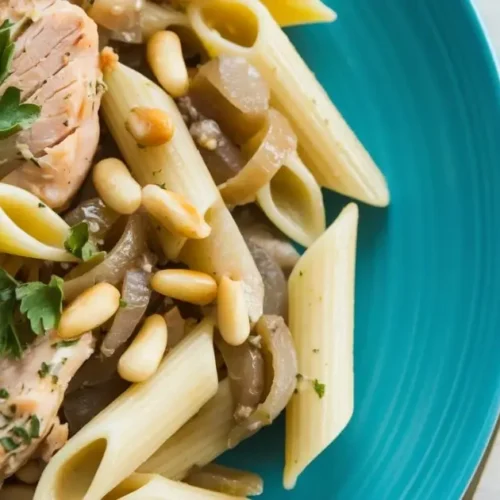
        Melt butter in your trustiest big skillet. Toss in those onion slices like you’re dealing cards. Let them sizzle low and slow while you pour yourself a drink and pretend you’re a French chef. When they’re golden and smell like heaven, you’re golden.
      2. Chicken Time (5 mins)
        Push onions to one side (no need to be neat about it). Toss in chicken cubes with a shower of garlic powder, salt, and pepper. Brown just enough to make it look cooked – it’ll finish later.
      3. Pasta Party (12 mins)
        Dump in the dry pasta and broth. Yes, dry! The starch makes the sauce creamy. Bring to a boil, then simmer while you set the table (or scroll Instagram).
      4. Cheese Emergency (3 mins)
        Stir in cream and handfuls of cheese until it’s gooey perfection. If the cheese pulls don’t Instagram themselves, did you even make it?

      Real Talk:

      • Burned the onions a bit? Toss in a pinch of sugar to balance it.
      • Out of cream? A dollop of sour cream or even cream cheese works.
      • Want extra fancy? Top with those crispy fried onions from your green bean casserole stash.

      Serve With:

      • A green salad (to pretend it’s healthy)
      • Garlic bread (because carbs on carbs is life)
      french onion chicken pasta (3)

      Next Day Magic:


      The leftovers make an insane baked pasta, just top with more cheese and broil until bubbly, breakfast of champions.

      This isn’t just dinner – it’s a survival tactic for real life. The kind of meal that makes everyone think you’ve got your act together, when you just know how to work smarter, not harder. And that melty, oniony, chickeny goodness? Pure edible therapy.

      Now go forth and conquer dinner like the weeknight warrior you are. You’ve got this! (And if not, there’s always extra cheese.)

      Leftover Magic

      Delicious Peanut Lime Chicken Noodles Recipe You’ll Love

      Easy Fajita Taco Salad for Lunch: Make Your Midday Meal Exciting

      The Best Pasta with Shrimp and Pistachio Pesto for Date Night 100%

      The Best Chicken with Coconut Lime Peanut Sauce Recipe

      french onion chicken pasta

      French Onion Chicken Pasta

      Jasper wellspring
      The ultimate one-pan comfort food mashup that combines creamy French onion soup flavors with tender chicken and pasta – ready in 45 minutes!
      Prep Time 15 minutes
      Cook Time 30 minutes
      Total Time 45 minutes
      Course Main Course, Side Dish
      Cuisine American, French
      Servings 4
      Calories 580 kcal

      Ingredients
        

      Ingredients:

      • – 2 tablespoons unsalted butter
      • – 1 tablespoon olive oil
      • – 2 large yellow onions thinly sliced
      • – 1 lb boneless chicken breasts cubed
      • – 1 teaspoon garlic powder
      • – 1 teaspoon salt
      • – ½ teaspoon black pepper
      • – 12 oz penne or rigatoni pasta about 3/4 box
      • – 3 cups beef broth
      • – ½ cup heavy cream
      • – 1 cup shredded cheese Gruyère, mozzarella, or provolone
      • – ¼ cup grated Parmesan cheese
      • – Optional: crispy fried onions for garnish

      Instructions
       

      Instructions:

      • Caramelize the onions: Melt butter with olive oil in large skillet over medium-low heat. Add onions with pinch of salt. Cook 15-20 minutes, stirring occasionally, until deep golden brown.
      • Cook the chicken: Push onions to one side. Add chicken cubes, garlic powder, salt and pepper. Cook 5 minutes until lightly browned (not fully cooked).
      • Add pasta and broth: Stir in dry pasta and beef broth. Bring to boil then reduce to simmer. Cook uncovered 12-14 minutes until pasta is al dente and liquid reduces by half.
      • Finish with cream and cheese: Reduce heat to low. Stir in heavy cream and shredded cheeses until melted and creamy. Garnish with extra Parmesan and fried onions if desired.

      Notes

      Pro Tips:

      • – For a deeper flavor, add ½ teaspoon thyme with the onions
      • – No heavy cream? Substitute ¼ cup cream cheese
      • – Make it gluten-free with GF pasta and cornstarch slurry
      • – Leftovers reheat beautifully with a splash of milk

      Frequently Asked

      Why is it called “marry me chicken pasta”?

      The dish got its name because it’s so delicious, it’s said to inspire marriage proposals! Its creamy, flavorful sauce (with sun-dried tomatoes, garlic, and Parmesan) makes it irresistibly romantic.

      What is French onion soup in France?

      In France, it’s called “Soupe à l’Oignon”—a classic dish made with:
      Caramelized onions (slow-cooked for sweetness)
      Beef broth (rich and savory)
      Toasted baguette & melted cheese (typically Gruyère or Comté)
      Fun fact: It originated in 18th-century Paris as a humble late-night snack for workers!

      How to cook apricot chicken in the oven?

      Prep: Coat chicken thighs/drumsticks in a mix of apricot jam, soy sauce, garlic, and spices (like ginger or paprika).
      Bake: Place in a dish at 375°F (190°C) for 35–45 mins, basting halfway.
      Finish: Broil 2–3 mins for sticky caramelization

      Is chicken and pasta a good combination?

      Yes! Chicken and pasta pair perfectly because:
      Versatile – Works with creamy (Alfredo), tangy (lemon-garlic), or tomato-based sauces.
        Protein + Carbs – Balanced, satisfying meal.
       Easy to customize – Add veggies, cheese, or herbs for extra flavor.
      Tip: Use grilled chicken for texture or shredded chicken for hearty dishes.

      Do you put onions in apricot chicken?

      Yes! Onions (especially sautéed yellow or red onions) add depth to apricot chicken by balancing the sweetness. Most recipes include them, but you can omit if preferred.
      How to Use:
      Sauté with garlic before adding sauce.
      Optional upgrades: Caramelize for extra richness or use shallots for subtlety.

      How do you keep chicken from drying out in the oven?

      Brining (Best for Whole Chicken): Soak in saltwater (1/4 cup salt + 4 cups water) for 1–4 hours before cooking.
      Baste or Cover: Brush with butter/oil every 15 mins, or tent with foil for the first half of cooking.
      Use a Thermometer: Pull chicken at 165°F (74°C)—it will rise to a safe temp while resting.
      Thighs > Breasts: Dark meat stays juicier. If using breasts, pound to even thickness.
      Pro Tip: Marinate in yogurt or buttermilk for extra tenderness!

      Don’t miss out—follow us on social media for updates:

      The Best Banana Bread with Walnuts and Raisins

      The Banana Bread We Can’t Stop Baking
      (Seriously, our neighbors keep “dropping by” when this is in the oven)

      Okay, friends. We need to talk about this best banana bread recipe FOR BREAKFAST. Not to brag, but it’s the kind of recipe that turns first-time bakers into kitchen heroes and has your family begging for “just one more slice.” Those three sad-looking bananas on your counter? They’re about to become legendary.

      banana bread with walnuts and raisins​

      Here’s why you’ll love this recipe:

      (banana bread old-fashioned)

      • It’s stupidly easy – no fancy techniques, I promise
      • The texture? Imagine a cloud and a muffin had a baby
      • That smell wafting through your house? Pure happiness in oven form
      • Customizable AF (more on that later)

      Let’s Get Messy (In the Best Way)

      Grab your favorite mixing bowl and toss in:

      • ½ cup softened butter (just leave it out for an hour)
      • ¾ cup sugar (white, brown, whatever – we’re not picky)

      Now, mush them together like you’re making the world’s easiest buttercream. When it looks fluffy and vaguely like wet sand, you’re golden.

      Pro Tip: If your butter’s still cold? Microwave it for 5-7 seconds – just enough to take the chill off.

      Banana Business

      Take those three very ripe bananas (black spots = flavor gold) and mash them in a separate bowl. Lumps are welcome – we’re not making baby food here. Unless you are, in which case… weird flex but okay.

      The Magic Happens Here

      1. Dump your banana mush into the butter mixture
      2. Crack two eggs (room temp blends better)
      3. Stir until it looks like yellow pancake batter
      4. In another bowl, whisk together:
      • 1½ cups flour
      • 1 tsp baking soda
      • ½ tsp salt

      Now gently mix the dry into the wet. I mean gently – we’re making bread, not working out aggression.

      The Fun Part

      • Splash in ½ tsp vanilla (the good stuff)
      • Fold in ½ cup raisins (or don’t, I’m not your mom)
      • Add 1 cup toasted walnuts (game changer)

      Mix-In Ideas for Rebels:
      → Chocolate chips (banana bread with walnuts and chocolate chips recipe)
      → Shredded coconut (tropical vibes)
      → Crushed pretzels (sweet & salty FTW)

      Bake It Like You Mean It

      (best banana bread recipe FOR BREAKFAST)

      1. Butter a loaf pan like you’re preparing it for a spa day
      2. Dust with flour like you’re Tony Montana (but less cocaine)
      3. Pour in that glorious batter
      4. Bake at 350°F for 55-60 minutes

      How to Know It’s Done:


      Toothpick test with moist crumbs (no wet batter) = perfect
      Clean toothpick = you overbaked it, friend

      banana bread with walnuts and raisins​

      The Best Part

      Let it cool for 10 minutes (torture, I know), then flip it out. That first slice? Absolute magic. Toasted the next day with butter? Chef’s kiss.

      Storage Pro-Tip:


      Wrap tightly in foil – stays moist for days. Or freeze slices for emergency cravings.

      Leftover Magic

      Top Pumpkin Pie Recipe: Rich, Creamy, and Full of Flavor

      How to Make a Swedish Princess Torte Cake

      Vintage Birthday Cakes: From Simple to Spectacular

      Real Talk

      This isn’t just banana bread. It’s memories-in-the-making bread. It’s “I-brought-this-to-the-potluck-and-now-everyone-loves-me” bread. Make it once, and you’ll understand why we keep extra bananas “accidentally” going brown.

      Variation We’re Obsessed With:


      Swirl in 2 tbsp peanut butter before baking. You’re welcome.

      Tag us if you make it! Or don’t – we’ll assume you ate the whole loaf yourself. No judgment.

      banana bread with walnuts and raisins​

      Banana Bread With Walnuts and Raisins​ Recipe

      Jasper wellspring
      Try this perfect banana bread with walnuts and raisins , soft, moist, and loaded with flavor! Easy recipe with ripe bananas, crunchy walnuts, and sweet raisins. Bake it today
      Prep Time 15 minutes
      Cook Time 55 minutes
      10 minutes
      Total Time 1 hour 15 minutes
      Course Appetizer, Breakfast, Dessert, Side Dish
      Cuisine American, International
      Servings 10 slices
      Calories 309 kcal

      Ingredients
        

      Ingredients:

      Wet Ingredients:

      • ½ cup unsalted butter softened
      • ¾ cup sugar white or brown
      • 3 very ripe bananas mashed
      • 2 large eggs room temperature
      • ½ teaspoon vanilla extract

      Dry Ingredients:

      • cups all-purpose flour
      • 1 teaspoon baking soda
      • ½ teaspoon salt

      Optional Add-Ins:

      • ½ cup raisins
      • 1 cup toasted walnuts chopped
      • Optional Mix-ins: chocolate chips shredded coconut, crushed pretzels

      Instructions
       

      Instructions:

        Preheat & Prep:

        • Preheat oven to 350°F (175°C).
        • Grease a loaf pan with butter and lightly dust with flour. Tap out the excess.

        Make the Base:

        • In a large mixing bowl, cream together softened butter and sugar until light and fluffy.
        • In a separate bowl, mash the bananas (lumps are totally fine).
        • Add mashed bananas and eggs to the butter-sugar mixture and stir until well combined.
        • Mix in vanilla extract.

        Add the Dry Stuff:

        • In a medium bowl, whisk together flour, baking soda, and salt.
        • Gently fold the dry ingredients into the wet mixture. Don’t overmix—just combine until no dry streaks remain.

        Fold in the Fun:

        • Stir in raisins and toasted walnuts, or use your favorite mix-ins.
        • Optional: Swirl 2 tablespoons of peanut butter into the batter for a next-level twist.

        Bake It:

        • Pour batter into prepared loaf pan.
        • Bake for 55–60 minutes, or until a toothpick inserted in the center comes out with moist crumbs (not wet batter).
        • Let cool in the pan for 10 minutes, then turn out onto a wire rack to cool fully.

        Notes

        Storage Tips

        • Counter: Wrap tightly in foil or plastic wrap—stays moist up to 4 days.
        • Freezer: Slice and freeze in an airtight bag for up to 2 months. Toast straight from frozen!

        Tips And Variations

        • Butter too cold? Microwave for 5–7 seconds.
        • No walnuts? Try pecans or skip them entirely.
        • Need to impress? Drizzle with honey or glaze after baking.
        • Going tropical? Add shredded coconut + lime zest.
        • Sweet & salty twist: Crushed pretzels + dark chocolate chips = game changer.

        Frequently Asked Questions (FAQ

        What is the number one mistake made when making banana bread?

        Overmixing the batter is the #1 mistake when making banana bread. Overmixing develops too much gluten, resulting in a dense, tough texture instead of a moist, tender crumb. For best results, mix just until ingredients are combined—small lumps are okay!

        What pairs well with banana bread?

        Best Pairings for Banana Bread (Quick Answer for Snippets):
        1. Coffee or Tea: Enhances the warm, spiced flavors (especially with cinnamon or nutmeg).
        2. Cream Cheese or Butter: Adds richness and balances sweetness.
        3. Greek Yogurt: Cuts through the density with tanginess.
        4. Fresh Berries: Bright acidity contrasts with the sweetness (strawberries, blueberries).
        5. Nuts or Nut Butter: Complements texture (almond butter, walnuts).
        6. Ice Cream: For dessert-style indulgence (vanilla or caramel).
        Serve slightly warmed for maximum flavor!

        Is banana bread healthy or unhealthy?

        Banana bread can be healthy if made with whole grains, less sugar, and nuts, but unhealthy if loaded with butter and refined flour. Homemade versions are often healthier than store-bought.

        Why is banana bread so high in calories?

        Banana bread packs calories because of:
        Sugar (white/brown sugar, honey)
        Butter or oil (for moisture and richness)
        Flour (refined or whole grain carbs)
        Add-ins (chocolate chips, nuts, frosting)
        Even bananas, while nutritious, add natural sugars. A single slice can range from 200 – 400+ calories, depending on ingredients.

        How do you keep walnuts from sinking in banana bread?

        The trick is coating walnuts in flour before mixing them into the batter. Here’s why it works:
        The flour creates a light barrier, helping them “float” in the batter during baking.
        Do this: Toss 1–2 tbsp of flour with walnuts before folding them in.

        Is banana bread bad for losing weight?

        Banana bread can fit a weight-loss diet if made healthy: use less sugar, whole grains, and nuts. Store-bought versions are often high-calorie. Stick to 1 small slice and adjust recipes to cut calories.

        How many calories are in a piece of homemade banana bread?

        A typical slice (1/12th of a 9×5 loaf) has 200–300 calories, depending on ingredients:
        Lower-cal (200) → Less sugar, no nuts, applesauce instead of oil
        Standard (250–300) → Contains butter/oil, sugar, walnuts/chocolate chips
        Tip: Cut thinner slices (1/16th loaf) to reduce to ~150–200 calories.

        Should I toast walnuts for banana bread?

        Yes! Lightly toasting walnuts (5–7 mins at 350°F/175°C) before adding them to banana bread:
         Enhances flavor – Brings out nutty richness
         Improves texture – Adds crunch, prevents fogginess
        Cool walnuts before mixing into batter to avoid melting wet ingredients

        What nuts go well with banana bread?

        The best Nuts for Banana Bread are:
         Walnuts – Classic choice, buttery & slightly bitter (balance sweetness)
          Pecans – Rich, caramel-like flavor (great with cinnamon)
          Almonds – Subtle crunch (slice or sliver them)
         Hazelnuts – Luxurious depth (pairs well with chocolate chips)
        Toast nuts first for maximum flavor!

        Don’t miss out—follow us on social media for updates:
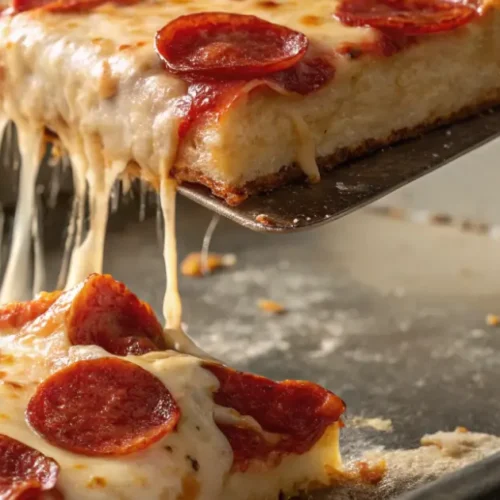
        Spicy Pepperoni Pizza : Sicilian Style with Hot Tomato Sauce

        Look, I get it. You want that thick, crispy-bottomed, pepperoni-cupped pizza magic without a PhD in dough hydrology. This is the cheat code. (easy spicy pizza recipe)

        Spicy Pizza
        Delicious, homemade, easy spicy pizza with a zesty kick, perfect for spice lovers.

        Why This Works for Normal Humans

        • No kneading. A food processor does the work (or just let time do it overnight).
        • Dump-and-go sauce. No fancy reductions—just garlic, tomatoes, and vibes.
        • Pepperoni that behaves. Natural casing = those little crispy cups you’re obsessed with.

        Dough: The 5-Minute Miracle

        (Makes enough for a half-sheet pan)

        Throw in a food processor:(easy spicy pizza recipe)

        • 4 cups flour
        • 1½ cups warm water
        • 2 tsp salt
        • 1 packet of yeast
        • 2 tbsp olive oil

        Pulse until it looks like Play-Doh. Plop it into an oiled sheet pan, stretch roughly, and leave it alone for 2 hours (or overnight in the fridge).

        No processor? Stir ingredients in a bowl, cover, and ignore for 18 hours. Boom: no-knead dough.

        Sauce: Shortcut Edition

        In a pan over low heat:

        • ¼ cup olive oil + 9 chopped garlic cloves (sizzle 1 min)
        • Add 1 tsp red pepper flakes + 1 tsp dried oregano
        • Dump in a 28-oz can of good crushed tomatoes
        • Simmer 10 minutes while you pour a drink

        Assembly: The 3-Layer Trick

        1. Cheese first – Cover dough with sliced mozzarella (8 oz).
        2. Sauce second – Spread 2 cups over cheese (this keeps the crust crispy).
        3. Pepperoni third – 6 oz natural-casing pep, spaced just shy of overlapping.

        Bake: Set It and (Mostly) Forget It

        • Oven at 550°F (max your oven goes)
        • Bake on the bottom rack for 15 min
        • Done when pepperoni looks like tiny edible satellite dishes

        Eat Like You Mean It

        • Let it cool 5 min (or don’t, I’m not your mom).
        • Cut into squares—Sicilian-style is supposed to be messy.
        • Cold leftovers are a feature, not a bug.

        Pro Move: Freeze half before baking. Future-you will send past-you a thank-you note.

        No food snobbery. No fuss. Just stupid good pizza. You’re welcome.

        Leftover Magic

        Pasta with Shrimp and Pistachio Pesto for Date Night 

        6 Easy Fruit Platter Ideas for Beginners

        Best Roaster Oven Turkey Recipe

        Sicilian Pizza With Pepperoni

        spicy pepperoni pizza recipe

        Jasper wellspring
        Extra spicy pepperoni pizza—loaded with crispy pepperoni cups & fiery tomato sauce. Better than takeout
        Prep Time 15 minutes
        Cook Time 15 minutes
        1 hour
        Total Time 1 hour 30 minutes
        Course Appetizer, Main Course, Side Dish, Snack
        Cuisine American
        Servings 8
        Calories 403 kcal

        Ingredients
          

        Ingredients:

        For the Dough:

        • 4 cups all-purpose flour
        • cups warm water
        • 2 teaspoons salt
        • teaspoons active dry yeast 1 packet
        • 2 tablespoons olive oil

        For the Sauce:

        • ¼ cup olive oil
        • 9 garlic cloves chopped
        • 1 teaspoon red pepper flakes
        • 1 teaspoon dried oregano
        • 1 28 oz can crushed tomatoes (high quality)

        Toppings:

        • 8 oz sliced low-moisture mozzarella cheese
        • 2 cups prepared tomato sauce above
        • 6 oz natural-casing pepperoni for curling & crisping

        Instructions
         

        Instructions:

          Dough (Food Processor Method):

          • In a food processor, combine flour, warm water, salt, yeast, and olive oil.
          • Pulse until a dough ball forms and looks like Play-Doh.
          • Transfer to an oiled half-sheet pan and stretch gently to fit most of the pan.
            Sicilian Pizza With Pepperoni
          • Cover and let rise for 2 hours at room temp or refrigerate overnight.

          Alternative No-Knead Dough Method:

          • Mix all dough ingredients in a large bowl.
          • Cover loosely and let rest at room temp for 12–18 hours.
          • Proceed with pan-stretching and rising before topping.

          Sauce:

          • In a small saucepan over low heat, warm olive oil and sauté garlic for 1 minute.
          • Stir in red pepper flakes and oregano.
          • Pour in crushed tomatoes, stir, and simmer for 10 minutes. Remove from heat.

          Assemble the Pizza:

          • Preheat oven to 550°F (or as hot as it goes).
          • Layer mozzarella slices directly onto the risen dough.
          • Spoon sauce evenly over the cheese (don’t overdo it).
            Sicilian Pizza With Pepperoni
          • Top with natural-casing pepperoni, spaced close together but not fully overlapping.

          Bake:

          • Place pan on the bottom rack and bake for 15 minutes, or until crust is golden, cheese is bubbling, and pepperoni edges are crisp and curled.

          To Serve:

          • Let rest for 5 minutes before slicing into squares.
          • Serve hot—or enjoy leftovers cold (they’re even better the next day).

          Notes

          Storage and Freezer Tips

          • Refrigerate: Leftovers can be stored in an airtight container for up to 4 days.
          • Freeze Before Baking: Freeze assembled, unbaked pizza for future easy meals. Bake straight from frozen, adding a few extra minutes.

           Pro Tips

          • Use a natural-casing pepperoni brand to get that iconic cup-and-char effect.
          • Don’t skip the olive oil in the pan—it’s key to that golden, crispy crust.
          • Mozzarella under the sauce = a dry, chewy base that doesn’t sog out.

          Frequently Asked

          What is in spicy pepperoni?

          Spicy pepperoni contains pork, beef, salt, spices (like paprika and chili flakes), garlic, and preservatives (sodium nitrite). The heat comes from red pepper, cayenne, or crushed chili peppers.

          How to spice up pepperoni pizza?

          Drizzle hot honey, add pickled jalapeños, sprinkle red pepper flakes, or upgrade to spicy pepperoni for instant heat. For gourmet flair, try chili oil or Calabrian chiles after baking!
          5 Easy Ways to Spice Up Your Pizza:
          Before Baking:
          Swap regular pepperoni for spicy or cup-and-char (curls into crispy, oily cups)
          Add thin-sliced serranos or fresh habaneros under the cheese
          After Baking:
          Drizzle garlic-chili oil or sriracha mayo
          Top with quick-pickled onions (tossed in vinegar + red pepper flakes)
          Finish with grated Pecorino Romano (naturally spicy, sharp cheese)

          Which pizza is very spicy?

          The “Hellfire” pizza (with ghost peppers, habaneros, and spicy salami) or “Diablo” pizza (featuring Calabrian chiles, cayenne-infused sauce, and pepperoncini) rank among the spiciest. Some pizzerias even offer “Death Wish” pizzas with Carolina Reaper toppings!
          5 Legendarily Spicy Pizzas:
           The Atomic : (Buffalo Wild Wings) – Scorpion pepper sauce + jalapeños
           El Diablo: (Blaze Pizza) – Spicy red sauce, chorizo, and chopped serranos
           Vicious Circles: (Hell’s Kitchen, Minneapolis) – Ghost pepper cheese blend + Thai chilies
           The Hottie: (Home Slice, Austin) – Pickled jalapeños + cayenne honey drizzle
           The Challenge Pizza: (various) – Must finish the entire Reaper-topped pie to win
          Pro Tip: Always ask for gloves—capsaicin sticks to fingers! Pair with cooling ranch or yogurt dip.

          Is spicy pizza a thing?

          Yes! Spicy pizza is a booming trend, with pizzerias offering ghost pepper-infused sauces, chili oil drizzles, and fiery toppings like jalapeños, nduja sausage, or Carolina Reaper slices. Some even have “heat challenge” pizzas for daredevils.

          What is the world’s spiciest pizza?

          The World’s Hottest Pizza: “The Widower” (180+ Scoville Units)
           Record Holder: Hell’s Fire Pizza (UK) uses a Carolina Reaper puree base, topped with:
          Ghost pepper salami
          Fresh habaneros
          Trinidad Scorpion chili flakes
          Infused chili oil

          How to make hot and spicy pizza?

          To make hot and spicy pizza, use spicy tomato sauce (mixed with chili flakes), pepper jack cheesespicy pepperonijalapeños, and finish with chili oil drizzle. Bake at 475°F (245°C) for 12–15 minutes for crispy, fiery perfection.

          Don’t miss out—follow us on social media for updates: