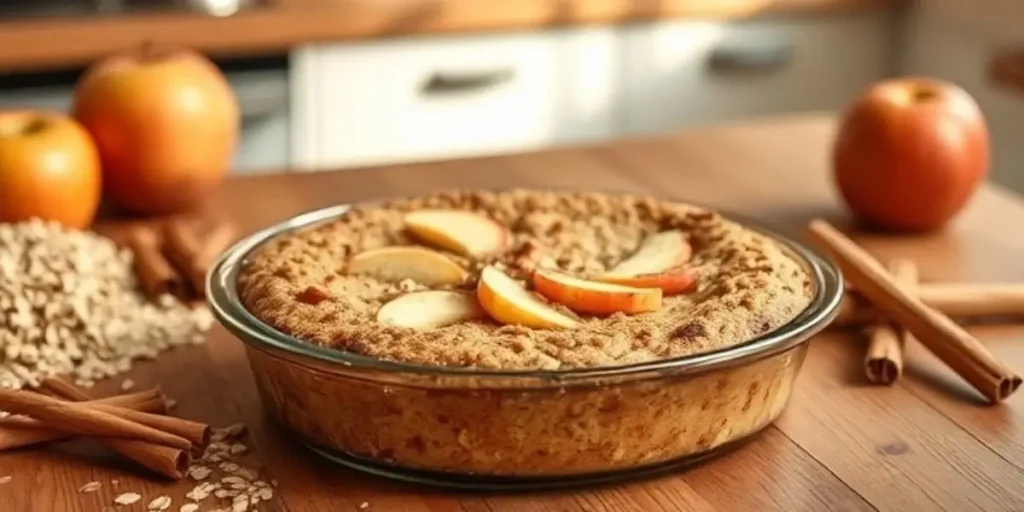
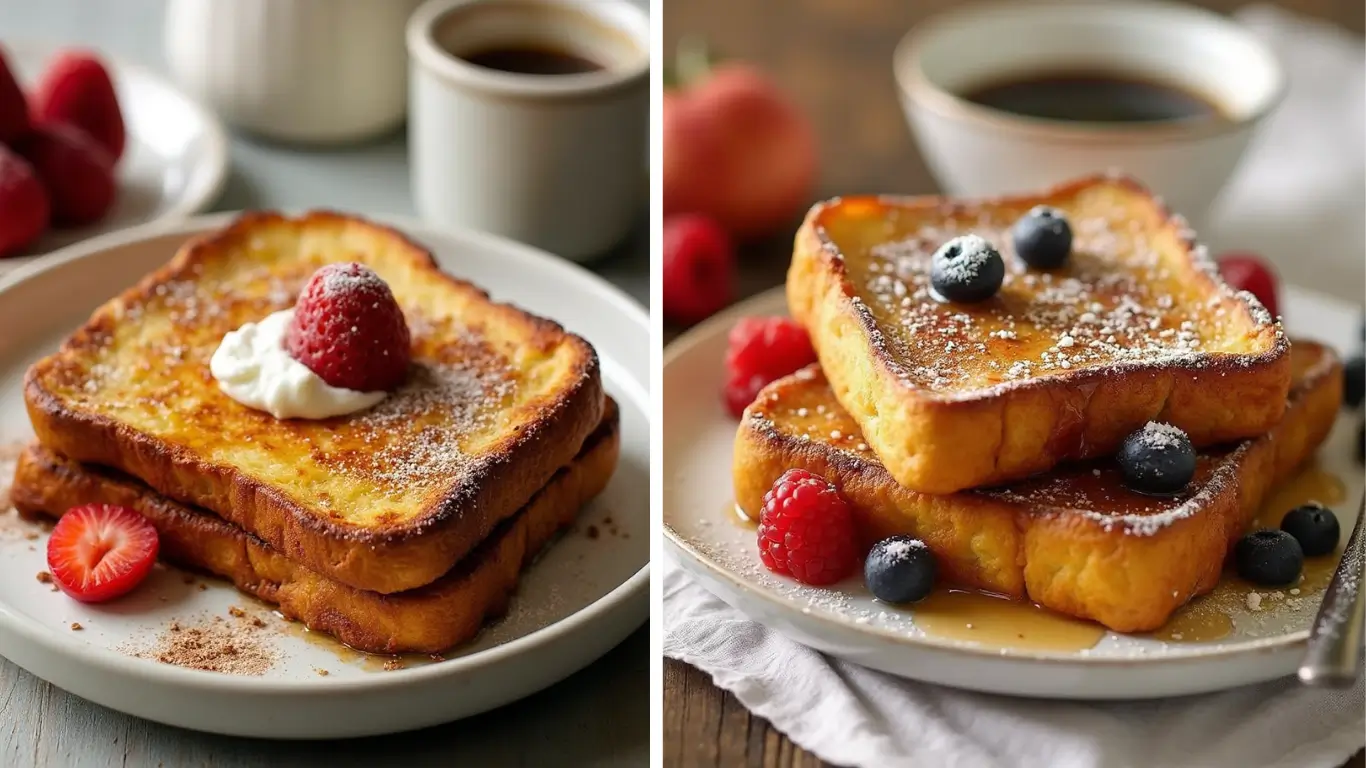
How to Make the Best Double Apple Baked Oatmeal: A Nutritious Twist on a Classic

Best Double Apple Baked Oatmeal

the best Health Benefits of Apples

best Double Apple Baked Oatmeal is not just a delicious breakfast—it’s also packed with health benefits. Apples, a key ingredient in this recipe, are loaded with fiber, antioxidants, and vitamins. Rich in soluble fiber, apples help to promote healthy digestion and keep you feeling full longer, making them a great option for weight management. Plus, the antioxidants in apples help combat inflammation and support heart health. The natural sweetness of apples adds flavor without the need for excessive sugar, making Double Apple Baked Oatmeal a wholesome choice for any meal.

The Appeal of Baked Oatmeal

When it comes to convenience and nutrition, baked oatmeal is hard to beat. Double Apple Baked Oatmeal is a one-pan wonder that can be prepared ahead of time, making it perfect for meal prepping. If you’re someone who enjoys a warm breakfast but doesn’t have time to cook every morning, this recipe is a game-changer. Not only does it save you time, but it also offers a delicious way to enjoy oats, which are known for their heart-healthy benefits. You can read more about the benefits of oats in our article on Healthy Oatmeal Recipes.

Baked oatmeal like this is also highly customizable. You can experiment with different fruits, spices, and mix-ins, but the combination of apples and oats in this Double Apple Baked Oatmeal is the perfect balance of flavor and texture. Whether you’re prepping for a busy week or simply want a cozy, nutritious breakfast, Double Apple Baked Oatmeal is the answer.

This versatile dish not only satisfies your taste buds but also helps fuel your day, making it a breakfast choice you’ll want to revisit again and again.
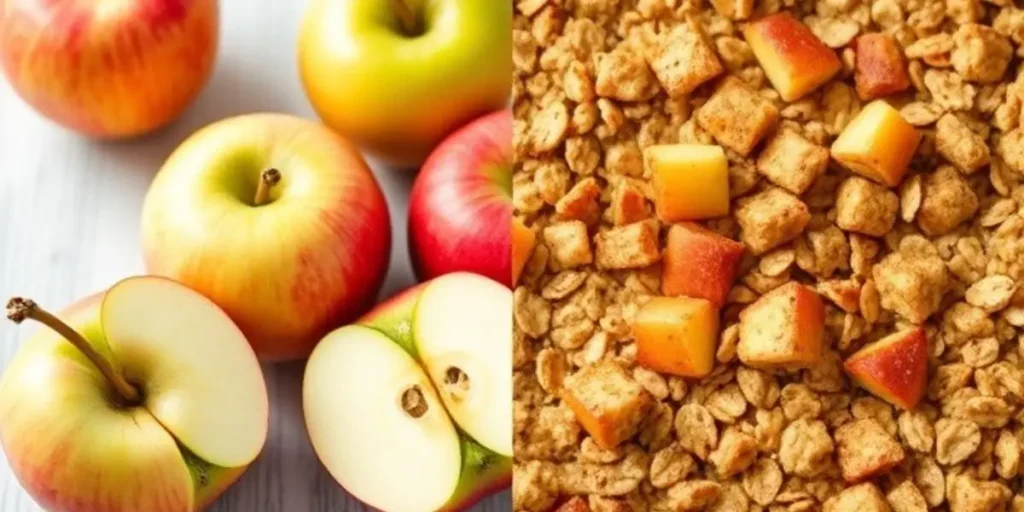
Double Apple Baked Oatmeal

Oats: The Heart of the Recipe

The base of any good baked oatmeal recipe is, of course, oats. For Double Apple Baked Oatmeal, rolled oats are the star ingredient. These oats provide a hearty texture and a dose of fiber that makes this breakfast both filling and nutritious. Oats are known for their ability to lower cholesterol, support heart health, and regulate blood sugar levels, making them a perfect addition to a balanced diet. Whether you’re baking this dish for yourself or the whole family, oats ensure that every bite of Double Apple Baked Oatmeal is both satisfying and nourishing.

Apples: The Double Apple Twist

What sets Double Apple Baked Oatmeal apart from other oatmeal recipes is the use of two different types of apples. We recommend a mix of tart Granny Smith apples and sweet Honeycrisp apples to create a well-rounded flavor profile. Granny Smith apples offer a tangy bite that contrasts beautifully with the sweetness of Honeycrisp apples, creating a balanced, flavorful dish. Apples are packed with vitamin C, fiber, and antioxidants, making them not only delicious but also incredibly beneficial for your health. This combination of apples in your oatmeal ensures each bite is juicy, flavorful, and full of nutrients.

Other Key Ingredients

In addition to oats and apples, several other key ingredients bring this double-apple baked Oatmeal to life. Eggs provide structure and moisture, ensuring the oatmeal bakes to a perfect consistency. Milk (or a dairy-free alternative, like almond milk) adds richness and creaminess, making the oatmeal extra comforting. A touch of cinnamon adds warmth and spice, complementing the apples’ sweetness. Vanilla enhances the overall flavor profile, while a drizzle of honey sweetens the dish naturally without overpowering the flavors. These ingredients come together to create a dish that’s not only nutritious but also irresistibly delicious.

Each of these ingredients plays a vital role in making Double Apple Baked Oatmeal a wholesome, satisfying breakfast. Whether you’re enjoying it fresh out of the oven or reheating leftovers, the balance of flavors and textures in this recipe is sure to please.
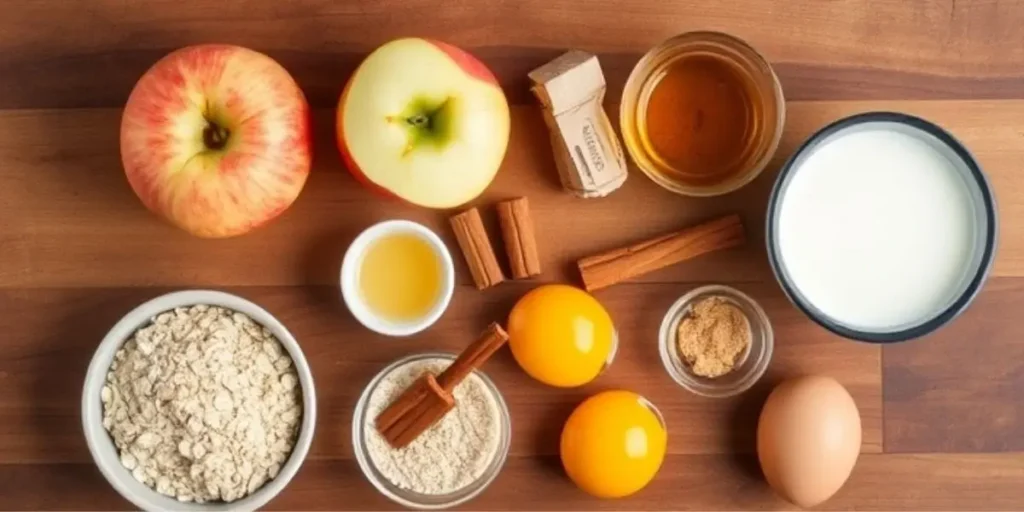
Double Apple Baked Oatmeal

Step-by-Step Instructions

Creating Double Apple Baked Oatmeal is simple, even for those who don’t consider themselves expert bakers. Here’s how to bring this delicious breakfast to life:

  1. Prep Your Ingredients:
    Start by preheating your oven to 375°F and greasing a baking dish with butter or nonstick spray. Peel, core, and dice one tart apple (like Granny Smith) and one sweet apple (such as Honeycrisp). Set the apples aside and gather the remaining ingredients, like rolled oats, milk, eggs, honey, cinnamon, and vanilla extract.
  2. Mix the Dry Ingredients:
    In a large bowl, combine the rolled oats, cinnamon, and a pinch of salt. Stir everything together to ensure the cinnamon is evenly distributed, as this will give your Double Apple Baked Oatmeal its warm, spiced flavor.
  3. Prepare the Wet Mixture:
    In a separate bowl, whisk together the milk, eggs, honey, and vanilla extract. This combination adds richness and binds the oatmeal while balancing sweetness with natural flavors.
  4. Combine Everything:
    Pour the wet mixture into the bowl with the oats and stir to combine. Carefully incorporate the chopped apples, spreading them evenly throughout the mixture to ensure every bite is packed with flavor. The double apple addition is what makes this recipe shine, so make sure each bite gets its fair share!
  5. Bake to Perfection:
    Pour the mixture into your greased baking dish, smoothing it into an even layer. Place it in the preheated oven and bake for 35–40 minutes, or until the top turns golden and the oatmeal is firm to the touch. You’ll know it’s ready when a toothpick inserted in the center comes out clean.

Double Apple Baked Oatmeal is versatile, so feel free to tweak it to your taste:

  • Dietary Preferences: Swap out dairy milk for almond or oat milk, or use a flax egg for a plant-based version.
  • Extra Add-Ins: Toss in chopped walnuts, raisins, or shredded coconut for added texture and flavor.
  • Sweeter Touch: If you prefer a sweeter oatmeal, drizzle maple syrup over the top before serving.

This recipe is as flexible as it is delicious, allowing you to make it your own while keeping the focus on the double apple goodness.

With its rich flavors and easy preparation, Double Apple Baked Oatmeal is a dish that anyone can enjoy. Whether it’s for meal prep or a weekend treat, you’ll love how simple and satisfying this recipe is to make.
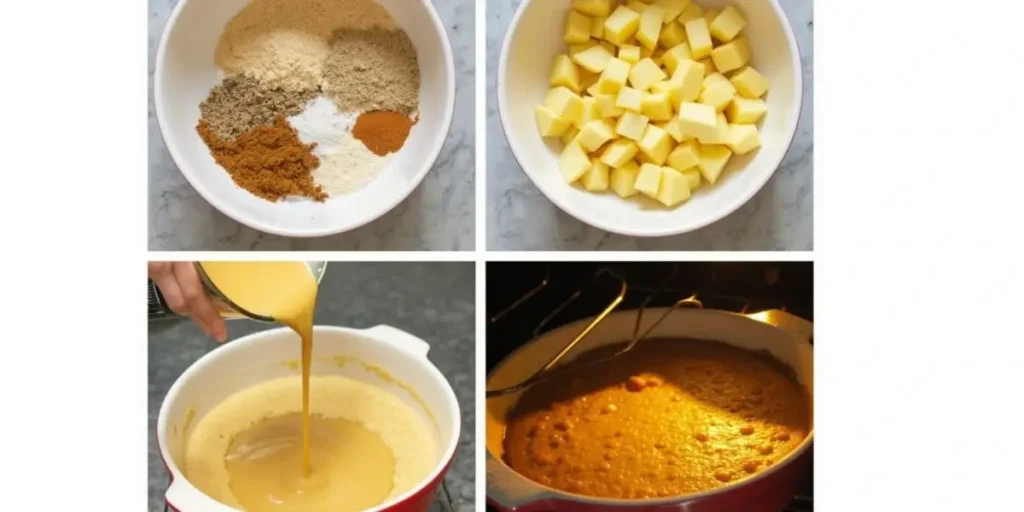
Double Apple Baked Oatmeal

Serving Suggestions

Double Apple Baked Oatmeal is as versatile as it is delicious, making it easy to serve in a variety of ways. For a simple, satisfying breakfast, enjoy a warm slice straight out of the oven. Want to elevate the experience? Try these delicious serving ideas:

  • For a creamy upgrade, top your slice with a spoonful of Greek yogurt to enhance the richness and add a protein-packed touch. The tangy flavor pairs beautifully with the sweet and tart apples in the oatmeal.
  • Drizzle of Sweetness: Drizzle maple syrup or a spoonful of honey over the oatmeal for added sweetness and shine.
  • Crunchy Toppings: Sprinkle some granola, chopped nuts, or toasted coconut flakes for a delightful crunch and extra texture.

Each serving idea brings a unique twist to your Double Apple Baked Oatmeal, making it a breakfast option you’ll never tire of.

Storage and Meal Prep Tips

One of the best things about Double Apple Baked Oatmeal is how well it stores, making it a dream for meal prep enthusiasts. Here’s how to keep it fresh and delicious all week:

  • Refrigerate Leftovers: Once cooled, store leftover oatmeal in an airtight container in the refrigerator. It can remain fresh and flavorful for up to five days.
  • Reheating Made Easy: For a quick breakfast, simply reheat a portion in the microwave for 30–60 seconds or warm it in the oven at 350°F until heated through.
  • Freeze for Later: If you’re prepping for the long term, freeze individual portions in airtight containers or freezer-safe bags. When ready to enjoy, thaw overnight in the fridge and reheat as usual.

By planning, you can enjoy the comforting flavors of best Double Apple Baked Oatmeal any day of the week without extra effort.

The Perfect Breakfast for Any Occasion

Whether you’re serving it fresh, reheating leftovers, or customizing it with your favorite toppings, Double Apple Baked Oatmeal offers endless possibilities for a satisfying breakfast. With its combination of wholesome ingredients and adaptable serving options, it’s sure to become a favorite in your kitchen.
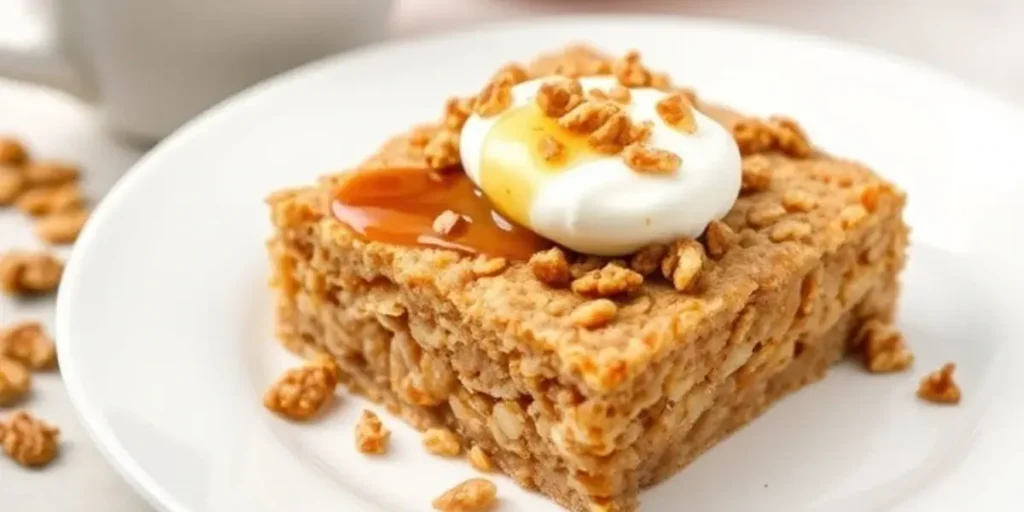
Double Apple Baked Oatmeal

In conclusion, the Best Double Apple Baked Oatmeal is the perfect way to start your day on a wholesome and delicious note. Packed with nutritious apples and hearty oats, this dish offers a satisfying and flavorful breakfast that’s both easy to make and versatile. Whether enjoyed fresh from the oven or as part of your meal prep, the Best Double Apple Baked Oatmeal is sure to become a favorite in your morning routine. Check out our Breakfast Ideas for more delicious and healthy breakfast options!

Not only is it a healthy option, but the Best Double Apple Baked Oatmeal can be customized to suit your tastes and preferences, making it a dish the whole family can enjoy. So, why not try the Best Double Apple Baked Oatmeal today and enjoy a delicious, nutritious start to your day?

Are oatmeal and apples good for you?

Yes, oatmeal and apples are both nutritious. Oatmeal is high in fiber, which supports digestion and helps keep you full, while apples provide essential vitamins, fiber, and antioxidants, making them a healthy combination.

Why aren’t my baked oats fluffy?

If your baked oats aren’t turning out fluffy, there are a few possible reasons:
Too much liquid: Adding too much milk or water can make the oats too dense. Ensure you’re following the correct ratio of oats to liquid.
Overmixing: Stirring the mixture too much can cause the oats to become dense. Mix just enough to combine the ingredients.
Underbaking: Make sure you bake them for the right amount of time. Underbaking can result in a wet, dense texture.
Oven temperature: If the oven isn’t hot enough, the oats may not rise as expected. Preheat your oven properly to ensure an even bake.
Type of oats: Rolled oats or old-fashioned oats work best for fluffy baked oats. Instant oats might result in a denser texture.
Adjusting these factors can help your baked oats turn out fluffier next time!

How to make oatmeal more delicious?

To make oatmeal more delicious, here are some easy ways to elevate its flavor:
Add Fresh or Dried Fruit: Apples, bananas, berries, or dried fruits like raisins or cranberries add natural sweetness and flavor.
Sweeteners: Add honey, maple syrup, or agave for extra sweetness. You can also use a sprinkle of brown sugar or coconut sugar.
Spices: Add a pinch of cinnamon, nutmeg, or vanilla extract for a warm, comforting flavor.
Nut Butter: Stir in peanut butter, almond butter, or cashew butter for richness and a creamy texture.
Nuts and Seeds: Sprinkle almonds, walnuts, chia seeds, or flax seeds for added crunch and nutrition.
Yogurt or Milk: Use milk (dairy or plant-based) instead of water for creamier oatmeal, or top with a dollop of yogurt for extra richness.
Chocolate or Cocoa: For a chocolatey twist, add dark chocolate chips, cocoa powder, or even a scoop of protein powder.
Coconut: Shredded coconut or coconut milk adds a tropical flair and extra creaminess.
Granola or Crispy Toppings: A crunchy topping like granola or toasted coconut can add texture to your oatmeal.
Savory Additions: If you prefer savory oatmeal, try adding avocado, sautéed vegetables, a poached egg, or cheese for a hearty breakfast.
Experimenting with these additions can take your oatmeal from basic to mouthwatering!

Why is my baked oatmeal gummy?

If your baked oatmeal turns out gummy, it could be due to one or more of the following reasons:
Too Much Liquid: Adding excess liquid to the oats can result in a gummy texture. Make sure you’re following the recipe’s liquid-to-oat ratio carefully. If you find the mixture too watery, reduce the liquid slightly.
Not Enough Baking Time: If baked oatmeal isn’t cooked long enough, it can retain a moist, undercooked texture. Be sure to bake it for the full recommended time, and check for doneness by inserting a toothpick or knife in the center; it should come out clean when done.
Overmixing the Oats: Mixing the oats too much can cause them to become overly soft and mushy. Stir the ingredients gently to avoid breaking the oats.
Too Many Wet Ingredients: Adding too many wet ingredients (like mashed bananas, yogurt, or applesauce) can result in a heavier, denser texture. Adjust the quantities to avoid making the mixture too wet.
Type of Oats: The type of oats you’re using can affect the texture. Steel-cut oats, for example, require more liquid and longer cooking times compared to rolled oats, which absorb liquid more easily and bake up fluffier.
To avoid a gummy result, focus on balancing the liquid and oats, and make sure your baking time and temperature are correct!

How do you fix gluey oatmeal?

To fix gluey oatmeal, here are a few helpful tips:
Add More Liquid: If your oatmeal is too thick or gluey, simply add more liquid (water, milk, or a dairy alternative) to loosen it up. Gradually stir in small amounts of liquid until the desired consistency is reached.
Reduce Heat: Cook your oatmeal on low heat instead of high heat. Cooking at too high a temperature can cause the oats to stick together and become gluey. Stir occasionally to ensure it cooks evenly and doesn’t stick to the bottom of the pot.
Stir Less: Stirring too much while cooking can cause the oats to break down and become mushy or gluey. Try to stir only occasionally to allow the oats to cook properly without becoming overworked.
Use Rolled Oats: If you’re using steel-cut oats or instant oats, try switching to rolled oats, which have a better texture for oatmeal that isn’t too sticky or gluey.
Check the Oat-to-Liquid Ratio: If you added too many oats relative to the liquid, the result can be gluey oatmeal. For a more balanced texture, use 1/2 cup of oats to 1 cup of liquid, and adjust based on your preference.
With these adjustments, you should be able to fix gluey oatmeal and enjoy a smooth, creamy bowl!

AM Eats

No post found

Cheesy Garlic Chicken Wraps Recipe

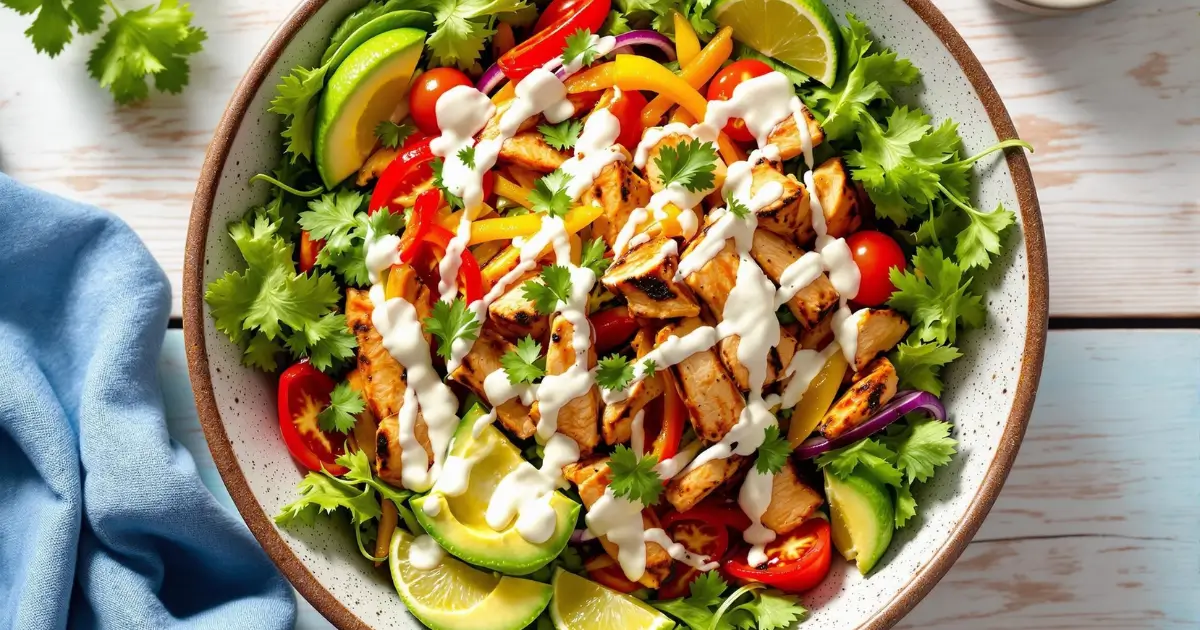
Cheesy Garlic Chicken Wraps
Imagine biting into a warm, soft tortilla filled with savory, cheesy chicken, perfectly seasoned with garlic and a touch of spice. These Cheesy Garlic Chicken Wraps are not just a meal; they’re a comfort food experience you’ll crave over and over again. The combination of tender chicken, gooey cheese, and the rich, buttery garlic sauce creates a mouth-watering flavor profile that’s hard to resist.

Whether you’re looking for a quick weeknight dinner, a satisfying lunch, or an appetizer for a weekend gathering, Cheesy Garlic Chicken Wraps are the ultimate solution. This recipe is perfect for anyone who loves cheesy, flavorful meals that can be whipped up in no time. The versatility of this dish makes it suitable for all occasions, and it’s easy to customize based on what you have in your kitchen or your dietary preferences.

In this recipe, we’ll guide you through the simple ingredients and easy steps that make these wraps irresistible. You’ll learn how to create a flavorful garlic butter sauce, assemble your wraps, and discover some tasty variations to make it your own. Plus, you’ll see why making these wraps at home is the best option, from fresher ingredients to endless customization possibilities.

Why Cheesy Garlic Chicken Wraps Are the Perfect Meal

The Appeal of Cheesy Garlic Chicken Wraps

Quick and Easy to Prepare

When it comes to a delicious meal that doesn’t take forever to prepare, Cheesy Garlic Chicken Wraps are a top choice. With a total prep and cook time of around 30 minutes, they’re ideal for busy weeknights when you want a satisfying meal without the fuss. The chicken cooks quickly, and the garlic butter sauce comes together in no time, making it a stress-free dish to prepare. Whether you’re rushing home from work or looking for a fast dinner option, these wraps have you covered.

Versatility and Customization

One of the most appealing aspects of Cheesy Garlic Chicken Wraps is their versatility. You can easily adapt the recipe to suit your taste or dietary preferences. Not a fan of chicken? Swap it out for turkey, beef, or even plant-based proteins like tofu. When it comes to cheese, feel free to experiment with different varieties such as mozzarella, cheddar, or pepper jack for a unique twist. You can even go gluten-free by using gluten-free wraps, or make it vegetarian by filling the wraps with extra veggies. With endless ways to personalize these wraps, you’re guaranteed to find a combination that’s just right for you.

Cheesy Garlic Chicken Wraps

Ingredients You’ll Need for Cheesy Garlic Chicken Wraps

Key Ingredients for the Best Flavor

Chicken (Boneless, Skinless Breasts or Thighs)

For Cheesy Garlic Chicken Wraps, boneless, skinless chicken breasts or thighs are the go-to choice. Chicken breasts are lean, cook quickly, and absorb flavors well, making them perfect for wraps. If you’re looking for a juicier, more flavorful option, chicken thighs are a great alternative. Both options provide the tender, flavorful protein that makes the wraps so satisfying.

Garlic and Seasoning Mix

Garlic is the hero of Cheesy Garlic Chicken Wraps—it brings that signature savory depth of flavor that elevates the dish. Fresh garlic is best for a punch of boldness, though garlic powder works if you’re in a pinch. Combine the garlic with a seasoning mix of salt, pepper, and any other spices you prefer—paprika, chili flakes, and onion powder can all add exciting depth to the flavor profile. The garlic seasoning mix is what makes the chicken so irresistible, infusing it with rich, comforting flavors.

Cheeses to Use (Mozzarella, Cheddar, Parmesan)

When it comes to making Cheesy Garlic Chicken Wraps, using the right cheeses is crucial for achieving the perfect texture and flavor. Mozzarella is a must for its excellent reliability and mild flavor. Pair it with a sharp cheddar for a tangy contrast and sprinkle in some freshly grated Parmesan for added richness. This blend of cheeses creates that gooey, melty texture that makes each bite of your wraps so indulgent and satisfying.

Tortillas or Wraps

The tortilla is the final touch that holds all of the delicious ingredients together in Cheesy Garlic Chicken Wraps. The type of wrap you choose can affect the overall taste and texture of the dish. Traditional flour tortillas are soft and pliable, but you can also opt for whole wheat or spinach wraps for added flavor and nutrition. Whatever you choose, the wrap serves as the perfect base for holding the chicken, cheese, and garlic butter sauce, ensuring every bite is as flavorful as the last.

Cheesy Garlic Chicken Wraps
IngredientAmountDescription/Notes
Boneless, Skinless Chicken2-3 breasts or thighsChicken breasts are lean and quick to cook, while thighs offer a juicier option. Both work well for wraps.
Garlic3-4 cloves (minced)Fresh garlic adds a rich, savory depth to the dish. Garlic powder can be used as an alternative.
Olive Oil1-2 tbspUsed for sautéing the chicken and adding flavor. You can also use butter for a richer flavor.
Cheddar Cheese1 cup (shredded)Sharp cheddar adds tangy flavor and melts well, creating a gooey texture inside the wrap.
Mozzarella Cheese1 cup (shredded)Mozzarella creates a perfect melt and adds a mild, creamy flavor that balances the other cheeses.
Parmesan Cheese1/4 cup (grated)Parmesan provides a sharp, nutty contrast to the mozzarella and cheddar, enhancing the overall flavor.
Flour Tortillas4-6 tortillas (8-inch)Choose flour tortillas for soft, pliable wraps, or use whole wheat or spinach wraps for added texture and nutrition.
Salt1/2 tspEssential for seasoning the chicken and balancing flavors.
Black Pepper1/4 tspAdds a mild spice and enhances the other seasonings.
Paprika1/2 tsp (optional)Adds a subtle smoky flavor, optional but recommended for extra depth.
Chili Flakes1/4 tsp (optional)For those who like a bit of heat, chili flakes bring the perfect amount of spice to the wraps.
Butter2 tbspTo make the garlic butter sauce that coats the chicken and adds richness.
Fresh Parsley1 tbsp (optional, for garnish)A sprinkle of parsley adds color and a fresh contrast to the savory wraps. Optional, but it’s a nice touch for presentation.
Ranch Dressing (optional)1/4 cupFor drizzling over the wraps or for dipping. Optional, but it adds an extra creamy element if desired.

This table covers the main ingredients used in the Cheesy Garlic Chicken Wraps, along with some optional seasonings and toppings you can add to customize the recipe. Let me know if you’d like additional details or modifications!

Step-by-Step Instructions for Making Cheesy Garlic Chicken Wraps

How to Make Cheesy Garlic Chicken Wraps: A Simple Recipe

Making Cheesy Garlic Chicken Wraps is as easy as it is delicious. With just a few simple steps, you can create a mouth-watering dish that’s sure to please the whole family. Follow these step-by-step instructions to bring this tasty meal to life.

Preparing the Chicken

The first step in making Cheesy Garlic Chicken Wraps is to prepare the chicken. Start by seasoning the boneless, skinless chicken breasts (or thighs) with salt, pepper, and any additional spices you love, such as paprika or chili flakes for extra flavor. Heat a tablespoon of olive oil or butter in a skillet over medium heat, and once the pan is hot, add the chicken.

Cook the chicken for about 5-7 minutes on each side, or until the internal temperature reaches 165°F. To ensure the chicken is cooked through, you can use a meat thermometer for accuracy. Once the chicken is cooked, take it out of the pan and allow it to rest for a few minutes. Then, slice it into thin strips or bite-sized pieces for easy assembly in your wraps. This juicy chicken will be the star of your Cheesy Garlic Chicken Wraps!

Cheesy Garlic Chicken Wraps

Garlic Butter Sauce

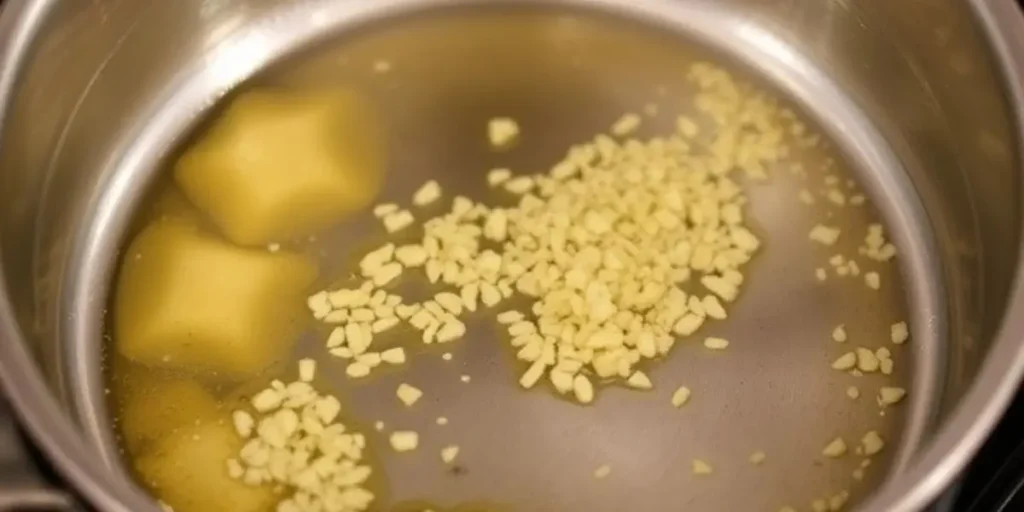
Next, it’s time to create the mouth-watering garlic butter sauce that will coat the chicken and add richness to your wraps. In the same skillet, melt 2 tablespoons of butter over medium heat. Once the butter has melted, add the minced garlic and cook for 1-2 minutes, stirring until the garlic is fragrant and turns golden brown. Be careful not to burn it—garlic can turn bitter if overcooked.

Once the garlic is ready, pour the garlic butter sauce over the sliced chicken, making sure every piece is generously coated. The rich, garlicky flavor will infuse the chicken, taking your Cheesy Garlic Chicken Wraps to the next level.

Cheesy Garlic Chicken Wraps

Assembling the Wraps

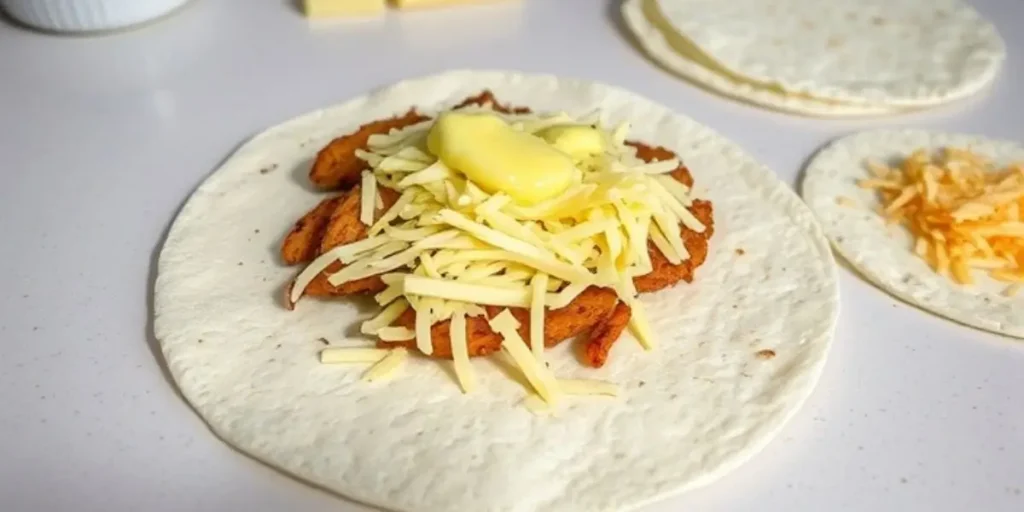
Now that the chicken is seasoned and coated with garlic butter, it’s time to assemble the wraps. Lay out your tortillas on a clean surface, and start by placing a generous portion of the garlic-coated chicken in the center of each tortilla. Next, sprinkle a combination of shredded mozzarella, cheddar, and parmesan cheese over the chicken—this cheesy trio will melt perfectly and create that gooey, delicious texture everyone loves in Cheesy Garlic Chicken Wraps.

If you’re feeling adventurous, add any extra ingredients like sautéed vegetables, fresh spinach, or even jalapeños for a bit of spice. Once all the fillings are in place, fold in the sides of the tortilla and roll it up tightly, making sure the ingredients stay inside. A tightly rolled wrap will give you the best results when it’s cooked.

Cheesy Garlic Chicken Wraps 4

Cooking the Wraps

The final step in making Cheesy Garlic Chicken Wraps is to cook the wraps for that perfect crispy finish. Heat a non-stick skillet over medium heat. Place your wrapped tortillas seam side down on the skillet and cook for 2-3 minutes per side or until golden brown and crispy. The cheese inside will melt, and the tortilla will crisp up, creating a satisfying crunch with each bite.

Once the wraps are cooked to perfection, remove them from the skillet and allow them to rest for a minute or two. This will help the cheese set, so it doesn’t ooze out when you slice the wraps. Garnish with freshly chopped parsley, and if you’re feeling indulgent, drizzle with a little ranch dressing or your favorite dipping sauce.

Cheesy Garlic Chicken Wraps

Tips and Variations to Try

Customize Your Cheesy Garlic Chicken Wraps

While the classic Cheesy Garlic Chicken wrap recipe is delicious on its own, there are plenty of ways you can make it your own by adding a few twists or substitutions. Here are some fun and tasty variations to help you create the perfect wrap every time.

Add Veggies for Extra Flavor

If you’re looking to boost the nutrition and flavor of your Cheesy Garlic Chicken Wraps, consider adding some fresh vegetables. Bell peppers, spinach, onions, and mushrooms are all great additions that complement the savory garlic chicken and melty cheese. These vegetables will add texture, color, and extra nutrients, making your wraps even more satisfying.

To add even more flavor, you can sauté the veggies in the same pan used for the chicken, allowing the garlic butter to coat them as well. This will enhance the overall taste and keep everything cohesive in your wrap.

Spice It Up

For those who love a little heat, spicing up your Cheesy Garlic Chicken Wraps can take them to the next level. Try adding sliced jalapeños for a fresh kick, or sprinkle in chili powder or hot sauce to add depth of flavor. If you’re a fan of heat, a drizzle of sriracha or buffalo sauce on top of the wrap adds a tangy, spicy finish that pairs perfectly with the rich garlic butter sauce.

If you’re preparing a batch of wraps for different tastes, you can always offer hot sauce or spicy mayo on the side, allowing everyone to adjust the spice level to their liking.

Make It a Meal

While Cheesy Garlic Chicken Wraps are filling on their own, pairing them with a few tasty sides can round out the meal. A simple side salad with fresh greens, cherry tomatoes, and a light vinaigrette complements the wrap’s richness. Crispy fries or sweet potato fries make for a delightful, comforting addition, and homemade coleslaw can add a tangy crunch that balances the creamy cheese in the wraps.

For a more indulgent side, try pairing your wraps with garlic bread or a creamy dip like ranch or blue cheese. The perfect sides will enhance the flavors of your Cheesy Garlic Chicken Wraps and turn a quick meal into a feast.

These tips and variations show how easy it is to make Cheesy Garlic Chicken Wraps your own. Whether you’re adding extra veggies, turning up the heat, or pairing with a tasty side, this recipe can be customized to fit your cravings and dietary needs. Feel free to experiment with different ingredients and discover your favorite version!

Nutritional Information for Cheesy Garlic Chicken Wraps

When preparing Cheesy Garlic Chicken Wraps, it’s always good to know what you’re eating, especially if you’re mindful of your diet. This section will break down the nutritional information of your homemade wraps, so you can enjoy them with confidence. Plus, we’ll explore some ways to lighten up the recipe while still keeping all the flavors you love.

Calories and Macronutrients

The great thing about Cheesy Garlic Chicken Wraps is that they’re packed with protein, healthy fats, and plenty of flavor—all while staying satisfying. Here’s a rough breakdown of what you can expect in terms of calories and macronutrients for one serving (1 wrap):

  • Calories: Around 450-500 calories (depending on ingredients used)
  • Protein: Approximately 30-35 grams of protein from the chicken and cheese
  • Fat: Around 25 grams of fat, including healthy fats from olive oil and butter
  • Carbohydrates: About 30-35 grams of carbs from the wrap and any added vegetables

This makes Cheesy Garlic Chicken Wraps a well-rounded meal that’s not only delicious but also provides a good balance of protein, fats, and carbs. It’s perfect for refueling after a long day or as a hearty lunch.

Healthier Modifications

If you’re looking to reduce the calorie content of your Cheesy Garlic Chicken Wraps or make them a bit lighter, there are several easy substitutions you can try:

  • Use Low-Fat Cheese: Opt for reduced-fat mozzarella or cheddar cheese to cut back on fat without sacrificing too much flavor. You can even use a smaller amount of cheese and still get that melty, cheesy texture.
  • Choose Whole Wheat or Low-Carb Wraps: Swap out regular flour tortillas for whole wheat or even low-carb wraps to make the dish more fiber-rich and lower in calories.
  • Lighten Up the Butter: If you’re trying to cut down on calories or fat, you can use less butter in the garlic sauce or substitute with olive oil for a healthier fat choice.
  • Add More Veggies: Bulking up the wraps with extra vegetables like spinach, peppers, or onions adds fiber and vitamins, helping to make the dish lighter and more nutritious.

These small tweaks can help you make your Cheesy Garlic Chicken Wraps a bit more diet-friendly while still keeping all the savory goodness you love.

Recap of Why You’ll Love This Recipe

If you’re looking for a quick, flavorful, and customizable meal, Cheesy Garlic Chicken Wraps are the perfect solution. With their rich, savory flavor and the comfort of melted cheese wrapped around tender chicken, this dish is a crowd-pleaser for any occasion. Whether you’re making them for dinner, lunch, or as a fun appetizer for a party, they’re sure to satisfy. The versatility of this recipe allows you to personalize it to your liking by adding veggies, adjusting spices, or even choosing different wraps. Plus, it’s a breeze to prepare, making it ideal for busy weeknights or when you’re craving something delicious but don’t have much time to spare.

Call to Action

Now that you’ve got the recipe and the tips to make your Cheesy Garlic Chicken Wraps a hit, it’s time to get cooking! We’d love to hear how your wraps turn out and any variations you try. Don’t forget to share your results and connect with us through our social media channels.

Looking for more simple and satisfying dinner ideas? Check out our Quick and Easy Simple Dinner Recipes for even more meal inspiration that’s just as delicious and easy to prepare.

For even more recipe inspiration, check out this Honey Garlic Chicken Breast to explore new ways to enjoy your favorite chicken.

With these easy-to-make Cheesy Garlic Chicken Wraps, you’re just a few steps away from enjoying a meal that’s packed with flavor, simple to make, and sure to become a favorite in your household. Happy cooking!

Savory Nights

No post found
Deliciously Easy Scrambled Eggs with Smoked Trout and Crème Fraîche

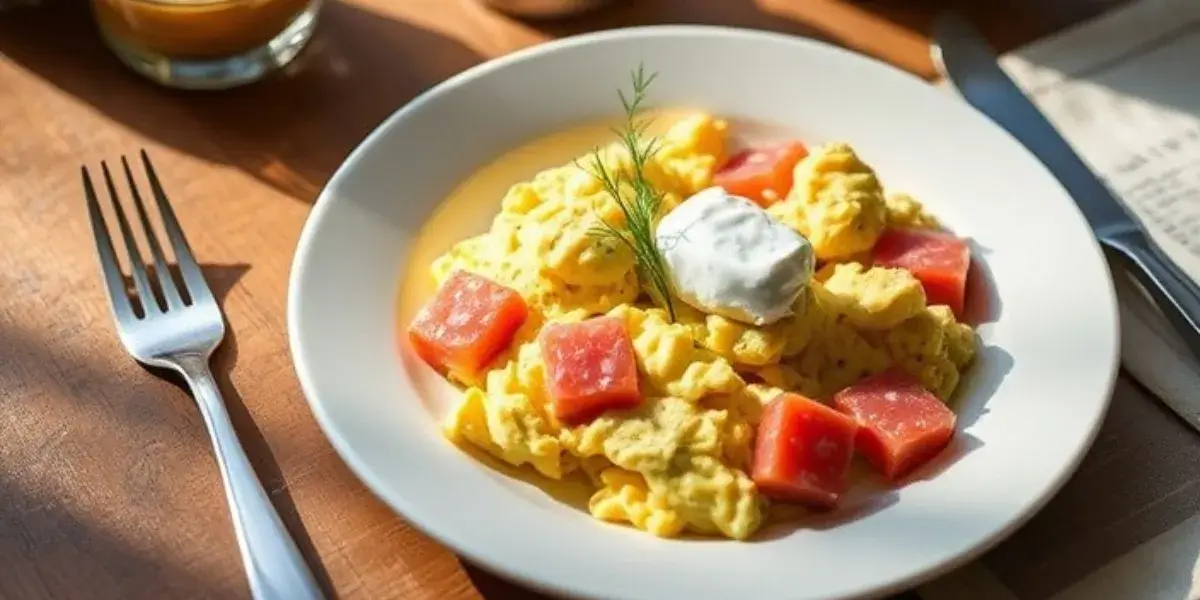
Scrambled Eggs with Smoked Trout and Crème Fraîche

Smoked Trout: A Flavorful Twist on Classic Scrambled Eggs

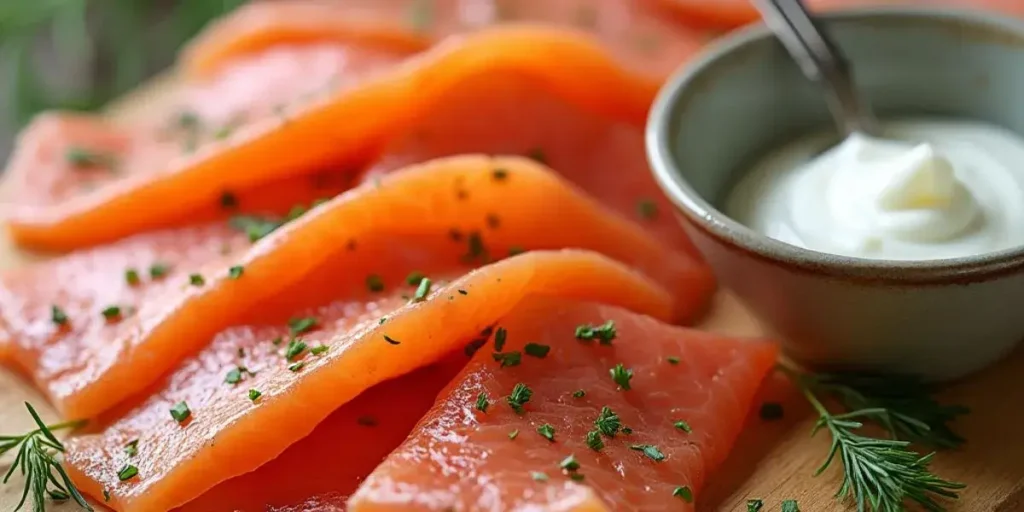
One of the standout ingredients in scrambled eggs with smoked trout and crème fraîche is the smoked trout itself. The addition of smoked trout takes your standard scrambled eggs from basic to extraordinary. The trout’s smokiness brings a layer of depth to the dish that pairs perfectly with the delicate texture of scrambled eggs. With its subtle yet rich flavor, smoked trout offers a gourmet touch that elevates this dish, making it feel as though you’ve stepped into a high-end brunch spot—right in your kitchen.

Not only does smoked trout enhance the taste, but it also provides a great source of protein and omega-3 fatty acids. These healthy fats contribute to heart health and offer numerous benefits, making your meal both delicious and nutritious. Whether you’re a seafood lover or a novice, smoked trout in scrambled eggs is a game-changer that adds both complexity and health benefits to your breakfast or brunch.

Crème Fraîche: The Secret to Creamy, Luxurious Scrambled Eggs

The second key ingredient in scrambled eggs with smoked trout and crème fraîche is the crème fraîche. Known for its rich, slightly tangy flavor, crème fraîche is the perfect complement to the savory smoked trout. It gives the scrambled eggs an ultra-creamy texture that makes every bite feel decadent. Unlike sour cream, which can be tangy and thick, crème fraîche adds a smooth, luxurious finish to scrambled eggs without overpowering the dish.

Incorporating crème fraîche into your scrambled eggs also ensures they remain soft and moist, creating the ideal scramble. This addition transforms ordinary eggs into a sophisticated dish, making them taste more indulgent and restaurant-quality. The creamy consistency of crème fraîche combines with the smoked trout to create an unforgettable balance of flavors that you’ll crave again and again.

A Perfect Pairing for a Gourmet Breakfast

When you combine smoked trout and crème fraîche with scrambled eggs, you’re creating an experience. The smoky, savory, and creamy elements make this dish irresistible. It’s a perfect go-to brunch option. Not only is it a treat for your taste buds, but it’s also an easy way to impress guests or enjoy a luxurious meal at home.

As you try this recipe, you’ll see why smoked trout and crème fraîche are essential in scrambled eggs, bringing out the best in each other for a unique twist on a classic dish.

Scrambled Eggs with Smoked Trout and Crème Fraîche

Scrambled Eggs: The Base of a Perfect Dish

At the heart of easy scrambled eggs with smoked trout and crème fraîche lies the scrambled eggs themselves. They may seem simple, but the quality of the eggs you use plays a crucial role in achieving the perfect texture and flavor. Fresh, high-quality eggs are essential for a creamy, fluffy scramble that complements the rich smoked trout and crème fraîche. When making scrambled eggs, it’s all about balance—using eggs that are fresh and free-range can make a noticeable difference in both taste and texture.

To make the perfect scrambled eggs, be sure to whisk them well before cooking. This helps incorporate air into the eggs, resulting in a soft, tender consistency when cooked. Cooking them over low heat and stirring gently ensures they don’t become overcooked or rubbery, creating a smooth and velvety base for your easy scrambled eggs with smoked trout and crème fraîche.

Smoked Trout: A Gourmet Addition

Smoked trout is the ingredient that truly sets scrambled eggs with smoked trout and crème fraîche apart from ordinary scrambled eggs. It brings an element of sophistication with its subtle smokiness, which enhances the dish without overwhelming it. The delicate flavor of smoked trout pairs beautifully with the creamy scrambled eggs, creating a savory, flavorful bite in every spoonful.

When selecting smoked trout, opt for a high-quality product that’s freshly smoked. Whether you buy it pre-sliced or whole, make sure it has a clean, smoky aroma and isn’t overly dry. Smoked trout adds not only flavor but also nutrition to the dish, as it’s packed with healthy omega-3 fatty acids and protein. This makes it a great option for those looking to enjoy a breakfast that’s both indulgent and nourishing.

Crème Fraîche: The Creamy, Tangy Finish

No dish is complete without the perfect finishing touch, and in scrambled eggs with smoked trout and crème fraîche, that touch is the crème fraîche. Known for its smooth, silky texture and slightly tangy flavor, crème fraîche adds a level of richness and complexity that enhances the other ingredients. It’s the secret to achieving that luscious, creamy consistency in the scrambled eggs, making each bite feel luxurious.

Unlike sour cream, crème fraîche has a gentler, milder tang and a thicker consistency, which makes it ideal for cooking. When you fold it into the scrambled eggs, it not only enriches the flavor but also prevents the eggs from drying out. Crème fraîche is a key ingredient in this recipe, providing the perfect balance to the smoked trout’s bold flavors and bringing the dish together in a way that’s simply irresistible.

Choosing the Right Ingredients for the Best Results

The quality of ingredients is key to perfect scrambled eggs with smoked trout and crème fraîche. Fresh eggs, high-quality smoked trout, and rich crème fraîche are essential for a flavorful, creamy, and indulgent dish. By selecting the right ingredients, you’re elevating this classic breakfast into something special, ensuring a gourmet experience with every bite.

Scrambled Eggs with Smoked Trout and Crème Fraîche

Table of Ingredients for easy Scrambled Eggs with Smoked Trout and Crème Fraîche

IngredientRole in the RecipeNotes
EggsThe base of the dish; provides the creamy, fluffy texture in the scrambleUse fresh, high-quality eggs for best results
Smoked TroutAdds smokiness and depth to the dish, transforming the eggs into a gourmet experienceChoose fresh, high-quality smoked trout for optimal flavor
Crème FraîcheAdds creaminess and a mild tang; making the scrambled eggs rich and velvetyUse full-fat crème fraîche for the best texture and flavor
Butter or Olive OilFor cooking the scrambled eggs, ensure they remain soft and smoothButter adds richness, but olive oil can be used as\ a lighter option
Salt and PepperBasic seasonings to enhance flavorAdjust to taste, but don’t over-season as smoked trout already adds flavor
Fresh Herbs (Optional)For garnish and added flavor; dill, chives, or parsley work wellFresh herbs provide a refreshing contrast to the richness of the dish

This table summarizes the key ingredients and their roles in the recipe, providing a helpful overview for readers.

Ingredients for Scrambled Eggs with Smoked Trout and Crème Fraîche

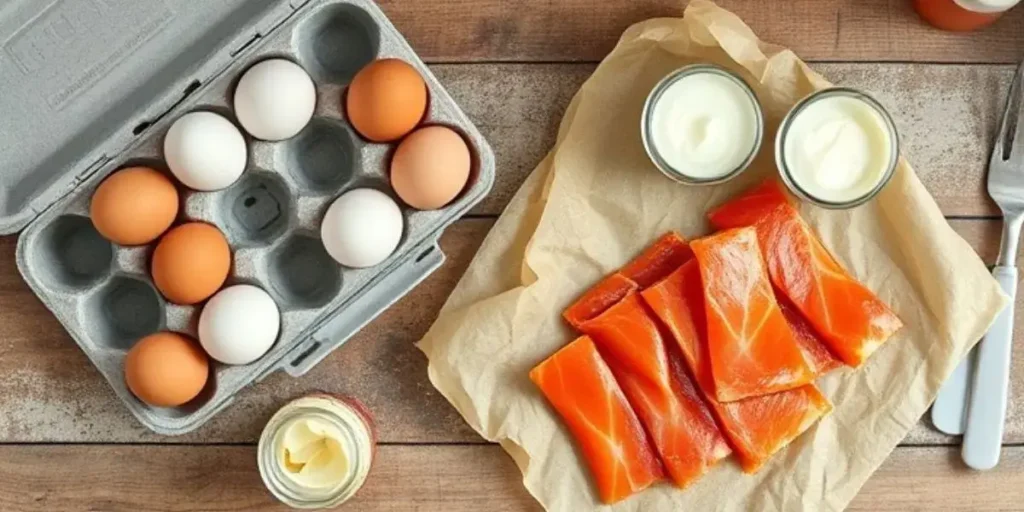
To get started on making scrambled eggs with smoked trout and crème fraîche, gather the following ingredients:

  • 4 large eggs (preferably fresh and free-range)
  • 100g smoked trout (sliced or flaked)
  • 2 tablespoons crème fraîche (full-fat recommended)
  • 1 tablespoon unsalted butter or olive oil (for cooking)
  • Salt and freshly ground black pepper, to taste
  • Fresh herbs (optional, such as dill or chives) for garnish

This combination of fresh ingredients will ensure a dish that’s both delicious and nutritious, with the right balance of creamy and smoky flavors.

Instructions for Scrambled Eggs with Smoked Trout and Crème Fraîche

Prepare the Ingredients


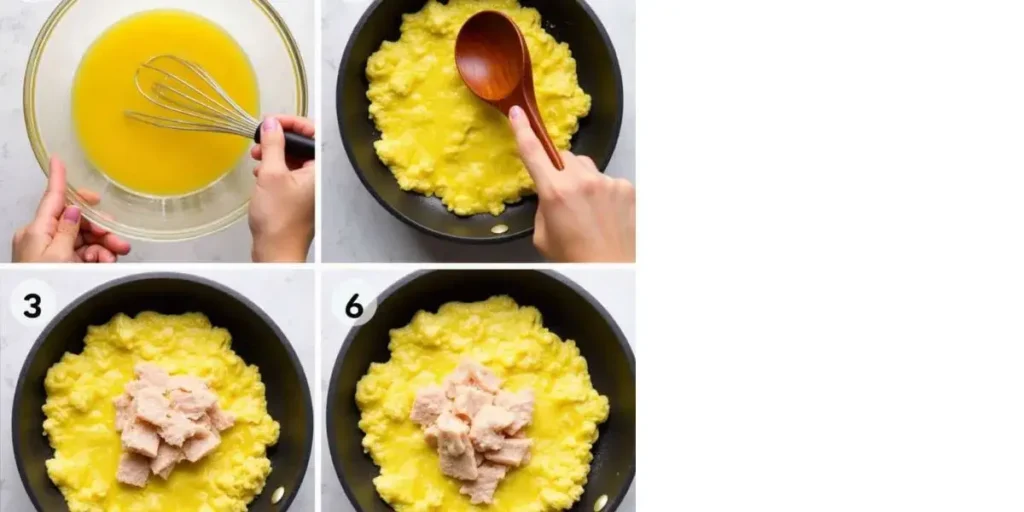
Start by cracking the eggs into a bowl. Whisk them well with a fork or whisk until the yolks and whites are fully incorporated. This helps incorporate air into the eggs, ensuring a light and fluffy texture when cooked. Season with a pinch of salt and a dash of pepper, then set aside.
Pro Tip: If you want extra creamy scrambled eggs, add a tablespoon of water or milk to the eggs before whisking.

Cook the Smoked Trout


Heat a non-stick skillet over medium heat. Add the butter or olive oil and let it melt. Once the butter is bubbling (but not browning), add the smoked trout and sauté for about 1-2 minutes, just to warm it up. You’re not cooking the trout, just giving it a little heat to enhance its smoky flavor. Remove from the skillet and set aside.
Pro Tip: If you like your trout slightly crisped, you can cook it for an additional minute, but be careful not to overdo it.

Scramble the Eggs


In the same skillet, reduce the heat to low to prevent the eggs from overcooking. Pour in the whisked eggs. Gently stir with a spatula, making sure to move the eggs from the edges toward the center. Continue this motion, allowing the eggs to cook slowly. This technique ensures soft, creamy scrambled eggs.
Pro Tip: Resist the urge to turn up the heat. Low and slow is key for the perfect scramble!

Add Crème Fraîche


When the eggs are almost cooked but still slightly runny, add in the crème fraîche. Stir it gently into the eggs, allowing it to melt and create a creamy, rich texture. The eggs should now be soft, fluffy, and coated in the luxurious crème fraîche.
Pro Tip: Crème fraîche should be added towards the end of cooking to maintain its smooth, velvety consistency.

Combine Smoked Trout and Eggs


Once the scrambled eggs are perfectly cooked and creamy, gently fold in the warm smoked trout. Make sure the trout is evenly distributed throughout the eggs, allowing the smokiness to infuse the dish.
Pro Tip: Don’t overmix! You want the eggs and trout to stay tender and distinct.

Garnish and Serve


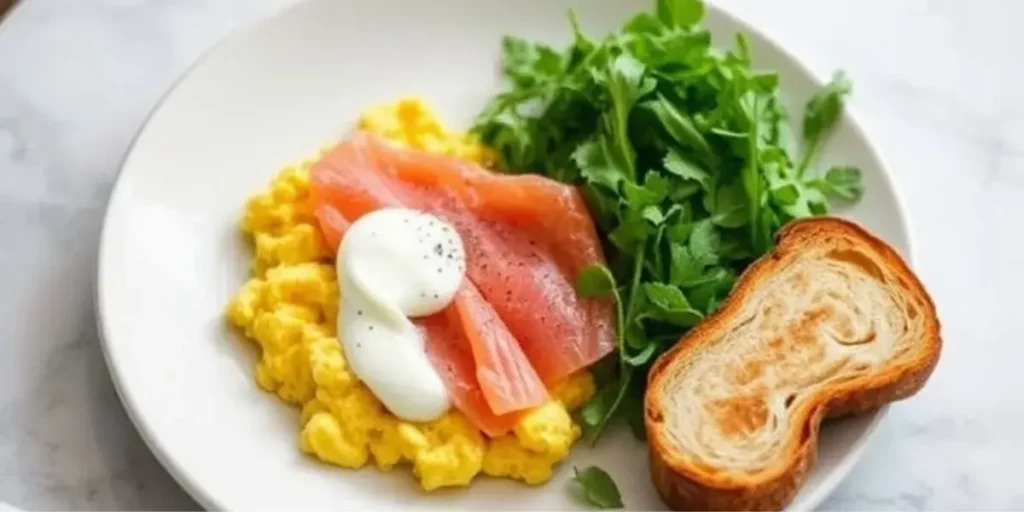
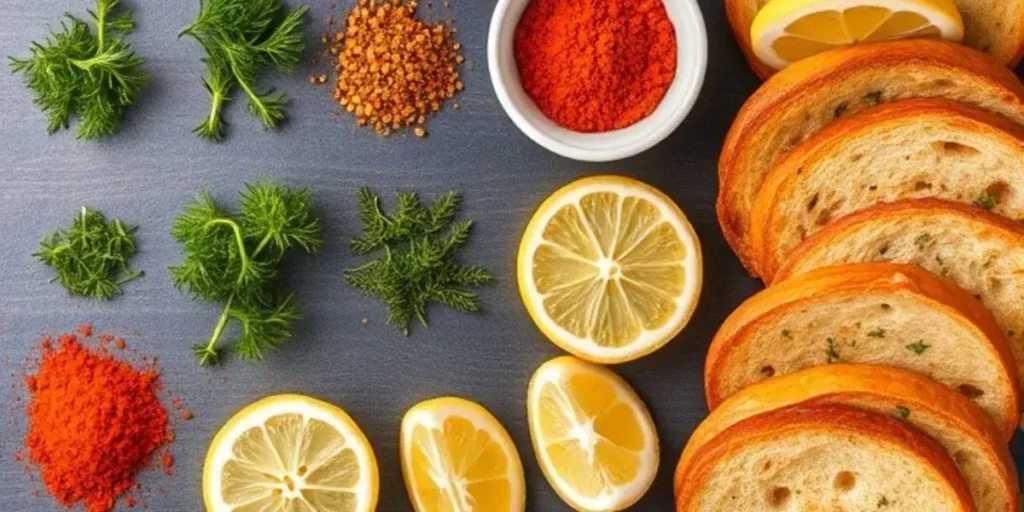
Transfer the scrambled eggs with smoked trout and crème fraîche to serving plates. Garnish with fresh herbs like dill or chives for a burst of color and added freshness. Serve immediately, paired with toast or a light salad if desired.
Pro Tip: Fresh herbs add a delightful contrast to the richness of the dish and make it look even more appetizing.

Scrambled Eggs with Smoked Trout and Crème Fraîche

Enjoy Your Gourmet Scrambled Eggs!

This easy, step-by-step recipe will transform your usual scrambled eggs into a decadent treat that’s sure to impress. With the right balance of smoky trout and creamy crème fraîche, every bite of your scrambled eggs with smoked trout and crème fraîche will feel like a special occasion. Enjoy this dish for brunch, breakfast, or whenever you want to indulge in something truly delicious.

Try Different Types of Fish

While scrambled eggs with smoked trout and crème fraîche is a fantastic combination, you can switch things up by using different types of smoked fish. Smoked salmon is a classic alternative that will add a rich, buttery flavor to your scrambled eggs. For a more adventurous twist, consider using smoked mackerel or even smoked haddock. Each type of fish offers a unique smokiness that will enhance your dish in its own way.

If you’re in the mood for something a bit lighter, you could also try using smoked whitefish, which has a more delicate flavor that won’t overpower the eggs and crème fraîche. This flexibility allows you to tailor your dish based on personal preference or what’s available at your local market.

Adjust the Level of Creaminess

One of the best things about scrambled eggs with smoked trout and crème fraîche is the creamy, indulgent texture. But if you’re looking to customize the richness, feel free to adjust the amount of crème fraîche you use. If you want a lighter version, reduce the crème fraîche slightly or substitute it with Greek yogurt for a tangy twist that still maintains creaminess without the added fat.

Alternatively, for an even richer dish, you could add a small dollop of mascarpone cheese or sour cream along with the crème fraîche. These additions will elevate the texture and flavor, making your scrambled eggs even more decadent.

Add Fresh Vegetables or Greens

For those looking to add a fresh element to their scrambled eggs with smoked trout and crème fraîche, consider folding in sautéed vegetables or fresh greens. Spinach, kale, or arugula can complement the rich eggs and smoked trout, adding a burst of color and a subtle peppery flavor that balances the dish.

You could also include some finely chopped tomatoes or avocado for a creamy, refreshing contrast. These additions not only bring more texture to the dish but also provide a nutritional boost, making it a heartier and more well-rounded meal.

Spice It Up with Seasonings

For a bit of extra flavor in your scrambled eggs with smoked trout and crème fraîche, don’t be afraid to get creative with your seasonings. If you love heat, a pinch of red pepper flakes or a drizzle of hot sauce can add a kick to the dish. You could also sprinkle in a little smoked paprika or fresh black pepper to enhance the smoky flavors of the trout.

Alternatively, fresh herbs like tarragon, basil, or parsley can bring a fragrant, refreshing note to your scrambled eggs. A squeeze of lemon juice or a zest of lemon rind can also bring out the natural flavors of the smoked trout, making your dish even more vibrant and flavorful.

Serve with a Twist

While scrambled eggs with smoked trout and crème fraîche are often served on their own or with a slice of toasted bread, there are plenty of ways to customize how you serve this dish. For a low-carb alternative, serve your scrambled eggs over a bed of sautéed greens or on top of a cauliflower mash. If you prefer a more substantial dish, pair it with a hearty grain like quinoa or farro.

For a truly indulgent brunch experience, you could serve your scrambled eggs alongside roasted potatoes or even a fresh croissant for a more European-style presentation.

Scrambled Eggs with Smoked Trout and Crème Fraîche

Make It Your Own

Ultimately, scrambled eggs with smoked trout and crème fraîche can be tailored to suit any taste. Whether you opt for a different type of fish, add extra vegetables, or adjust the level of creaminess, there are countless ways to make this dish your own. The best part is that it’s versatile enough to work for any occasion, from a casual breakfast at home to an elegant brunch with friends. Don’t be afraid to get creative and experiment with new flavors, textures, and garnishes—you’ll end up with a unique dish that’s perfectly suited to your tastes.

Overcooking Eggs

One of the biggest pitfalls when making scrambled eggs with smoked trout and crème fraîche is overcooking the eggs. The secret to creamy, soft scrambled eggs is low, slow heat. Cooking them too quickly or at too high a temperature leads to a dry, rubbery texture that can ruin the dish.

To ensure the perfect scramble, cook the eggs on low heat, stirring gently and continuously. It’s essential to remove them from the pan just before they are fully set, as they will continue cooking in the residual heat. Aim for a soft, creamy consistency that allows the eggs to meld seamlessly with the smoked trout and crème fraîche.

Pro Tip: Low heat and patience are your best friends when making scrambled eggs. Rushing the process will result in a less-than-ideal texture.

Too Much Crème Fraîche

While crème fraîche is a key ingredient in this dish, adding too much can overwhelm the other flavors. Scrambled eggs with smoked trout and crème fraîche rely on a delicate balance—crème fraîche should enhance the eggs, not overpower them. If you add too much, the eggs may become too heavy and lose their light, fluffy texture.

Start with a small amount, and then taste and adjust as needed. A tablespoon or two is typically enough to create a luxurious, creamy finish without taking away from the smoky richness of the trout.

Pro Tip: A little goes a long way. Add crème fraîche gradually to ensure it doesn’t overpower the eggs.

Tough Smoked Trout

Another mistake to avoid is cooking or storing smoked trout improperly. Scrambled eggs with smoked trout and crème fraîche rely on the delicate texture and flavor of the trout, so it’s important to handle it with care. Overcooking the trout or storing it incorrectly can lead to dry, tough fish that won’t meld well with the eggs.

When cooking smoked trout, only warm it through gently—don’t cook it further. Store smoked trout in the refrigerator and use it within a few days of purchase for the best flavor and texture.

Pro Tip: Treat smoked trout with respect. Gently warm it before incorporating it into your scrambled eggs to preserve its tenderness.

In conclusion, this Easy Scrambled Eggs with Smoked Trout and Crème Fraîche recipe offers a perfect blend of flavors that will elevate your breakfast or brunch. The easy healthy scrambled eggs recipe is not only quick and simple but also adds a touch of gourmet with the creamy texture of crème fraîche and the smoky richness of trout. Whether you’re looking for a nutritious start to your day or a special treat, the Easy Scrambled Eggs with Smoked Trout and Crème Fraîche is sure to become a new favorite in your kitchen.

Plus, for a deeper dive into the nutritional benefits of trout, check out The Benefits of Eating Trout and learn why this flavorful fish is a great addition to your diet.

Can I use smoked trout instead of smoked salmon?

Yes, you can use smoked trout instead of smoked salmon. Both have a similar texture and smoky flavor, but smoked trout tends to be milder and less oily than smoked salmon. It will still work well in recipes that call for smoked salmon, such as scrambled eggs, pasta, or salads. Just keep in mind that the flavor profile may be slightly different, but the dish will still be delicious!

How to make scrambled eggs without browning?

To make scrambled eggs without browning, follow these tips:
Use Low to Medium Heat: Cook the eggs over low to medium heat instead of high heat. High heat can cause the eggs to cook too quickly and brown.
Constant Stirring: Stir the eggs gently and continuously while they cook. This helps them cook evenly without sticking to the pan or getting too brown.
Use Fresh Eggs: Fresh eggs tend to cook more smoothly and evenly, reducing the chances of browning.
Add a Liquid: You can add a splash of milk, cream, or water to your eggs before cooking. This will help create a creamy texture and prevent them from browning.
Use Non-Stick Cookware: A non-stick pan makes it easier to cook scrambled eggs without them sticking or turning brown.
Avoid Overcooking: Remove the eggs from the heat as soon as they are set but still slightly creamy. Overcooking can lead to dry and browned eggs.
By following these tips, you can achieve smooth, creamy scrambled eggs without any browning!

Why are restaurant scrambled eggs so fluffy?

Restaurant scrambled eggs are often fluffier than homemade ones due to several key techniques and ingredients used. Here’s why:
Low and Slow Cooking: Restaurants tend to cook scrambled eggs on low heat, allowing them to cook more slowly and evenly, which results in a creamier texture. This also helps avoid overcooking, which can make eggs dry or rubbery.
Whisking Eggs Thoroughly: In restaurants, eggs are often whisked very well, incorporating air into the mixture. This extra air helps make the eggs fluffier when cooked.
Adding Liquid: Many restaurants add a small amount of liquid—such as milk, cream, or even water—into the egg mixture. This helps create a smoother, fluffier texture by making the eggs less dense.
Use of Butter or Oil: A generous amount of butter or oil is often used for cooking, contributing to the creamy texture of the eggs. The fat also helps prevent the eggs from sticking and drying out.
Cooking in Small Batches: In professional kitchens, eggs are often cooked in small batches rather than all at once. This ensures that each egg is cooked evenly and stays soft and fluffy.
Constant Stirring: Chefs frequently stir the eggs gently while cooking, ensuring they cook evenly and maintain a light, fluffy texture without forming large curds.
Freshness of Ingredients: Fresh eggs are a key factor in the fluffiness of scrambled eggs. Fresher eggs tend to have more moisture and a better texture when cooked.
These factors combined result in scrambled eggs that are much fluffier, creamier, and smoother than those often made at home.

AM Eats

No post found

Top Pumpkin Pie Recipe: Rich, Creamy, and Full of Flavor

For many bakers, condensed milk is the secret to achieving that perfectly smooth texture without the need for heavy cream or additional sugar. Whether you’re looking for a quick fix with an easy pumpkin pie recipe with fresh pumpkin or trying out this condensed milk version, both options are guaranteed to be a hit. Stay tuned as we explore why condensed milk works so well in this pie and how you can make either version your own with a few simple ingredients.

Pumpkin Pie with Condensed Milk

Why Use Condensed Milk in Pumpkin Pie?

The Benefits of Condensed Milk for Texture

When it comes to pumpkin pie with condensed milk, one of the standout advantages is the texture it creates. Condensed milk helps produce a smooth, silky filling that is distinctively creamy compared to traditional pumpkin pie recipes. The condensed milk adds richness, eliminating the need for extra eggs or cream, resulting in a thick, velvety pie filling with perfect density. This luxurious texture ensures every bite of the pie is soft and indulgent, making it feel almost like a custard but with that signature pumpkin spice flavor.

The Sweetness Factor

Another reason pumpkin pie with condensed milk is so beloved is the perfect balance of sweetness it offers. Sweetened condensed milk is a natural sweetener that allows you to reduce the amount of sugar typically used in pumpkin pies. With its concentrated sweetness, you’ll achieve the ideal level of sugar without overwhelming the pie. This subtle sweetness complements the blend of spices in the pie—cinnamon, nutmeg, and ginger—creating a harmonious flavor profile that isn’t too sweet, but just right.

By incorporating condensed milk into your pumpkin pie recipe, you get an incredibly rich flavor without the need to use several different sweeteners. It’s the secret ingredient that ties everything together, bringing out the depth of the pumpkin while enhancing the spices in the most delicious way possible.

Pumpkin Pie with Condensed Milk

Key Ingredients for top Pumpkin Pie recipe with Condensed Milk

Main Ingredients Overview

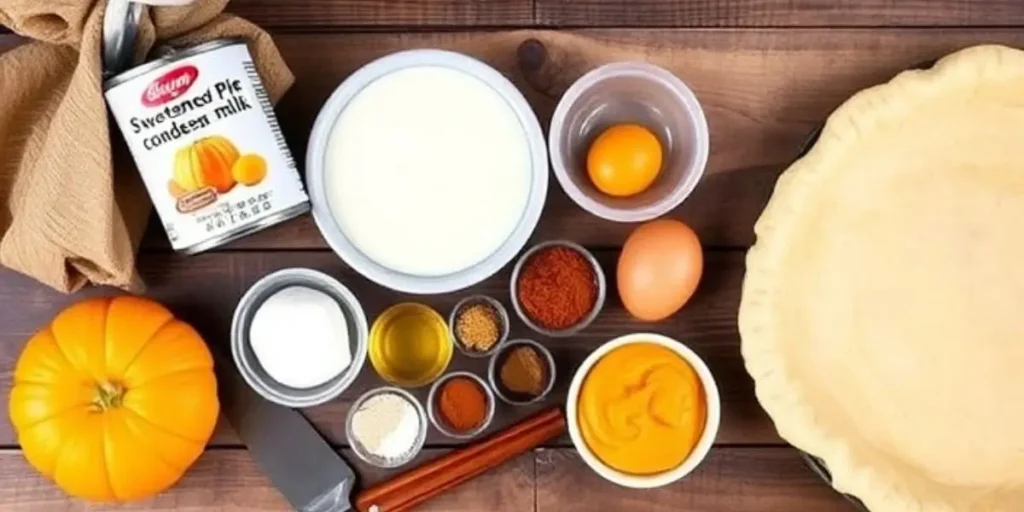
Creating the perfect pumpkin pie with condensed milk starts with the right ingredients. While the recipe is simple, each element plays a crucial role in bringing out the rich flavor and smooth texture that makes this dessert so irresistible. The main ingredients for this recipe include pumpkin puree, sweetened condensed milk, eggs, warm spices, and a buttery pie crust.

  • Pumpkin Puree: The foundation of any pumpkin pie, this ingredient gives the pie its signature flavor and vibrant color. It’s essential to use pure pumpkin puree, not pumpkin pie filling, to ensure you control the flavor and sweetness of your pie.
  • Sweetened Condensed Milk: The star ingredient in this recipe, condensed milk provides that smooth, creamy texture that makes this version of pumpkin pie stand out. It’s naturally sweet, which helps to reduce the amount of sugar you need, making the pie perfectly balanced in flavor.
  • Eggs: Eggs serve as a binder, giving the pie filling structure and richness. They help achieve that perfect custard-like texture that holds the pie together.
  • Spices: The warm spices typically used in pumpkin pie—cinnamon, nutmeg, and ginger—are essential for creating the comforting, aromatic flavor profile. These spices, along with the pumpkin, create that nostalgic fall scent that fills the house as the pie bakes.
  • Pie Crust: Whether you choose a store-bought or homemade crust, it must be buttery and flaky. The crust serves as the perfect base for the creamy filling and complements the richness of the pie.

This combination of ingredients comes together in perfect harmony to create a pumpkin pie with condensed milk that’s rich, smooth, and wonderfully spiced. With just a few simple ingredients, you can create a pie that tastes like it’s been passed down through generations.

Choosing the Right Condensed Milk

Not all condensed milk is created equal, so choosing the right one for your pumpkin pie with condensed milk is important. Sweetened condensed milk is the key ingredient here, and it’s essential to differentiate it from evaporated milk, which is unsweetened and has a different texture. Sweetened condensed milk adds the richness and sweetness needed to make the filling smooth and delicious.

When selecting condensed milk, opt for a high-quality brand for the best results. Look for a brand that lists only milk and sugar as ingredients—this ensures you’re getting pure, flavorful condensed milk without any unnecessary additives. Renowned brands such as Eagle Brand offer reliable quality, making them a favorite choice for achieving the perfect creamy pumpkin pie filling.

Choosing the right condensed milk makes all the difference in achieving the perfect balance of texture and sweetness in your pumpkin pie with condensed milk.

Pumpkin Pie with Condensed Milk

Here’s a simple table of ingredients for your Pumpkin Pie with Condensed Milk recipe:

IngredientAmount
Pumpkin Puree1 ¾ cups (15 oz can)
Sweetened Condensed Milk1 can (14 oz)
Eggs2 large
Ground Cinnamon1 tsp
Ground Nutmeg½ tsp
Ground Ginger½ tsp
Salt¼ tsp
Granulated Sugar¾ cup
Pie Crust (store-bought or homemade)1 (9-inch)

This table outlines the key ingredients to make the creamy, flavorful pumpkin pie with condensed milk. Feel free to adjust based on your preferences or dietary needs!

How to Make Pumpkin Pie with recipe

Step-by-Step Recipe

Making pumpkin pie with condensed milk is easier than you might think, and with a few simple steps, you can create a dessert that’s both comforting and delicious. Follow this easy recipe to bring a homemade pumpkin pie to your table in no time.

Step 1: Set the oven to the right temperature and get your pie crust ready for a flawless pumpkin pie with condensed milk

Begin by preheating your oven to 425°F (220°C). If you’re using a store-bought pie crust, simply place it in your pie dish and set it aside. For homemade crusts, roll out your dough and gently press it into the dish, making sure the edges are crimped to your liking. Once your crust is ready, set it aside while you prepare the filling.

Step 2: Combine Ingredients
In a large mixing bowl, whisk together the pumpkin puree, sweetened condensed milk, eggs, spices (cinnamon, nutmeg, and ginger), and salt. Stir until the mixture is completely smooth and evenly combined. The condensed milk gives the filling its signature smoothness, while the eggs help to bind everything together. The spices infuse the pie with that warm, comforting aroma that defines pumpkin pie.
Step 3: Pour the Filling Into the Crust
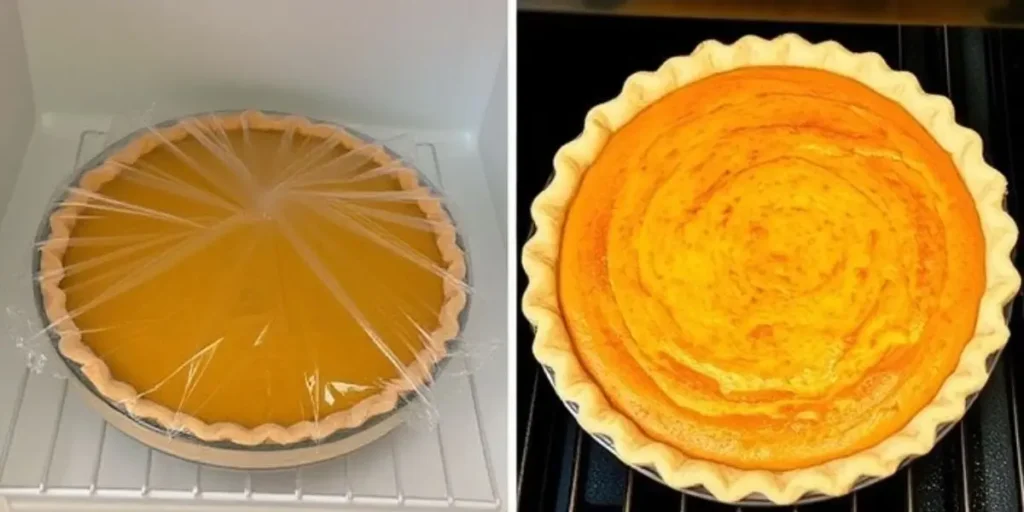
Once your filling is ready, carefully pour it into the prepared pie crust. Use a spatula to gently level the filling, creating a smooth and even surface for your pumpkin pie with condensed milk. Be sure not to overfill the crust, as the pie will puff up slightly while baking.
Step 4: Bake Until Set
Place your pie in the preheated oven and bake for 15 minutes at 425°F. After 15 minutes, reduce the oven temperature to 350°F (175°C) and continue baking for another 40-45 minutes. The pie is done when the filling is set and a knife inserted near the center comes out clean. The edges of the crust should turn a beautiful golden brown.
Step 5: Cool and Serve
Once your pumpkin pie with condensed milk is done baking, remove it from the oven and let it cool completely on a wire rack. Cooling the pie allows the filling to set properly, ensuring a smooth and creamy texture. Once cooled, slice it up and serve with whipped cream or a drizzle of caramel for an extra indulgent touch.
Pumpkin Pie with Condensed Milk

Pro Tips for Perfecting Your Pie

  • Avoid a soggy crust: To prevent the crust from getting soggy, you can blind-bake the pie crust for 5-10 minutes before adding the filling. This creates a protective layer between the crust and the moist filling.
  • Test for doneness: If you’re unsure whether the pie is done, give it a gentle shake. The filling should be set and slightly firm, with minimal jiggle. A knife inserted into the center should come out clean.
  • Add optional toppings: To make your pumpkin pie with condensed milk even more special, top it with a dollop of freshly whipped cream or a drizzle of caramel sauce. You can even sprinkle a bit of cinnamon on top for a festive finish.

Now that you know how to make the perfect pumpkin pie with condensed milk, it’s time to get baking! This easy, creamy pie is bound to become a favorite in your holiday dessert lineup.

Common Mistakes to Avoid When Making Pumpkin Pie with Condensed Milk

Overmixing the Filling

One of the most common mistakes when making pumpkin pie with condensed milk is overmixing the filling. While you may be eager to blend everything perfectly, overmixing can introduce too much air into the mixture, resulting in a filling that’s too light and fluffy rather than smooth and creamy. The goal is to keep the filling dense and rich, not airy. Overmixing can also cause the pie to puff up more than desired during baking, affecting its texture.

To avoid this, mix the ingredients gently until they’re just combined. A few stirs will be enough to achieve the right consistency for your pumpkin pie with condensed milk.

Not Allowing the Pie to Cool Completely

It’s tempting to cut into your pumpkin pie with condensed milk as soon as it comes out of the oven, especially when your kitchen smells so inviting! However, cutting the pie before it’s fully cooled can result in a messy slice with a runny filling. The filling needs time to set properly, and if you slice it too soon, the texture can suffer.

Allow the pie to cool on a wire rack for at least two hours before cutting. This gives the filling time to firm up and makes slicing much easier. If you prefer a firmer texture, you can refrigerate the pie overnight and serve it chilled.

Using the Wrong Type of Milk

Another mistake is confusing sweetened condensed milk with evaporated milk or regular milk. Sweetened condensed milk is the key to making your pie creamy and sweet, so using the wrong type of milk will throw off the texture and flavor of the pie. Evaporated milk is unsweetened and will not provide the same rich consistency that sweetened condensed milk delivers.

Make sure you’re using sweetened condensed milk for the best results in your pumpkin pie with condensed milk. It’s the secret ingredient that helps create that smooth, velvety filling.

Skipping the Spice Balance

Spices are what give pumpkin pie with condensed milk its signature flavor, but it’s easy to go overboard or leave them out entirely. The blend of cinnamon, nutmeg, and ginger should be perfectly balanced to enhance the pumpkin’s flavor without overpowering it. Too much spice can make the pie taste bitter, while too little can result in a bland dessert.

Stick to the recommended amounts or adjust the spices to suit your taste. A balanced spice mixture will ensure your pumpkin pie with condensed milk has the warm, cozy flavors that everyone loves.

Underbaking or Overbaking the Pie

Achieving the right texture for your pumpkin pie with condensed milk depends on getting the baking time just right. Underbaking can leave the filling too soft and unset while overbaking can cause the edges of the crust to burn and the filling to become dry. The key is to bake the pie at the right temperature and for the right amount of time.

To check for doneness, gently shake the pie. The filling should be set but still slightly jiggle in the center. A knife inserted close to the center should emerge clean. This ensures your pie is perfectly cooked and ready for slicing.

By avoiding these common mistakes, your pumpkin pie with condensed milk will come out perfectly every time—creamy, smooth, and full of flavor!

Pumpkin Pie with Condensed Milk

Variations of Pumpkin Pie with Condensed Milk

Gluten-Free Pumpkin Pie

For those following a gluten-free diet, you can still enjoy the creamy goodness of pumpkin pie with condensed milk. Simply swap out the traditional pie crust for a gluten-free version. Many gluten-free pie crusts are available at grocery stores, but you can also make your own using gluten-free flour, butter, and a bit of sugar for a sweet, crumbly base. The pie filling will remain the same, and you’ll still enjoy that smooth, custardy texture that makes pumpkin pie with condensed milk so irresistible.

This easy swap ensures that everyone can indulge in a slice of pumpkin pie, regardless of dietary preferences!

Vegan Pumpkin Pie

If you’re looking for a dairy-free or vegan alternative to traditional pumpkin pie, it’s simple to adapt your pumpkin pie with condensed milk recipe. The key substitution here is using vegan sweetened condensed milk. There are several brands of dairy-free condensed milk available in stores, often made from coconut or almond milk. Additionally, you can replace the eggs with flax eggs (a mixture of ground flaxseed and water) or chia seeds to maintain the texture of the pie.

This vegan version allows everyone to enjoy the rich, smooth filling without compromising on flavor or texture. Plus, it’s a great way to cater to different dietary needs while still serving up a classic dessert!

Spiced-Up Versions

While pumpkin pie with condensed milk already has a delicious blend of cinnamon, nutmeg, and ginger, why not take things up a notch with some additional spices? For a unique twist, consider adding a pinch of cloves, cardamom, or allspice to the filling. These spices can add depth and complexity to the flavor, giving your pumpkin pie with condensed milk a slightly different kick without overpowering the traditional taste.

If you’re feeling adventurous, you could even experiment with a splash of bourbon or maple syrup in the filling for an extra layer of flavor. The possibilities are endless when it comes to spicing up your pumpkin pie, so feel free to get creative!

Pumpkin Pie Bars

For a fun twist on the classic pie, consider making pumpkin pie with condensed milk in bars instead of a traditional pie. You can use the same filling and pour it into a baking pan, then bake it for a shorter period, cutting it into squares once it’s cooled. This is a great option for parties or gatherings where people can easily grab a bite without needing a slice of pie. The crust can be pre-baked, and the filling can be poured directly on top for a simple yet delicious treat.

These pumpkin pie bars are just as tasty as the classic pie, but they offer a convenient and portable alternative that still brings that rich, creamy flavor of pumpkin pie with condensed milk.

With these variations, you can customize your pumpkin pie with condensed milk to suit different tastes and dietary preferences, while still enjoying the comforting flavors of fall. Whether you’re making it gluten-free, vegan, or just adding some extra spices, there’s no wrong way to enjoy this beloved dessert.

Storing and Reheating Pumpkin Pie recipe

How to Store Your Pie

Once your pumpkin pie with condensed milk is baked to perfection, you might find yourself with some leftovers—or perhaps you made it ahead of time for a special occasion. Either way, knowing how to store it properly will help maintain its flavor and texture.

To store your pumpkin pie with condensed milk, allow it to cool completely at room temperature before covering it with plastic wrap or aluminum foil. Store the pie in the refrigerator for up to 4 days to maintain its freshness. The cool temperature helps the filling maintain its smooth, creamy texture, and the spices will only get better with time.

If you’re planning to keep your pie for a longer period, you can also freeze it. Wrap the pie tightly in plastic wrap, then aluminum foil, and store it in the freezer for up to a month. When you’re ready to enjoy it again, simply thaw the pie overnight in the refrigerator before reheating.

Reheating Tips

Reheating pumpkin pie with condensed milk is simple, but there are a few tricks to ensure the pie retains its original texture and flavor. When reheating, it’s important not to overheat the pie, as this can cause the filling to dry out or become too runny.

To reheat your pumpkin pie with condensed milk, preheat your oven to 350°F (175°C). Set the pie on a baking sheet and loosely cover it with aluminum foil to protect the crust from burning. Bake for 10-15 minutes, or until fully heated. If you’re reheating a single slice, you can microwave it for 20-30 seconds, but be cautious as this can affect the texture of the filling if overheated.

For an extra touch, you can top your reheated pie with fresh whipped cream or a drizzle of caramel sauce to bring back that freshly made feel. The goal is to enjoy that same creamy, flavorful pumpkin pie with condensed milk that everyone loves!

Knowing how to properly store and reheat your pumpkin pie with condensed milk ensures that each bite will be just as delicious as the first. Whether you’re savoring leftovers or preparing a pie ahead of time, these simple tips will help keep your pie fresh and flavorful for days to come.

top Pumpkin Pie recipe with Condensed Milk

Embrace the Sweetness of Pumpkin Pie with Condensed Milk

Making a pumpkin pie with condensed milk is a surefire way to bring comfort and warmth to your kitchen. This easy recipe enhances the classic pumpkin pie with a smooth, creamy texture and the perfect amount of sweetness, thanks to the sweetened condensed milk. Whether you’re baking for the holidays or simply craving a delicious fall treat, this version of pumpkin pie will be a hit with friends and family alike.

From the rich flavor to the velvety filling, every bite of pumpkin pie with condensed milk will remind you why this dessert has been a holiday favorite for generations. With the added benefits of condensed milk, your pie will be smooth, creamy, and perfectly sweet—just the way it should be!

Now that you have all the tools to make a mouthwatering pumpkin pie with condensed milk recipe, it’s time to get baking! Don’t hesitate to add your twist with a variety of spices or toppings like whipped cream, caramel drizzle, or a dash of cinnamon. The possibilities are endless, and the best part is making it your own. We’d love to hear about your variations—drop a comment below and share your tips or tweaks!

For more holiday recipe inspiration, check out our guide on How to Make the Perfect Christmas Bundt Cake: A Festive Holiday Recipe. It’s another delightful dessert that’s sure to impress at your next holiday gathering.

When it comes to the holidays, the sweet comfort of pumpkin pie with condensed milk is always a winner. Don’t forget to share your creations and enjoy the compliments that will surely follow!

Trusted Resources for Holiday Baking Tips

For more trusted advice on pie baking and holiday desserts, visit Food Network for expert tips and recipes

How to make pumpkin pie look pretty?

Crimp the edges of the crust.
Use a lattice crust.
Add whipped cream or cream cheese topping.
Sprinkle with cinnamon or nutmeg.
Garnish with pumpkin seeds or edible flowers.
Serve with a side of fruit.
Use a beautiful pie dish.
Brush with an egg wash.
Choose a unique shape.
Ensure even baking.1

Should pumpkin pie be warm or cold?

Pumpkin pie can be served both warm or cold, depending on personal preference:
Warm: Many people enjoy pumpkin pie warm, right out of the oven or after reheating, as it enhances the spices and gives a comforting feeling.
Cold: Some prefer it chilled, especially after letting it set in the refrigerator, which allows the filling to firm up and makes slicing easier.
Ultimately, it’s up to you and your guests!

Can i make pumpkin pie with honey instead of sugar?

Yes, you can make pumpkin pie with honey instead of sugar. Here’s how:
Use Less Honey: Honey is sweeter than sugar, so you’ll need to use about 3/4 cup of honey for every 1 cup of sugar.
Reduce Liquids: Since honey adds moisture, reduce the amount of liquid in the recipe (like milk or cream) by about 1/4 cup to maintain the right consistency.
Adjust Baking Time: Honey can cause the pie to bake faster, so keep an eye on it and check for doneness slightly earlier.
Flavor Change: Honey will add a different flavor profile, so the taste of the pie will have a slight honey flavor instead of the usual sweetness from sugar.
This substitution works well for a slightly different taste but still delicious pumpkin pie!

AM Eats

No post found
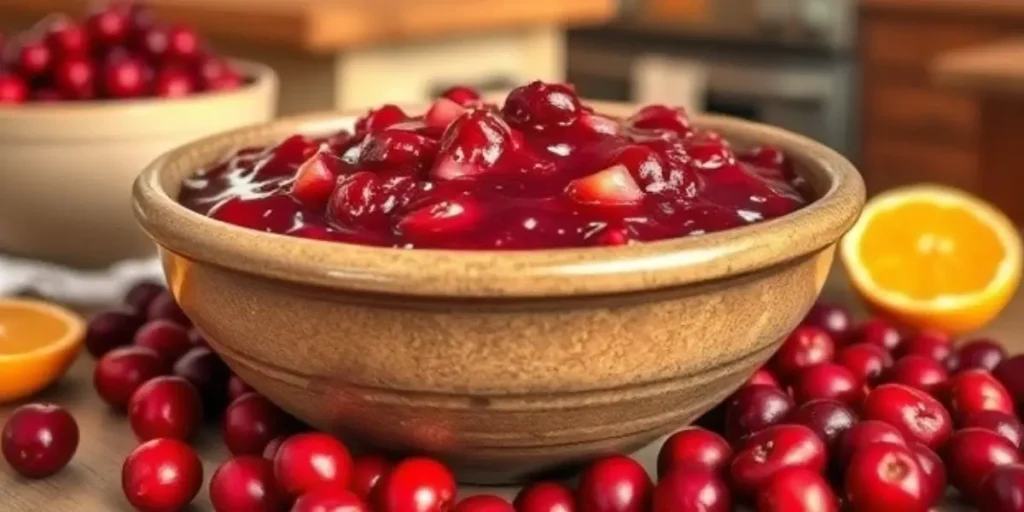
Homemade Cranberry Sauce

Homemade Cranberry Sauce

The Allure of Homemade Cranberry Sauce

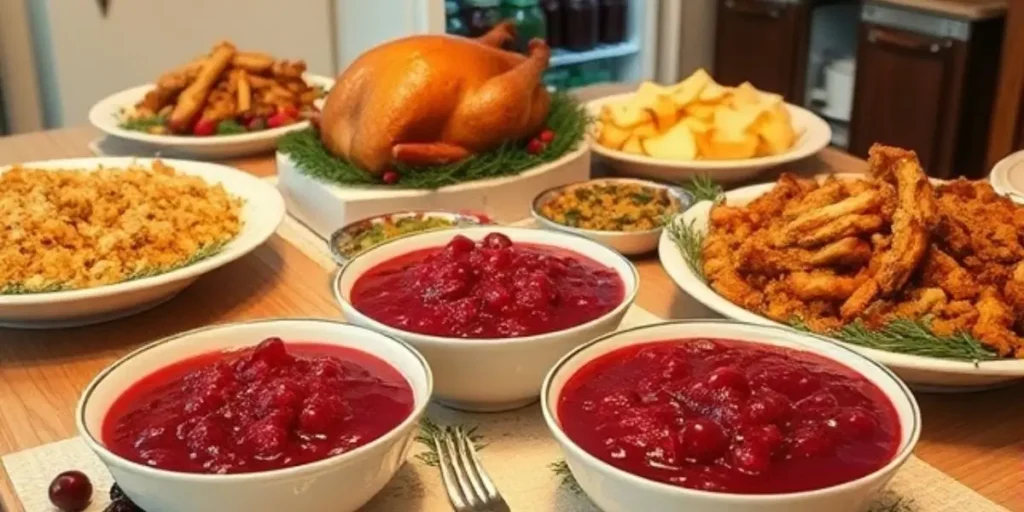
Cranberry sauce is a beloved classic at American holiday tables, particularly around Thanksgiving and Christmas. But while many are familiar with the store-bought variety, there’s nothing quite like homemade cranberry sauce. The flavor is fresher, the texture is customizable, and the ability to control sweetness allows you to make a version that’s perfect for your tastes. Whether you love it tart, sweet, or with a twist of citrus, homemade cranberry sauce can elevate any holiday spread.

Making cranberry sauce at home isn’t just about flavor – it’s about creating something truly special. When you prepare homemade cranberry sauce, you get to decide exactly how it should taste. No more settling for a jar of cranberry sauce packed with preservatives and extra sugar. With a few simple ingredients, you can make a sauce that complements your meal beautifully. Plus, it’s incredibly easy to whip up, even for beginners in the kitchen.

In this guide, we’ll walk you through the steps to create your homemade cranberry sauce, explore ways to customize it with fun flavors and share tips for perfecting it every time. So, if you’re ready to ditch the canned version and make the best cranberry sauce from scratch, keep reading! You’ll soon discover why homemade cranberry sauce is the ultimate addition to any holiday meal

Table of Contents

Why Make Homemade Cranberry Sauce?

Healthier & Fresher Option

When it comes to holiday meals, freshness matters. Homemade cranberry sauce offers a healthier alternative to the store-bought varieties, which often contain preservatives and excess sugar. By making your own cranberry sauce, you can control exactly what goes into it, ensuring that you’re using high-quality, natural ingredients. Fresh cranberries, a bit of natural sweetener, and a splash of fresh juice are all you need to create a vibrant, flavorful sauce that brings out the best in your holiday dishes.

Not only does homemade cranberry sauce taste better, but it’s also much more nutritious. Cranberries are packed with antioxidants, vitamins, and fiber, which are often lost in commercial versions due to processing. When you make cranberry sauce from scratch, you’re preserving all those beneficial nutrients, making it a healthier addition to your holiday spread.

Versatility in Flavor

One of the best things about homemade cranberry sauce is its versatility. Unlike the canned versions, which tend to have a one-size-fits-all flavor, homemade cranberry sauce can be easily customized to suit your tastes. Whether you prefer it extra sweet, tangy, or with a hint of spice, the possibilities are endless.

Customizable Add-ins

You can experiment with a variety of add-ins to make your homemade cranberry sauce unique. For example, orange zest or juice adds a bright, citrusy note that balances the tartness of the cranberries. Cinnamon, ginger, or cloves bring warmth and depth, perfect for a cozy, holiday feel. You might even consider adding a splash of liquor, like rum or brandy, for an adult twist on the classic. With homemade cranberry sauce, the choice is yours, allowing you to create a version that’s perfectly tailored to your preferences.

Easy to Make

Another great reason to make cranberry sauce at home is how incredibly easy it is. If you’re worried about complicated recipes or time-consuming preparation, fear not. Making homemade cranberry sauce requires only a few simple steps. With just a handful of ingredients, you can prepare this dish in under 30 minutes, making it the perfect addition to your holiday menu. Plus, the satisfaction of serving up something made from scratch adds a personal touch to your meals. So why settle for canned when you can create a fresher, more flavorful homemade cranberry sauce?

Homemade Cranberry Sauce

Ingredients for Homemade Cranberry Sauce

The Essentials

Creating the perfect homemade cranberry sauce starts with just a few key ingredients. Each one plays an important role in delivering the sweet, tangy, and vibrant flavors that make this dish a holiday favorite.

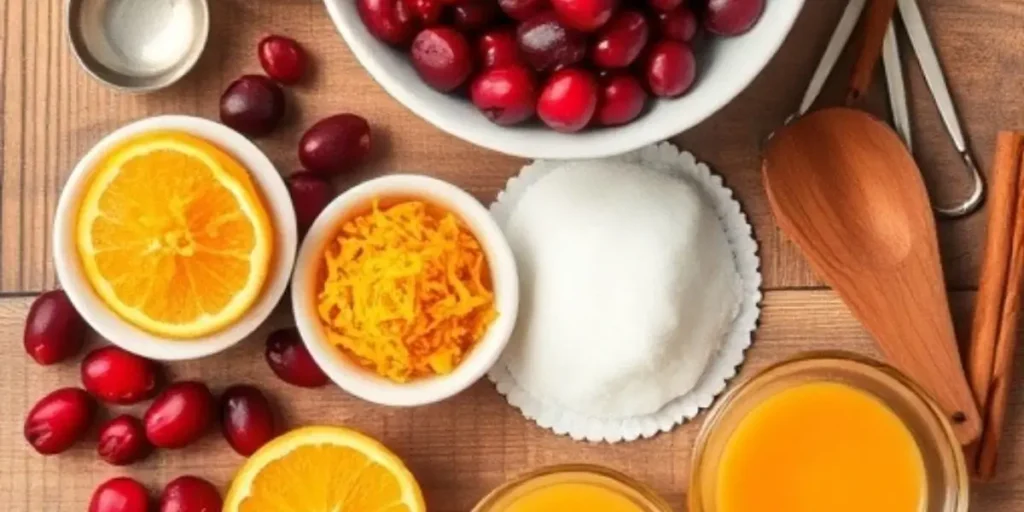
  • Fresh Cranberries: The star of the show, fresh cranberries bring bold color and tartness to your sauce. Look for firm, bright-red berries for the best results. Frozen cranberries can also be used, but fresh ones yield the most vibrant flavor.
  • Sweeteners: To balance the natural tartness of cranberries, sweeteners are a must. Granulated sugar is the most common choice, but you can also use honey, maple syrup, or a combination for a more complex flavor profile.
  • Liquid Base: Water is a classic choice, but swapping it with orange juice or apple cider can add an extra layer of flavor. Juice brings sweetness and acidity that complement the cranberries beautifully.

Optional Flavor Add-ins

Homemade cranberry sauce is highly customizable, and experimenting with flavor add-ins can elevate it to new levels.

  • Orange Juice or Zest: For a refreshing citrus twist, add freshly squeezed orange juice or a sprinkle of orange zest. The brightness pairs perfectly with the cranberries’ tartness.
  • Warm Spices: Add depth with cinnamon sticks, cloves, or ground ginger. These spices bring a festive warmth to the dish, making it ideal for holiday meals.
  • Vanilla Extract: A small splash of vanilla extract can add a touch of sweetness and round out the flavors.
  • Liquor or Liqueurs: For a more sophisticated flavor, consider adding a splash of rum, brandy, or Grand Marnier. This subtle addition adds complexity without overpowering the sauce.

Balancing Flavors

When assembling the ingredients for your homemade cranberry sauce, remember that balance is key. Personalize the balance of sweetness, tanginess, and spice to create a cranberry sauce that perfectly complements your holiday table. A taste test during the cooking process will help you achieve the perfect blend.

Pro Tip: Keep it simple for your first batch, then experiment with add-ins as you gain confidence. Homemade cranberry sauce is forgiving and fun to customize!

IngredientQuantityNotes
Fresh cranberries12 oz (approximately 3 cups)Rinse and pick out any soft or discolored berries.
Granulated sugar1 cupAdjust to taste; substitute with honey or maple syrup if desired.
Water (or orange juice)1 cupUse orange juice for added citrus flavor.
Orange zest1 tspOptional; adds brightness and depth.
Cinnamon stick1 stickOptional; substitute with ½ tsp ground cinnamon.
Ground cloves⅛ tspOptional; a little goes a long way.
Vanilla extract½ tspOptional; adds subtle sweetness.
Rum or brandy (optional)1 tbspAdds a rich, festive twist.

This table provides a clear, organized list of ingredients and allows for easy reference while preparing the recipe.

Homemade Cranberry Sauce

How to Make Homemade Cranberry Sauce

Step 1: Prepare the Cranberries

Start by rinsing the fresh cranberries under cold water, removing any stems or soft, discolored berries. Ensuring the cranberries are clean and vibrant sets the foundation for a flavorful homemade cranberry sauce.

Step 2: Combine Ingredients

In a medium-sized saucepan, combine your fresh cranberries, sweetener, and liquid base. For a classic flavor, use water and granulated sugar. If you’re feeling adventurous, swap the water for orange juice to add a bright, citrusy twist. Warm the mixture over medium heat, allowing it to reach a gentle simmer while stirring periodically.

Step 3: Cook the Sauce

As the mixture simmers, you’ll notice the cranberries beginning to pop open, releasing their natural juices. This process takes about 10 minutes. Stir frequently to prevent sticking, and adjust the heat as needed to maintain a gentle simmer. If you’re adding spices, like a cinnamon stick or cloves, now is the time to include them.

Step 4: Customize Your Flavor

Once the cranberries have softened and the sauce has thickened, it’s time to customize. Add your chosen flavor boosters, such as orange zest, vanilla extract, or a splash of rum for a festive twist. Taste the sauce and adjust the sweetness or acidity to your liking.

Step 5: Let It Cool

Take the saucepan off the heat and allow the cranberry sauce to cool to room temperature. During the cooling process, it will naturally thicken, achieving its signature texture. Once cooled, transfer the sauce to a serving bowl or store it in an airtight container.

Pro Tip: If you prefer a smoother texture, use an immersion blender to puree the sauce before cooling. To maintain a chunkier texture, simply leave the sauce unblended.

Homemade Cranberry Sauce

Storing and Serving Homemade Cranberry Sauce

How to Store Cranberry Sauce

Once you’ve prepared your homemade cranberry sauce, proper storage is essential to maintain its freshness and flavor. If you’re serving it within a day or two, transfer the cranberry sauce to an airtight container and store it in the refrigerator. Homemade cranberry sauce can be refrigerated for up to a week, making it a convenient dish to prepare ahead of time for holiday meals.

For longer storage, freezing is a great option. Spoon the cooled cranberry sauce into a freezer-safe container or a resealable plastic bag, removing as much air as possible. Label it with the date, and it can be stored in the freezer for up to three months. To use, simply thaw it in the refrigerator overnight and give it a quick stir before serving.

Pro Tip: When freezing, portion your cranberry sauce into smaller containers. This way, you can thaw only what you need, reducing waste and preserving the rest for future meals.

Creative Ways to Serve Homemade Cranberry Sauce

Homemade cranberry sauce isn’t just for turkey! While it shines on the Thanksgiving table, there are plenty of other ways to enjoy this versatile dish.

  • Classic Pairings: Serve your cranberry sauce alongside roasted turkey, ham, or chicken for a traditional holiday spread.
  • Cheese Platters: Use it as a sweet and tangy complement to creamy brie, sharp cheddar, or goat cheese on a festive cheese board.
  • Sandwich Spread: Slather cranberry sauce onto leftover turkey or ham sandwiches for a burst of flavor.
  • Dessert Topping: Drizzle it over cheesecake, ice cream, or pound cake to add a tart and fruity kick.
  • Breakfast Boost: Mix cranberry sauce into yogurt, and oatmeal, or spread it on toast for a refreshing morning treat.

By thinking beyond the holiday table, you’ll discover endless ways to incorporate homemade cranberry sauce into your meals year-round.

Pro Tip: Pair your cranberry sauce with complementary dishes to create a cohesive flavor profile. For example, cranberry sauce with a hint of orange zest pairs beautifully with citrus-glazed chicken or roasted root vegetables.

Final Thoughts on Serving

Homemade cranberry sauce is not only delicious but also incredibly versatile. Whether you’re hosting a grand holiday feast or simply adding a special touch to everyday meals, this flavorful sauce will never disappoint. Its vibrant color and bold taste make it a standout addition to any plate, ensuring your culinary efforts shine.

Homemade Cranberry Sauce

The Sweet Simplicity of Homemade Cranberry Sauce

Homemade cranberry sauce is more than just a side dish—it’s a tradition that brings warmth and flavor to your holiday table. From its rich, tangy taste to its vibrant color, this simple yet elegant recipe has the power to elevate any meal. By making it yourself, you can enjoy the freshness, customization, and sense of accomplishment that come with serving something made from scratch.

Whether you’re pairing it with turkey, spreading it on leftover sandwiches, or using it to brighten up a dessert, homemade cranberry sauce is as versatile as it is delicious. Plus, with its easy preparation and ability to store well, it’s a stress-free addition to your holiday planning.

Looking for more ways to enhance your holiday spread? Pair your cranberry sauce with a slice of pumpkin pie with condensed milk for the ultimate sweet and tart combination. These two classics together create a memorable dessert table that will impress your guests. You can check out this Thanksgiving Cranberry Saucey Saucecipes for more holiday recipe inspiration.

Why opt for the store-bought version when you can craft something homemade and truly exceptional? With this guide, you’re ready to whip up a batch of homemade cranberry sauce full of flavor and perfectly tailored to your taste. Try it this holiday season and make your meals even more unforgettable!

Lunch Break Bliss

No post found
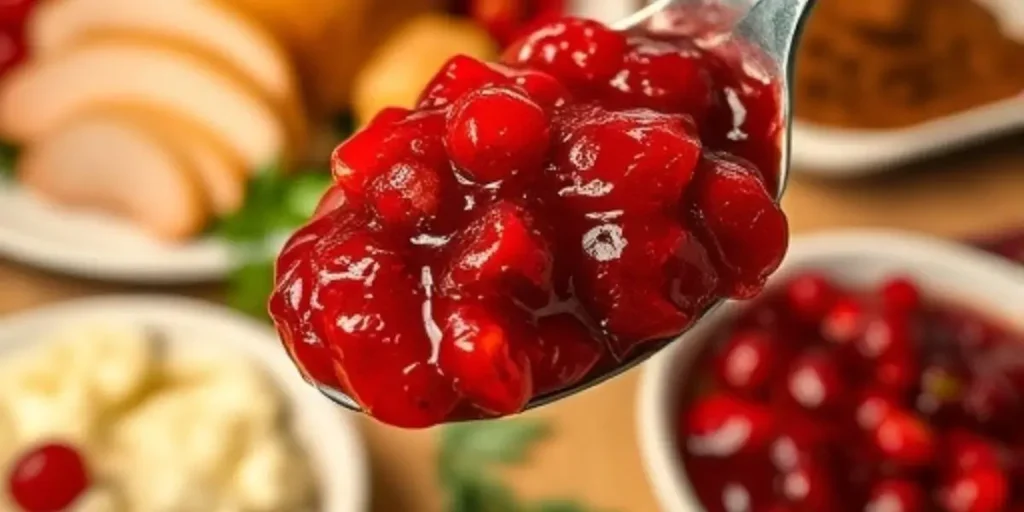
5-Star Garlic Butter Steak Bites with Decadent Parmesan Cream Sauce

Let me tell you about the steak dish that changed my weeknight dinner game. It’s not fussy. It doesn’t require fancy techniques. But something magical happens when those juicy, garlicky steak bites hit the table. The kids stop complaining about homework. My partner puts down his phone. For a few beautiful minutes, there’s just the sound of forks scraping plates and the occasional satisfied sigh. (Garlic Butter Steak Bites)
garlic butter steak bites with parmesan cream sauce
garlic butter steak bites with parmesan cream sauce recipe

Why This Works When You’re Tired and Hungry


We’ve all been there – it’s 6 PM, everyone’s cranky, and takeout sounds tempting. Here’s why I reach for this recipe instead:

  • 30 minutes is all you need (less time than delivery would take)
  • One pan does all the work (more time for that glass of wine you deserve)
  • It feels indulgent without being complicated (that sauce could make shoe leather taste good)
  • Leftovers reinvent beautifully (next-day steak and eggs? Yes, please)

The Steak Situation(Garlic Butter Steak Bites)

Here’s my no-stress approach:

  1. Any decent steak works – Filet’s great if you’re feeling fancy, but sirloin gets the job done
  2. Cutting it small means it cooks fast and stays tender
  3. That 10-minute rest after seasoning isn’t optional – it’s the difference between “good” and “where has this been all my life?”

Confession About the Garlic


The recipe calls for 10 cloves, but sometimes, I use 12. Judge me if you must, but when that garlic hits the butter and the scent wafts through the house, even the teenagers emerge from their caves to investigate. It’s nature’s best dinner bell.

The Sauce That’ll Make You a Legend


Here’s the truth – people will rave about the steak, but it’s the sauce that keeps them coming back. A few pro tips:

  • Keep the heat low when adding the cream – nobody wants scorched dairy
  • Freshly grated parmesan melts better than the pre-shaken stuff
  • That splash of pasta water you saved? It’s good for adjusting consistency

What I Wish I Knew Earlier

  • Mise en place matters – Have everything chopped and measured before you start
  • The potatoes can wait – They hold heat better than the steak holds doneness
  • Double the sauce – Because someone will inevitably “just taste” half of it

When Life Gives You Variations

  • No heavy cream? Half-and-half works in a pinch
  • Vegetarian version? King oyster mushrooms are shockingly steak-like
  • Extra veggies? Toss in some spinach at the end – it wilts beautifully
Garlic Butter Steak Bites

The Real Magic


This isn’t just food. It’s the kind of meal that makes an ordinary Wednesday feel like an occasion. It’s what I make when I want to say “I love you” without being sappy about it. And it’s proof that great cooking doesn’t require fancy skills – just good ingredients and the willingness to use an entire head of garlic without apology.

So go ahead – make it tonight. Then watch as the plates empty faster than you thought possible. That contented silence around the table? That’s your new favorite sound.
How to make garlic butter steak bites with parmesan cream sauce

garlic butter steak bites with parmesan cream sauce

Garlic Butter Steak Bites with Parmesan Cream Sauce

Jasper wellspring
Juicy steak bites in garlic-Parm cream sauce—30 min, one pan, restaurant-worthy! Perfect over mashed potatoes or pasta. #SteakLovers
Prep Time 10 minutes
Cook Time 30 minutes
Total Time 40 minutes
Course Main Course, Snack
Cuisine American, International
Servings 4
Calories 520 kcal

Ingredients
  

Ingredients:

For the Steak Bites:

  • 1.5 lb sirloin steak cut into 1-inch cubes
  • Salt and black pepper to taste
  • 1 tbsp olive oil
  • 2 tbsp unsalted butter
  • 4 cloves garlic minced
  • 1 tsp Italian seasoning
  • 1 tbsp fresh parsley chopped, for garnish

For the Parmesan Cream Sauce:

  • 2 tbsp unsalted butter
  • 2 cloves garlic minced
  • 1 cup heavy cream
  • ½ cup grated Parmesan cheese
  • Salt and pepper to taste
  • 1 tsp cornstarch + 2 tbsp water optional, for thickening

Instructions
 

Instructions:

    For the Steak Bites:

    • Season the steak bites with salt, pepper, and Italian seasoning.
    • Heat olive oil in a large skillet over medium-high heat.
    • Add steak cubes in a single layer and sear for 2-3 minutes per side, until browned and cooked to your preferred doneness.
    • Add butter and minced garlic to the pan. Stir and cook for another 1-2 minutes until garlic is fragrant.
    • Remove steak bites from pan and set aside.

    For the Parmesan Cream Sauce:

    • In the same pan, melt 2 tbsp butter over medium heat.
    • Add 2 cloves garlic and sauté for 30 seconds.
    • Pour in the heavy cream and bring to a gentle simmer.
    • Stir in Parmesan cheese and cook until the sauce thickens slightly (about 3–4 minutes).
    • Optional: For a thicker sauce, stir in the cornstarch slurry and simmer for 1 minute.
    • Season with salt and pepper to taste.

    To Serve:

    • Return steak bites to the pan and toss them gently in the sauce.
    • Garnish with fresh parsley and serve hot with mashed potatoes, pasta, or steamed veggies.

    Frequently Asked Questions

    How to make garlic butter steak?

    Garlic Butter Steak in 3 Steps:
    Season steak (salt/pepper), sear 3-5 mins per side in hot pan.
    Add 2 tbsp butter, 3 garlic cloves (crushed), and thyme to the pan.
    Baste steak with melted garlic butter for 1-2 minutes. Rest & serve
     Use cast iron for a perfect crust.

    How can you make garlic butter?

     to Make Garlic Butter (3-Ingredient Recipe)
    Soften ½ cup (1 stick) unsalted butter to room temp.
    Mix with 3 minced garlic cloves + 1 tbsp chopped parsley.
    Season with salt & pepper.
    Optional Boosters:
    Lemon zest
    Red pepper flakes
    Grated Parmesan

    What kind of steak is best for steak bites?

    Best Steaks for Bites (Juicy & Tender!)
    Ribeye – Marbled fat = ultra-juicy bites (splurge-worthy)
    Sirloin – Lean but flavorful (budget-friendly)
    Filet Mignon – Butter-tender (perfect for special occasions)
    Flat Iron – Affordable + great beefy flavor
    Avoid: Tougher cuts like round or flank (better for slow cooking).
    Pro Tip: Cut against the grain for maximum tenderness!

    What to marinate steak bites in?

    Best Steak Bite Marinades (Fast & Flavorful!):
    Garlic-Soy: 2 tbsp soy sauce + 1 tbsp minced garlic + 1 tsp honey
    Spicy Lime: Juice of 1 lime + 1 tsp chili powder
    Italian Dressing: ¼ cup store-bought (lazy hack!)
    Marinate 30 mins – 2 hours.

    Don’t miss out—follow us on social media for updates:

    The Noodle Dish That Will Make You Excited to Cook on a Weeknight

    Let’s be real – most “quick and easy” dinner recipes lie to us. They promise flavor but deliver sadness. But this? This Peanut Lime Chicken Noodles Recipe situation is different. It’s the kind of meal that makes you text your roommate like “omg you have to try this” while you’re still chewing the first bite.

    Peanut Lime Chicken Noodles Recipe

    Why This Works When You’re Tired and Hangry

    • That sauce. Ohhhh that sauce. It’s creamy from peanut butter, zingy from lime, with just enough heat to keep things interesting. You’ll want to drink it.
    • Minimal chopping (we’re talking like… 5 minutes of actual work)
    • Uses pantry staples (no hunting for obscure ingredients at 6 pm)
    • Leftovers taste even better (hello, next-day lunch win)

    Grocery List for People Who Hate Grocery Lists


    Grab these next time you’re at the store:

    • Chicken (breasts or thighs – your call)
    • Rice noodles (or whatever noodles are already in your cabinet)
    • Peanut butter (the cheap kind works fine)
    • Lime (please don’t use the plastic bottle juice)
    • A bell pepper (red looks prettier, but any color tastes fine)
    • Garlic and ginger (the pre-minced stuff in jars is allowed)
    • Cilantro, if you’re into it (if you’re a soap-taste person, skip it)
    • Peanuts (because crunchy bits make everything better)

    How to Make Peanut Lime Chicken Noodles Recipe

    1. Boil noodles like the package says. Drain them. Easy.
    2. Mix peanut butter, soy sauce, lime juice, sriracha, and a splash of water in a bowl. Taste it. Adjust until you go “oh damn that’s good.”
    3. Cook chicken in a pan until it’s no longer pink. Add peppers and garlic.
    4. Throw noodles and sauce in the pan. Stir until everything’s coated and happy.
    5. Top with all the crunchy/pretty things (peanuts! herbs! more lime!)

    Real Talk Tips from Someone Who Messes This Up So You Don’t Have To

    • If your sauce seems too thick, add a splash of the noodle cooking water
    • No fresh ginger? Powder works in a pinch
    • Forgot to buy chicken? Tofu or shrimp work great too
    • If you burn the garlic (we’ve all been there), start that part over

    The Best Part


    This isn’t a ” healthy-ish ” recipe that tastes like punishment. It’s delicious, like “why would I order takeout when I can make this?” delicious. And it’s flexible enough that you can tweak it based on what’s already in your fridge.

    Make it tonight. Thank yourself tomorrow when you’re eating the leftovers cold straight from the container. We don’t judge here.

    Instructions for creamy peanut lime chicken with noodles​

    peanut lime chicken with noodles​

    Savory peanut sauce meets zesty lime and tender chicken in this 30-minute flavor bomb. Perfectly balanced with a spicy kick, crunchy peanuts, and fresh herbs, easier than takeout and way more satisfying. Weeknight dinner solved

    Step 1: Cook the Noodles

    best Creamy Peanut-Lime Chicken With Noodles

    Boil noodles like the package says. Drain them. Easy.

    Step 2: Prepare the Sauce

    easy Peanut-Lime Chicken With Noodles recipe

    Mix peanut butter, soy sauce, lime juice, sriracha, and a splash of water in a bowl. Taste it. Adjust until you go

    Step 3: Cook the Chicken

    creamy peanut-lime chicken with noodles​

    Cook chicken in a pan until it’s no longer pink. Add peppers and garlic.

    Step 4: Combine Everything

    Thai-Inspired Creamy Peanut Chicken Noodles

    Throw noodles and sauce in the pan. Stir until everything’s coated and happy.

    Step 5: Garnish and Serve

    Plate the peanut lime chicken noodles and garnish with chopped peanuts, fresh cilantro, and a lime wedge for extra zest. Serve immediately and enjoy your flavorful dish!

    Top with all the crunchy/pretty things (peanuts! herbs! more lime!)

    FAQs: Get the Answers You Need

    Does peanut butter taste good in noodles?

    Peanut butter makes noodles rich, creamy, and packed with savory-sweet flavor—like a next-level upgrade to boring pasta. Combined with lime, chili, and soy, it’s the addictive sauce base in dishes like pad Thai or dan dan noodles. If you like satay or PB&J, you’ll love it here. Just think of it with a splash of hot water or broth so it coats every strand perfectly.

    Why add peanut butter to noodles?

    Yes! Peanut butter adds rich, creamy depth to noodles, balancing spicy/savory flavors. It’s the secret to restaurant-style sauces (like in pad Thai) and makes boring noodles irresistible with just 2-3 ingredients. Try it!

    Can you eat chicken with noodles?

    Yes! Chicken and noodles are a classic combo, whether in creamy peanut sauces, stir-fries, or soups. It’s a protein-packed, easy meal ready in 30 minutes. Try it in Asian-inspired dishes, pasta bakes, or quick ramen upgrades

    What is peanut sauce good with?

    Peanut sauce pairs perfectly with:
    Noodles (Pad Thai, satay noodles, cold sesame noodles)
    Grilled Meats (chicken satay, pork skewers, beef)
    Veggies (spring rolls, stir-fried or raw veggies)
    Rice & Bowls (Buddha bowls, fried rice, rice paper rolls)
    Tofu/Tempeh (crispy or grilled)
    Dipping (egg rolls, dumplings, fried wontons)
    Bonus: Thin it for dressings or thicken for dipping

    What should I pair with peanut butter?

    Best Peanut Butter Pairings:
    Sweet: Bananas, apples, oatmeal, toast, chocolate, yogurt
    Savory: Stir-fries, noodles (like pad Thai), grilled chicken, spring rolls
    Snacks: Celery, pretzels, crackers, smoothies
    Dips/Sauces: Mix with soy sauce, lime, and garlic for an easy Asian-inspired sauce
    Peanut butter adds creaminess and rich flavor to both sweet and savory dishes. For quick meals, thin it with water or broth to make a versatile sauce.

    What country are peanut noodles from?

    Peanut noodles originate from China, specifically as a variation of Sichuan-style cold noodles (Liang Mian) or Dan Dan Noodles, where peanut or sesame paste is used in the sauce. The dish gained global popularity through adaptations like Indonesian/Malaysian Satay Noodles and Thai Peanut Noodles (similar to Pad Thai).

    How many calories are in peanut butter noodles?

    Calories in Peanut Butter Noodles (Per Serving):
    Basic Recipe (noodles + peanut sauce): 450–600 kcal
    With Chicken/Veggies: 550–750 kcal
    Restaurant Versions: Up to 900+ kcal (due to extra oil/sugar)
    What Changes the Count:
    Sauce: Peanut butter, oil, and sweeteners add the most calories.
    Portion Size: Restaurants often serve 2–3x a standard portion.
    Add-ons: Meat, tofu, or extra nuts increase calories.
    Quick Estimate:
    A homemade bowl with 2 oz noodles + 2 tbsp peanut sauce + veggies ≈ , 500 kcal.
    For accuracy, track your specific ingredients using apps like MyFitnessPal.

    Don’t miss out—follow us on social media for updates:

    Egg bake with cottage cheese and spinach recipe

    Raise your hand if you’ve ever stared into the fridge at 7 a.m., torn between “I should eat…

    Elegant & Delicious: How to Make a Swedish Princess Torte Cake

    Have you ever scrolled through Instagram and spotted that gorgeous green dome cake that looks like…

    The Visual Evolution of Vintage Birthday Cakes: From Simple to Spectacular

    Hey there, fellow bakers! Have you ever scrolled through Instagram drooling over those fancy cakes…

    the best Easy Homemade Sauce Recipes

    Forget the supermarket aisle! The secret to transforming everyday meals into extraordinary culinary…

    Good Dipping Sauce for French Fries – The Best Tasty Ideas

    I’ve always been a huge fan of crispy French fries, and I believe the right dipping sauce can take…

    Best Garlic Bread Stuffing Recipe for Thanksgiving

    As the scent of autumn leaves fills the air and families gather, the heart of Thanksgiving beats…

    The Best Chicken with Coconut Lime Peanut Sauce Recipe

    Discover an explosion of flavors with this unique take on peanut lime chicken. This dish—often…

    Delicious Baked Scrambled Eggs for Breakfast: A Healthy and Easy Morning Recipe

    Baked scrambled eggs are a blank canvas for your breakfast creativity! Add your favorite cheeses…

    best Easy Scrambled Egg Toast with Cream Cheese

    Are you tired of the same old boring breakfast routine? Are your taste buds begging for…