Fish Tacos Recipe _ love with cook

Fish Tacos

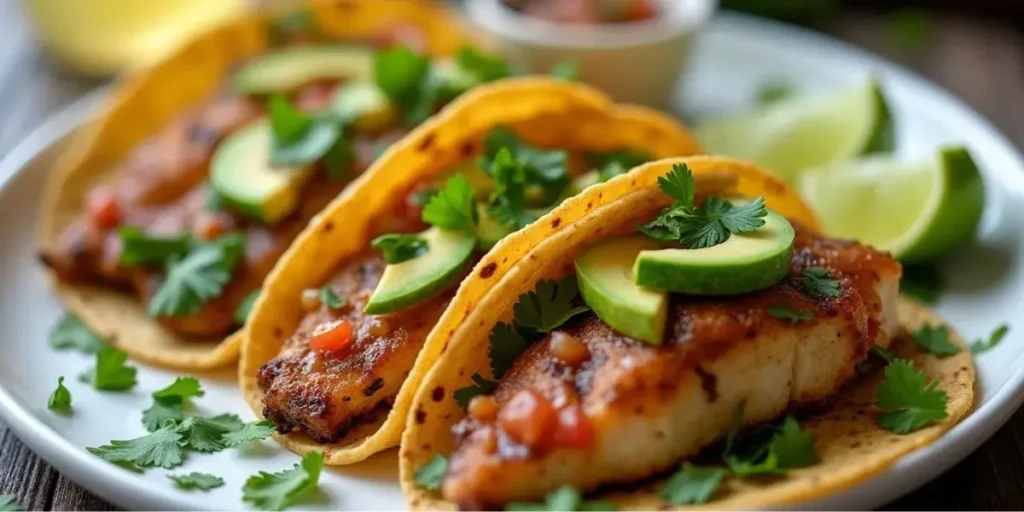
Fish tacos have become a staple in many kitchens and a favorite dish at restaurants across the United States. This delicious meal blends fresh fish with vibrant toppings, offering a flavorful, customizable experience that satisfies a wide range of tastes. Whether you’re enjoying them at a seaside taco stand or preparing them at home, fish tacos are versatile, healthy, and easy to make, making them perfect for any occasion. In this fish tacos recipe, we’ll explore how you can create your own version using various fish options, unique toppings, and flavorful sauces.
What makes fish tacos so popular is their ability to adapt to anyone’s preferences. From crispy to grilled fish, to spicy or mild flavors, there’s no wrong way to make fish tacos. This recipe is not only a treat for the taste buds but also a healthier alternative to many heavier meat-based dishes, making it an excellent choice for those looking to add more nutritious meals to their weekly menu. If you’ve ever wondered how to make the perfect fish taco, this easy-to-follow recipe will guide you every step of the way.
So, whether you’re craving a quick meal for busy weeknights or looking to impress guests at your next gathering, this fish tacos recipe will provide all the tips and tricks you need to create a delicious taco experience. Keep reading to discover how to prepare and customize your very own fish tacos with fresh ingredients and bold flavors!

Why Fish Tacos are a Perfect Meal Choice

The Health Benefits of Fish

When it comes to choosing a meal that’s both delicious and nutritious, fish tacos stand out as an excellent option. Fish, especially varieties like tilapia, cod, and mahi-mahi, is rich in omega-3 fatty acids, which are known for their heart-healthy benefits. Packed with protein, fish also provides essential nutrients like vitamin D and selenium, supporting your overall well-being. What’s even better is that fish tacos are a healthier alternative to many meat-heavy dishes, making them a perfect choice for anyone looking to enjoy a balanced meal without sacrificing flavor. This fish tacos recipe not only delivers on taste but also helps you maintain a nutritious diet.

The Versatility of Fish Tacos

One of the greatest things about fish tacos is their versatility. You can tailor this fish tacos recipe to your liking by choosing different types of fish, like flaky cod or tender mahi-mahi, depending on your personal preferences. The beauty of fish tacos is that they can be easily customized with various toppings and sauces. From crunchy cabbage slaw to creamy avocado, fresh cilantro, or even a spicy chipotle mayo, there’s no shortage of ways to build the perfect taco. Whether you prefer a mild, refreshing taco or something with a little heat, fish tacos offer endless options to suit any craving, making them ideal for both casual meals and more adventurous taste buds.

Quick and Easy to Prepare

Fish tacos are not only tasty but also incredibly easy to prepare, making them the perfect meal for busy nights or when you’re short on time. This fish tacos recipe can be whipped up in less than 30 minutes, which means you can have a satisfying, healthy dinner ready in no time. Whether you’re pan-searing your fish or grilling it for a smoky finish, the steps are straightforward and beginner-friendly. With just a few ingredients and a little creativity, you’ll have fresh, homemade fish tacos that rival anything you’d find at a restaurant. Plus, the simplicity of the recipe allows you to make these tacos as quick or as detailed as you like, ensuring you never have to settle for a boring meal.

In summary, fish tacos are the perfect choice for anyone looking to enjoy a meal that’s nutritious, versatile, and easy to make. They offer health benefits, a range of customization options, and the convenience of quick preparation. Now, let’s dive into the ingredients that make this fish tacos recipe so irresistible!

Ingredients for the Perfect Fish Taco Recipe

Essential Ingredients for the Fish

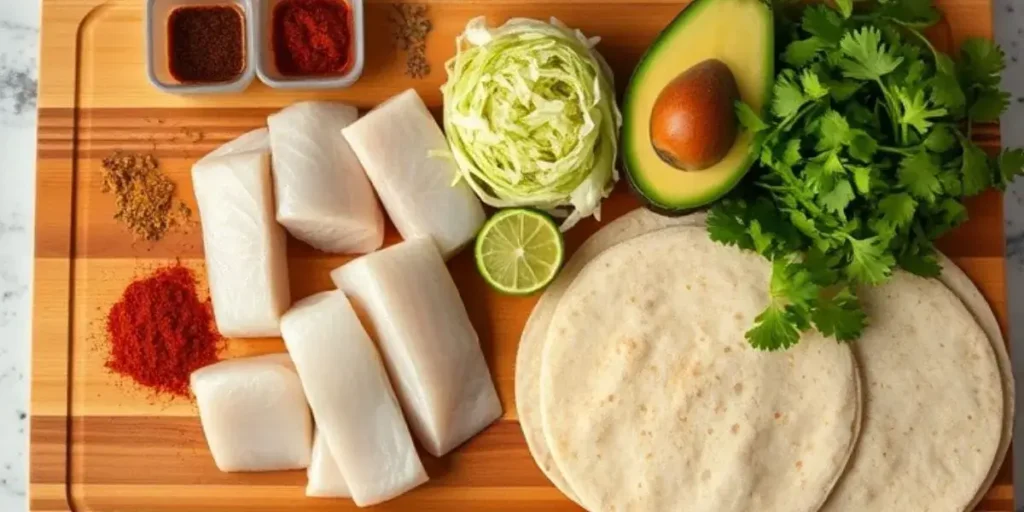
To create a delicious fish taco, it all starts with the right fish. For this fish tacos recipe, you’ll need fresh fish fillets like cod, tilapia, or mahi-mahi. These fish varieties are mild in flavor, firm in texture, and perfect for pan-searing or grilling. Season your fish with a blend of spices such as paprika, cumin, chili powder, garlic powder, salt, and pepper to bring out its natural flavors. You can also squeeze a little lime juice over the fish for a bright, zesty finish. If you’re looking for a little extra punch, try adding some garlic or fresh cilantro to the mix. These ingredients will elevate the flavor profile of your fish tacos, making them a satisfying choice for any taco lover.

Toppings and Fillings for Fish Tacos

The toppings are what truly make fish tacos a standout meal, offering endless possibilities to customize them to your taste. Start with a simple cabbage slaw made from shredded cabbage, carrots, and a tangy dressing to provide crunch and a bit of zing. For an added burst of freshness, top your tacos with a scoop of pico de gallo, a few slices of creamy avocado, and a sprinkle of fresh cilantro. If you’re feeling adventurous, you can also add a drizzle of smoky chipotle mayo or a tangy crema. The best part about this fish tacos recipe is that you can experiment with different fillings to suit your preferences, whether you like it spicy, creamy, or fresh. Don’t be afraid to get creative with your toppings to make your fish tacos truly unique.

Tortillas and Sauces

The tortilla serves as the base of any good taco, and for fish tacos, you have two great options: corn or flour. Corn tortillas offer a traditional, slightly earthy flavor and a sturdy base that holds up well to the fish and toppings. Flour tortillas are soft, slightly chewy, and can handle larger fillings if you’re looking for a more substantial taco. When warming your tortillas, make sure they’re fresh and soft to enhance the overall taco experience.

For sauces, consider a creamy lime sauce or a tangy chipotle mayo to complement the mild flavors of the fish. A good sauce ties all the ingredients together and adds a rich, flavorful layer. You can also try a cilantro-lime crema or even a simple squeeze of fresh lime juice to keep it light and refreshing. This fish tacos recipe gives you the flexibility to choose the right tortilla and sauce combination that fits your flavor preferences.
Fish Tacos

In summary, the ingredients for the perfect fish taco are simple yet flavorful. With fresh fish, a mix of tasty toppings, soft tortillas, and a delicious sauce, you’ll be able to create a taco that’s both satisfying and packed with flavor. Next, we’ll walk you through the step-by-step process of preparing your fish tacos, so you can enjoy this delicious meal in no time!

Step-by-Step Fish Tacos Recipe

Preparing the Fish

The first step to creating the perfect fish taco is preparing the fish. For this fish tacos recipe, choose fresh, firm fish fillets like cod, tilapia, or mahi-mahi. Start by patting the fish dry with a paper towel to remove any excess moisture, ensuring a nice sear when cooking. Next, season the fish with a blend of spices, including paprika, cumin, chili powder, garlic powder, salt, and pepper. These spices add depth and warmth to the fish, creating a flavorful base for your tacos.

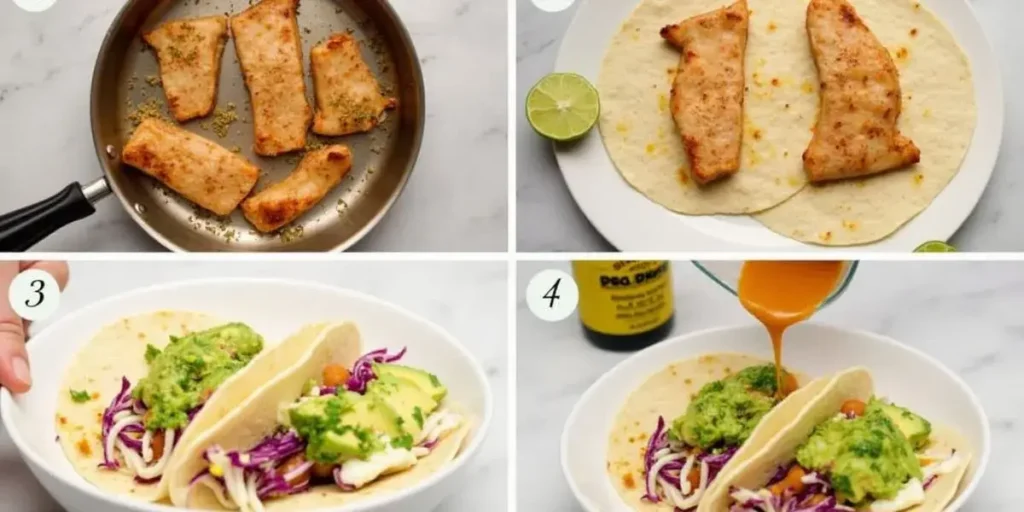
Now, it’s time to cook the fish. You can either pan-sear or grill the fillets, depending on your preference. For pan-searing, heat a bit of oil in a skillet over medium-high heat. Once the oil is hot, carefully place the fish in the skillet and cook for about 3-4 minutes on each side, until the fish is golden brown and flakes easily with a fork. If you’re grilling, preheat your grill to medium-high and cook the fish for about 3-4 minutes per side. Once your fish is cooked to perfection, remove it from the heat and set it aside to cool slightly before cutting it into bite-sized pieces. This step ensures your fish tacos will have a crispy and flavorful fish base that pairs beautifully with your toppings.

Assembling the Tacos

Once your fish is ready, it’s time to assemble your tacos. Start by warming your tortillas—whether you choose corn or flour, a quick heat on the stove or in the microwave will make them soft and pliable. Lay each tortilla flat on a plate, ready to be loaded with your flavorful ingredients.

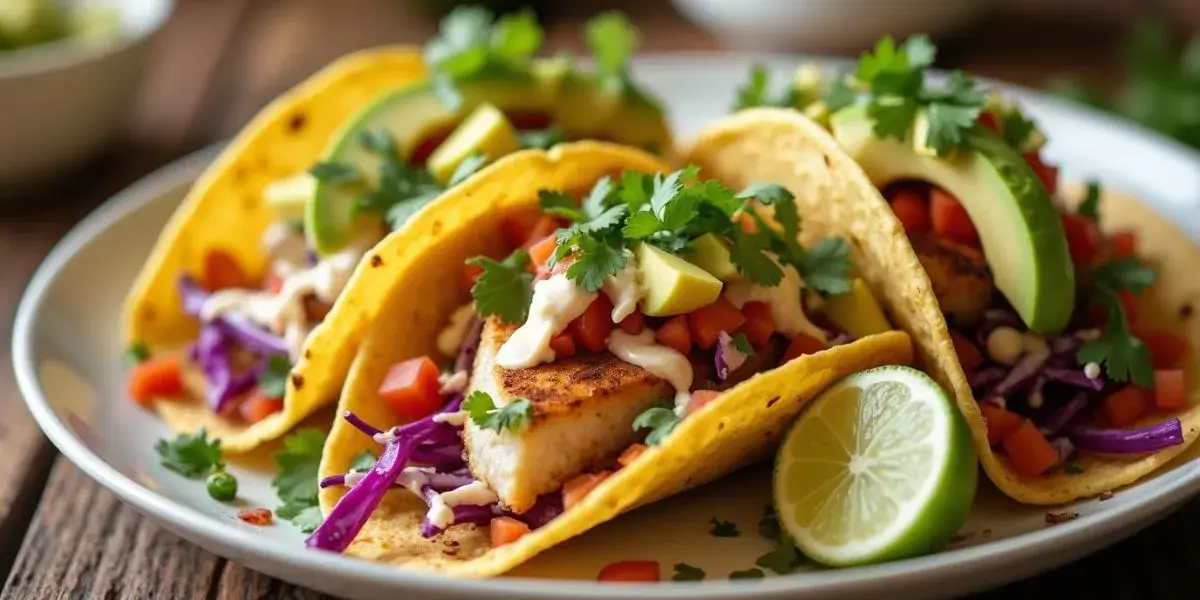
For the next step, carefully place a few pieces of the cooked fish onto each tortilla. Then, top it with a generous scoop of cabbage slaw for that perfect crunch. Add a spoonful of pico de gallo for a fresh and tangy burst of flavor, followed by slices of creamy avocado for richness. Don’t forget to sprinkle some fresh cilantro over the top to add a pop of color and flavor that ties everything together. You can also drizzle a bit of your chosen sauce—whether it’s a smoky chipotle mayo or a refreshing cilantro-lime crema—to bring all the elements together.

When assembling your fish tacos, be sure to balance the toppings with the fish so that each bite is packed with flavor. The combination of fresh, crunchy, and creamy elements makes these tacos irresistible.
Fish Tacos

Serving Suggestions

Fish tacos are already a complete meal, but if you’re looking to take it to the next level, consider pairing them with some delicious sides. Mexican rice is a classic option that complements the flavors of the tacos and adds a bit of heartiness to the meal. For something light and refreshing, grilled vegetables like peppers and onions can offer a smoky contrast to the fresh fish. Chips and salsa also make a great side, perfect for dipping while you enjoy your tacos.

To further elevate your dining experience, you can serve your fish tacos with a chilled drink, such as a refreshing margarita or a cold cerveza. These additions round out the meal, making it perfect for casual dinners or even for a festive taco night with friends.

In summary, the step-by-step process for making fish tacos is simple yet packed with flavor. By preparing the fish correctly, assembling your tacos with fresh ingredients, and pairing them with delicious sides, you’ll create a taco experience that’s both satisfying and delicious. Ready to customize your tacos even further? In the next section, we’ll share some tips and variations to make your fish tacos truly your own.

Tips and Variations for the Perfect Fish Taco

Customizing Fish Taco Flavors

One of the best things about fish tacos is how easy it is to customize them to suit your taste. While the basic fish tacos recipe is delicious on its own, there are plenty of ways to elevate the flavor profile with unique twists. For those who like a little heat, you can add extra spices to your fish seasoning, such as cayenne pepper or smoked paprika, to create a spicy kick. If you prefer a fresher, citrusy taste, squeeze some extra lime juice over the fish before serving. The beauty of fish tacos is that you can play with different seasoning blends, from sweet and smoky to bold and zesty, to suit your personal flavor preferences.

Additionally, if you want to make your fish tacos even more customized, experiment with alternative toppings. You could swap the traditional cabbage slaw for a tangy mango salsa for a fruity, tropical twist. Or, try adding a creamy cilantro-lime sauce if you’re craving something rich and refreshing. Don’t be afraid to adjust the recipe based on what you enjoy most—this flexibility makes fish tacos a dish everyone can make their own.

How to Make Fish Tacos for a Crowd

If you’re planning to serve fish tacos at a party or family gathering, scaling up the recipe is easy and ensures everyone gets a taste of this delicious meal. When making fish tacos for a crowd, consider using larger fish fillets or even whole fish that can be cooked and shredded for easy taco assembly. Preparing the fish in batches or grilling it all at once on a large outdoor grill can save time and allow you to serve a crowd more efficiently.

Additionally, offering a taco bar is a fun and interactive way to let guests build their fish tacos to their liking. Set up a station with tortillas, fish, an array of toppings (like cabbage slaw, pico de gallo, and avocado), and different sauces. This way, everyone can create their perfect taco, making your fish taco recipe the star of the event. It’s a great way to cater to different tastes while keeping things easy and fun.

Adapting Fish Tacos for Dietary Preferences

Fish tacos are already a healthier choice, but they can be easily adapted to suit a variety of dietary preferences, making them even more versatile. For those following a gluten-free diet, simply swap the traditional tortillas for gluten-free options, such as corn tortillas or gluten-free flour tortillas. You can also make the recipe dairy-free by using avocado or a dairy-free crema instead of sour cream-based sauces.
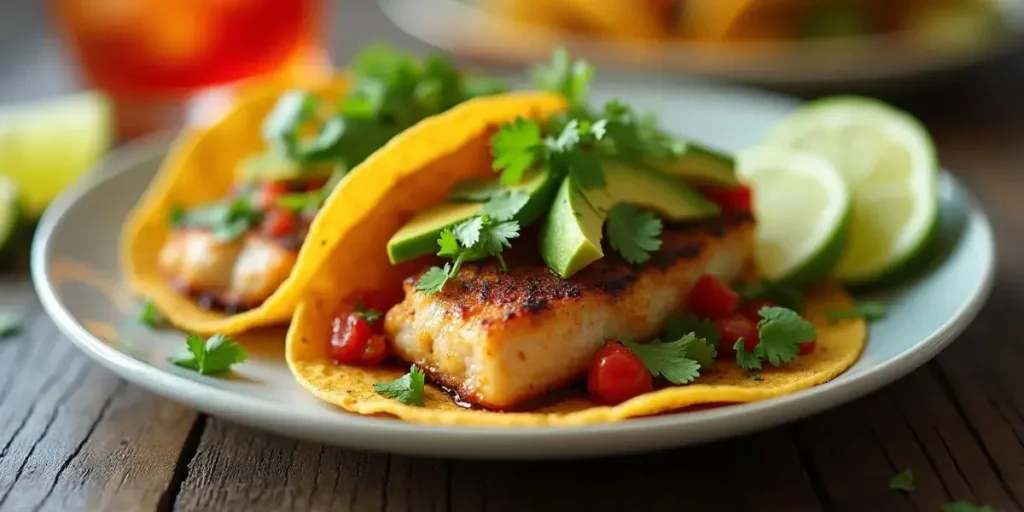
Fish Tacos

For those watching their carbs, a low-carb option is to serve the fish in lettuce wraps instead of tortillas. This swap allows you to enjoy the same great flavors of the fish tacos recipe, while keeping the dish light and low-carb. Whether you’re catering to specific dietary needs or simply want to try something new, there are plenty of ways to tweak this recipe to make it work for everyone.

Fish tacos are a flavorful, versatile meal perfect for any occasion. With endless customization options for fish, toppings, and sauces, this recipe can suit any taste. It’s not only delicious but also healthy, packed with protein and omega-3 fatty acids.

Now that you have the perfect fish tacos recipe, it’s time to get creative. Whether you stick to traditional toppings or try something new, these tacos are easy to make and always satisfying.

Share your fish taco creations with us! We’d love to hear how you customize this recipe to fit your tastes! Share your experience in the comments or on social media, and explore more taco recipes on Love with Cook. For more health tips on eating fish, visit Advice about Eating Fish. Try the recipe today!

Lunch Break Bliss

creamy peanut lime chicken with noodles​

The Noodle Dish That Will Make You Excited to Cook on a Weeknight

Let’s be real – most “quick and easy” dinner recipes lie to us. They promise…
A homemade easy spicy pizza topped with pepperoni, jalapeños, and red pepper flakes for a fiery flavor.

Spicy Pepperoni Pizza : Sicilian Style with Hot Tomato Sauce

Look, I get it. You want that thick, crispy-bottomed, pepperoni-cupped pizza magic without a PhD…
fried rice with frozen vegetables​

Quick Fried Rice with Frozen Vegetables – Ready in 20 Minutes

Look, I’m no superhero – but this fried rice with frozen vegetables​ makes me feel…
orange chicken broccoli with rice stir fry​

Orange Chicken Broccoli With Rice Stir Fry​

I get it. That neon-orange takeout box calls to you at 7 pm when you’re…
A bowl of tasty mashed potatoes vegetarian-style, made with milk and garnished with parsley and roasted garlic

How to Make Tasty Mashed Potatoes Vegetarian for Any Meal

If you’re craving a comforting and delicious side dish, Tasty Mashed Potatoes Vegetarian is the…
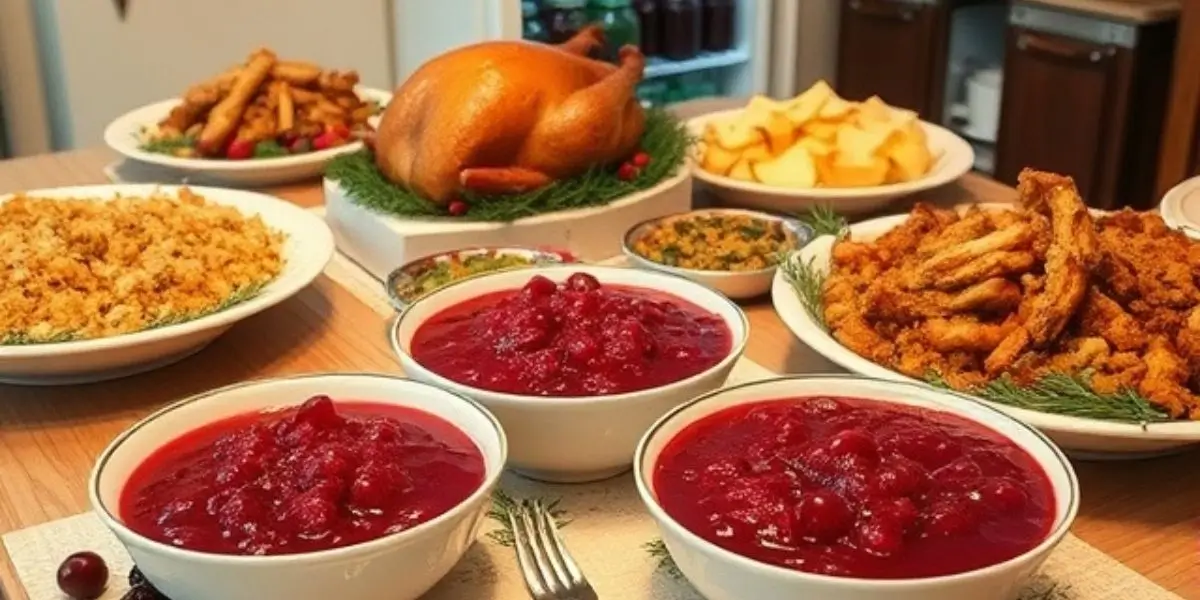
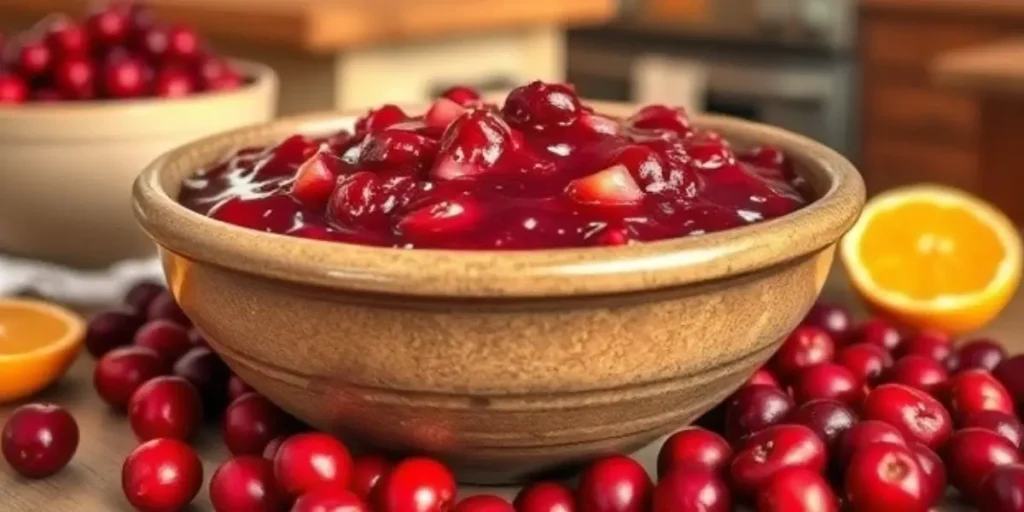
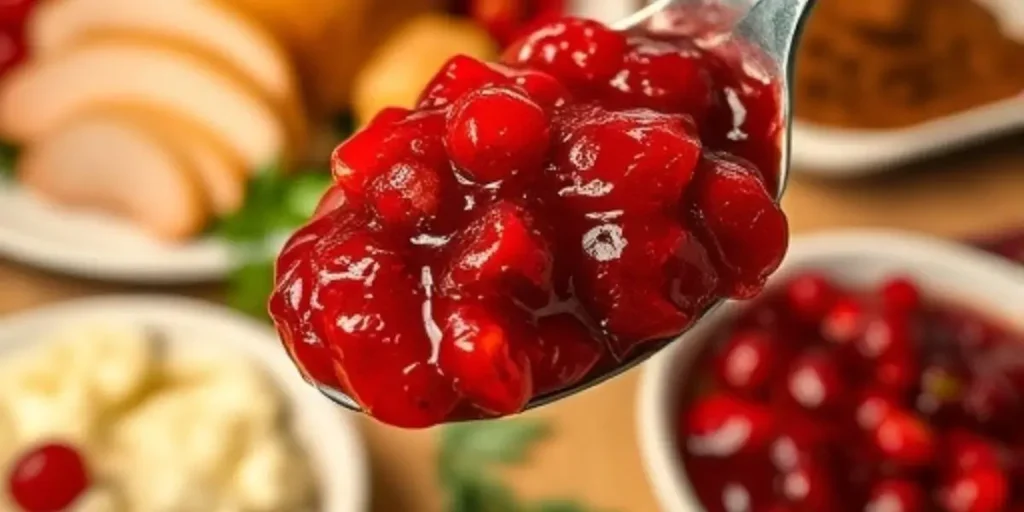
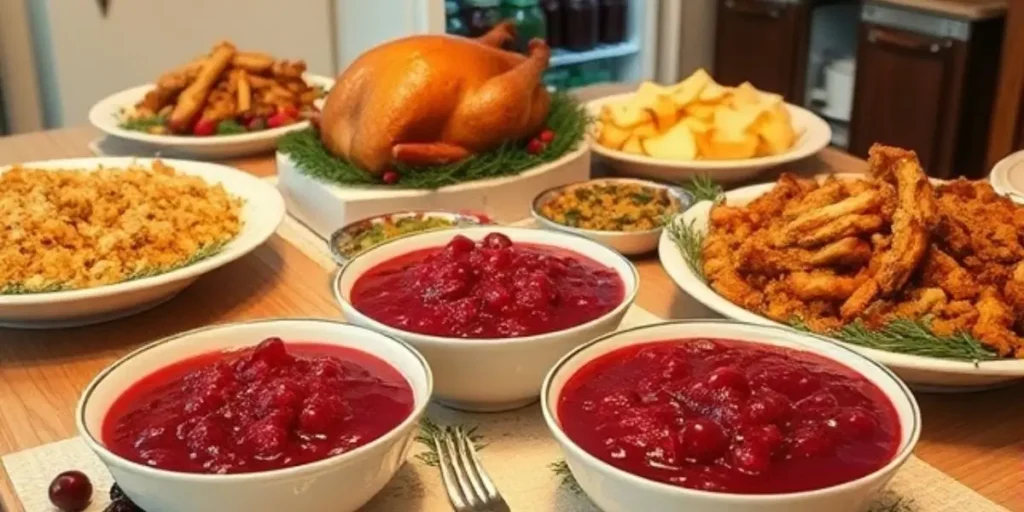
Homemade Cranberry Sauce

Homemade Cranberry Sauce

The Allure of Homemade Cranberry Sauce Cranberry sauce is a beloved classic at American holiday…
Fish Tacos

Fish Tacos Recipe _ love with cook

Fish tacos have become a staple in many kitchens and a favorite dish at restaurants…
Chicken Fajita Salad

Chicken Fajita Salad: The 30-Minute Dinner

Look, I wasn’t expecting my picky feline to approve my dinner, but here we are—J…

Homemade Cranberry Sauce

Homemade Cranberry Sauce

The Allure of Homemade Cranberry Sauce

Cranberry sauce is a beloved classic at American holiday tables, particularly around Thanksgiving and Christmas. But while many are familiar with the store-bought variety, there’s nothing quite like homemade cranberry sauce. The flavor is fresher, the texture is customizable, and the ability to control sweetness allows you to make a version that’s perfect for your tastes. Whether you love it tart, sweet, or with a twist of citrus, homemade cranberry sauce can elevate any holiday spread.

Making cranberry sauce at home isn’t just about flavor – it’s about creating something truly special. When you prepare homemade cranberry sauce, you get to decide exactly how it should taste. No more settling for a jar of cranberry sauce packed with preservatives and extra sugar. With a few simple ingredients, you can make a sauce that complements your meal beautifully. Plus, it’s incredibly easy to whip up, even for beginners in the kitchen.

In this guide, we’ll walk you through the steps to create your homemade cranberry sauce, explore ways to customize it with fun flavors and share tips for perfecting it every time. So, if you’re ready to ditch the canned version and make the best cranberry sauce from scratch, keep reading! You’ll soon discover why homemade cranberry sauce is the ultimate addition to any holiday meal

Table of Contents

Why Make Homemade Cranberry Sauce?

Healthier & Fresher Option

When it comes to holiday meals, freshness matters. Homemade cranberry sauce offers a healthier alternative to the store-bought varieties, which often contain preservatives and excess sugar. By making your own cranberry sauce, you can control exactly what goes into it, ensuring that you’re using high-quality, natural ingredients. Fresh cranberries, a bit of natural sweetener, and a splash of fresh juice are all you need to create a vibrant, flavorful sauce that brings out the best in your holiday dishes.

Not only does homemade cranberry sauce taste better, but it’s also much more nutritious. Cranberries are packed with antioxidants, vitamins, and fiber, which are often lost in commercial versions due to processing. When you make cranberry sauce from scratch, you’re preserving all those beneficial nutrients, making it a healthier addition to your holiday spread.

Versatility in Flavor

One of the best things about homemade cranberry sauce is its versatility. Unlike the canned versions, which tend to have a one-size-fits-all flavor, homemade cranberry sauce can be easily customized to suit your tastes. Whether you prefer it extra sweet, tangy, or with a hint of spice, the possibilities are endless.

Customizable Add-ins

You can experiment with a variety of add-ins to make your homemade cranberry sauce unique. For example, orange zest or juice adds a bright, citrusy note that balances the tartness of the cranberries. Cinnamon, ginger, or cloves bring warmth and depth, perfect for a cozy, holiday feel. You might even consider adding a splash of liquor, like rum or brandy, for an adult twist on the classic. With homemade cranberry sauce, the choice is yours, allowing you to create a version that’s perfectly tailored to your preferences.

Easy to Make

Another great reason to make cranberry sauce at home is how incredibly easy it is. If you’re worried about complicated recipes or time-consuming preparation, fear not. Making homemade cranberry sauce requires only a few simple steps. With just a handful of ingredients, you can prepare this dish in under 30 minutes, making it the perfect addition to your holiday menu. Plus, the satisfaction of serving up something made from scratch adds a personal touch to your meals. So why settle for canned when you can create a fresher, more flavorful homemade cranberry sauce?

Homemade Cranberry Sauce

Ingredients for Homemade Cranberry Sauce

The Essentials

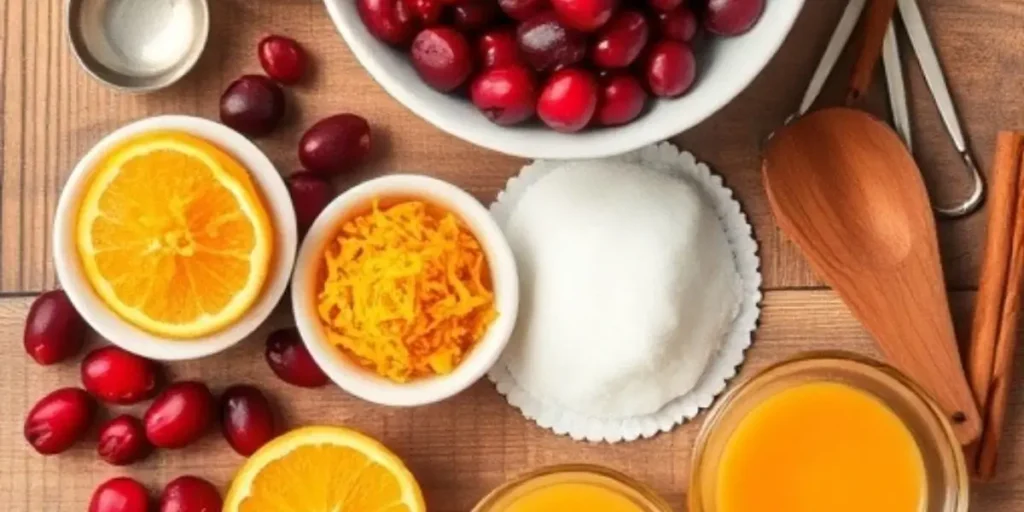
Creating the perfect homemade cranberry sauce starts with just a few key ingredients. Each one plays an important role in delivering the sweet, tangy, and vibrant flavors that make this dish a holiday favorite.

  • Fresh Cranberries: The star of the show, fresh cranberries bring bold color and tartness to your sauce. Look for firm, bright-red berries for the best results. Frozen cranberries can also be used, but fresh ones yield the most vibrant flavor.
  • Sweeteners: To balance the natural tartness of cranberries, sweeteners are a must. Granulated sugar is the most common choice, but you can also use honey, maple syrup, or a combination for a more complex flavor profile.
  • Liquid Base: Water is a classic choice, but swapping it with orange juice or apple cider can add an extra layer of flavor. Juice brings sweetness and acidity that complement the cranberries beautifully.

Optional Flavor Add-ins

Homemade cranberry sauce is highly customizable, and experimenting with flavor add-ins can elevate it to new levels.

  • Orange Juice or Zest: For a refreshing citrus twist, add freshly squeezed orange juice or a sprinkle of orange zest. The brightness pairs perfectly with the cranberries’ tartness.
  • Warm Spices: Add depth with cinnamon sticks, cloves, or ground ginger. These spices bring a festive warmth to the dish, making it ideal for holiday meals.
  • Vanilla Extract: A small splash of vanilla extract can add a touch of sweetness and round out the flavors.
  • Liquor or Liqueurs: For a more sophisticated flavor, consider adding a splash of rum, brandy, or Grand Marnier. This subtle addition adds complexity without overpowering the sauce.

Balancing Flavors

When assembling the ingredients for your homemade cranberry sauce, remember that balance is key. Personalize the balance of sweetness, tanginess, and spice to create a cranberry sauce that perfectly complements your holiday table. A taste test during the cooking process will help you achieve the perfect blend.

Pro Tip: Keep it simple for your first batch, then experiment with add-ins as you gain confidence. Homemade cranberry sauce is forgiving and fun to customize!

IngredientQuantityNotes
Fresh cranberries12 oz (approximately 3 cups)Rinse and pick out any soft or discolored berries.
Granulated sugar1 cupAdjust to taste; substitute with honey or maple syrup if desired.
Water (or orange juice)1 cupUse orange juice for added citrus flavor.
Orange zest1 tspOptional; adds brightness and depth.
Cinnamon stick1 stickOptional; substitute with ½ tsp ground cinnamon.
Ground cloves⅛ tspOptional; a little goes a long way.
Vanilla extract½ tspOptional; adds subtle sweetness.
Rum or brandy (optional)1 tbspAdds a rich, festive twist.

This table provides a clear, organized list of ingredients and allows for easy reference while preparing the recipe.

Homemade Cranberry Sauce

How to Make Homemade Cranberry Sauce

Step 1: Prepare the Cranberries

Start by rinsing the fresh cranberries under cold water, removing any stems or soft, discolored berries. Ensuring the cranberries are clean and vibrant sets the foundation for a flavorful homemade cranberry sauce.

Step 2: Combine Ingredients

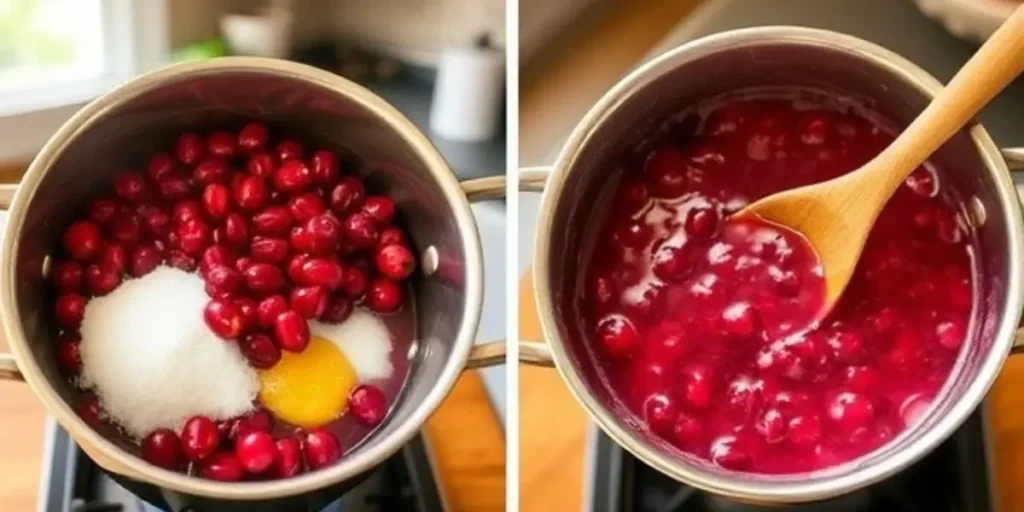
In a medium-sized saucepan, combine your fresh cranberries, sweetener, and liquid base. For a classic flavor, use water and granulated sugar. If you’re feeling adventurous, swap the water for orange juice to add a bright, citrusy twist. Warm the mixture over medium heat, allowing it to reach a gentle simmer while stirring periodically.

Step 3: Cook the Sauce

As the mixture simmers, you’ll notice the cranberries beginning to pop open, releasing their natural juices. This process takes about 10 minutes. Stir frequently to prevent sticking, and adjust the heat as needed to maintain a gentle simmer. If you’re adding spices, like a cinnamon stick or cloves, now is the time to include them.

Step 4: Customize Your Flavor

Once the cranberries have softened and the sauce has thickened, it’s time to customize. Add your chosen flavor boosters, such as orange zest, vanilla extract, or a splash of rum for a festive twist. Taste the sauce and adjust the sweetness or acidity to your liking.

Step 5: Let It Cool

Take the saucepan off the heat and allow the cranberry sauce to cool to room temperature. During the cooling process, it will naturally thicken, achieving its signature texture. Once cooled, transfer the sauce to a serving bowl or store it in an airtight container.

Pro Tip: If you prefer a smoother texture, use an immersion blender to puree the sauce before cooling. To maintain a chunkier texture, simply leave the sauce unblended.

Homemade Cranberry Sauce

Storing and Serving Homemade Cranberry Sauce

How to Store Cranberry Sauce

Once you’ve prepared your homemade cranberry sauce, proper storage is essential to maintain its freshness and flavor. If you’re serving it within a day or two, transfer the cranberry sauce to an airtight container and store it in the refrigerator. Homemade cranberry sauce can be refrigerated for up to a week, making it a convenient dish to prepare ahead of time for holiday meals.

For longer storage, freezing is a great option. Spoon the cooled cranberry sauce into a freezer-safe container or a resealable plastic bag, removing as much air as possible. Label it with the date, and it can be stored in the freezer for up to three months. To use, simply thaw it in the refrigerator overnight and give it a quick stir before serving.

Pro Tip: When freezing, portion your cranberry sauce into smaller containers. This way, you can thaw only what you need, reducing waste and preserving the rest for future meals.

Creative Ways to Serve Homemade Cranberry Sauce

Homemade cranberry sauce isn’t just for turkey! While it shines on the Thanksgiving table, there are plenty of other ways to enjoy this versatile dish.

  • Classic Pairings: Serve your cranberry sauce alongside roasted turkey, ham, or chicken for a traditional holiday spread.
  • Cheese Platters: Use it as a sweet and tangy complement to creamy brie, sharp cheddar, or goat cheese on a festive cheese board.
  • Sandwich Spread: Slather cranberry sauce onto leftover turkey or ham sandwiches for a burst of flavor.
  • Dessert Topping: Drizzle it over cheesecake, ice cream, or pound cake to add a tart and fruity kick.
  • Breakfast Boost: Mix cranberry sauce into yogurt, and oatmeal, or spread it on toast for a refreshing morning treat.

By thinking beyond the holiday table, you’ll discover endless ways to incorporate homemade cranberry sauce into your meals year-round.

Pro Tip: Pair your cranberry sauce with complementary dishes to create a cohesive flavor profile. For example, cranberry sauce with a hint of orange zest pairs beautifully with citrus-glazed chicken or roasted root vegetables.

Final Thoughts on Serving

Homemade cranberry sauce is not only delicious but also incredibly versatile. Whether you’re hosting a grand holiday feast or simply adding a special touch to everyday meals, this flavorful sauce will never disappoint. Its vibrant color and bold taste make it a standout addition to any plate, ensuring your culinary efforts shine.

Homemade Cranberry Sauce

The Sweet Simplicity of Homemade Cranberry Sauce

Homemade cranberry sauce is more than just a side dish—it’s a tradition that brings warmth and flavor to your holiday table. From its rich, tangy taste to its vibrant color, this simple yet elegant recipe has the power to elevate any meal. By making it yourself, you can enjoy the freshness, customization, and sense of accomplishment that come with serving something made from scratch.

Whether you’re pairing it with turkey, spreading it on leftover sandwiches, or using it to brighten up a dessert, homemade cranberry sauce is as versatile as it is delicious. Plus, with its easy preparation and ability to store well, it’s a stress-free addition to your holiday planning.

Looking for more ways to enhance your holiday spread? Pair your cranberry sauce with a slice of pumpkin pie with condensed milk for the ultimate sweet and tart combination. These two classics together create a memorable dessert table that will impress your guests. You can check out this Thanksgiving Cranberry Saucey Saucecipes for more holiday recipe inspiration.

Why opt for the store-bought version when you can craft something homemade and truly exceptional? With this guide, you’re ready to whip up a batch of homemade cranberry sauce full of flavor and perfectly tailored to your taste. Try it this holiday season and make your meals even more unforgettable!

Lunch Break Bliss

creamy peanut lime chicken with noodles​

The Noodle Dish That Will Make You Excited to Cook on a Weeknight

Let’s be real – most “quick and easy” dinner recipes lie to us. They promise…
A homemade easy spicy pizza topped with pepperoni, jalapeños, and red pepper flakes for a fiery flavor.

Spicy Pepperoni Pizza : Sicilian Style with Hot Tomato Sauce

Look, I get it. You want that thick, crispy-bottomed, pepperoni-cupped pizza magic without a PhD…
fried rice with frozen vegetables​

Quick Fried Rice with Frozen Vegetables – Ready in 20 Minutes

Look, I’m no superhero – but this fried rice with frozen vegetables​ makes me feel…
orange chicken broccoli with rice stir fry​

Orange Chicken Broccoli With Rice Stir Fry​

I get it. That neon-orange takeout box calls to you at 7 pm when you’re…
A bowl of tasty mashed potatoes vegetarian-style, made with milk and garnished with parsley and roasted garlic

How to Make Tasty Mashed Potatoes Vegetarian for Any Meal

If you’re craving a comforting and delicious side dish, Tasty Mashed Potatoes Vegetarian is the…
Homemade Cranberry Sauce

Homemade Cranberry Sauce

The Allure of Homemade Cranberry Sauce Cranberry sauce is a beloved classic at American holiday…
Fish Tacos

Fish Tacos Recipe _ love with cook

Fish tacos have become a staple in many kitchens and a favorite dish at restaurants…
Chicken Fajita Salad

Chicken Fajita Salad: The 30-Minute Dinner

Look, I wasn’t expecting my picky feline to approve my dinner, but here we are—J…

The Noodle Dish That Will Make You Excited to Cook on a Weeknight

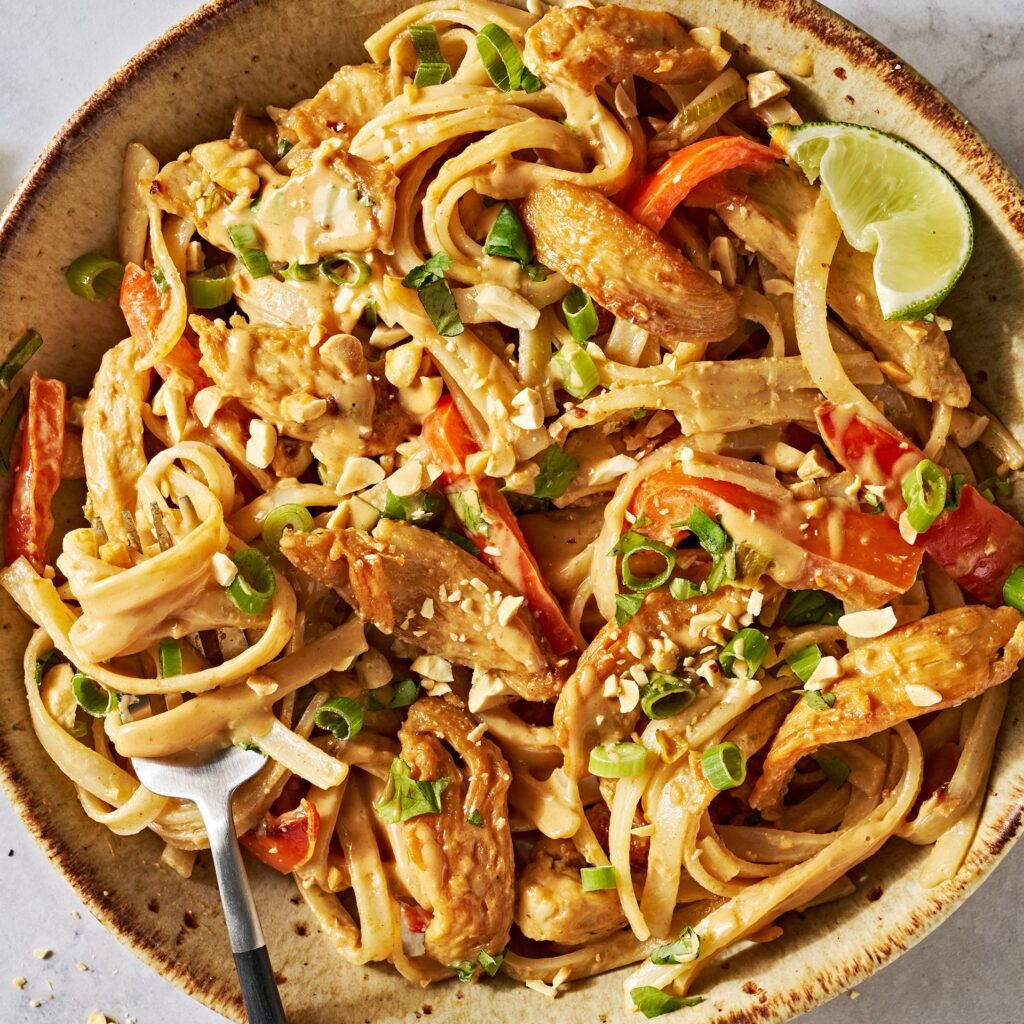
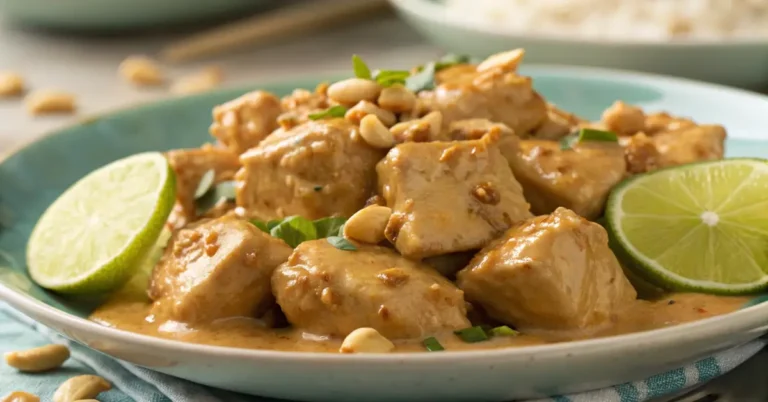
Let’s be real – most “quick and easy” dinner recipes lie to us. They promise flavor but deliver sadness. But this? This Peanut Lime Chicken Noodles Recipe situation is different. It’s the kind of meal that makes you text your roommate like “omg you have to try this” while you’re still chewing the first bite.

Peanut Lime Chicken Noodles Recipe

Why This Works When You’re Tired and Hangry

  • That sauce. Ohhhh that sauce. It’s creamy from peanut butter, zingy from lime, with just enough heat to keep things interesting. You’ll want to drink it.
  • Minimal chopping (we’re talking like… 5 minutes of actual work)
  • Uses pantry staples (no hunting for obscure ingredients at 6 pm)
  • Leftovers taste even better (hello, next-day lunch win)

Grocery List for People Who Hate Grocery Lists


Grab these next time you’re at the store:

  • Chicken (breasts or thighs – your call)
  • Rice noodles (or whatever noodles are already in your cabinet)
  • Peanut butter (the cheap kind works fine)
  • Lime (please don’t use the plastic bottle juice)
  • A bell pepper (red looks prettier, but any color tastes fine)
  • Garlic and ginger (the pre-minced stuff in jars is allowed)
  • Cilantro, if you’re into it (if you’re a soap-taste person, skip it)
  • Peanuts (because crunchy bits make everything better)

How to Make Peanut Lime Chicken Noodles Recipe

  1. Boil noodles like the package says. Drain them. Easy.
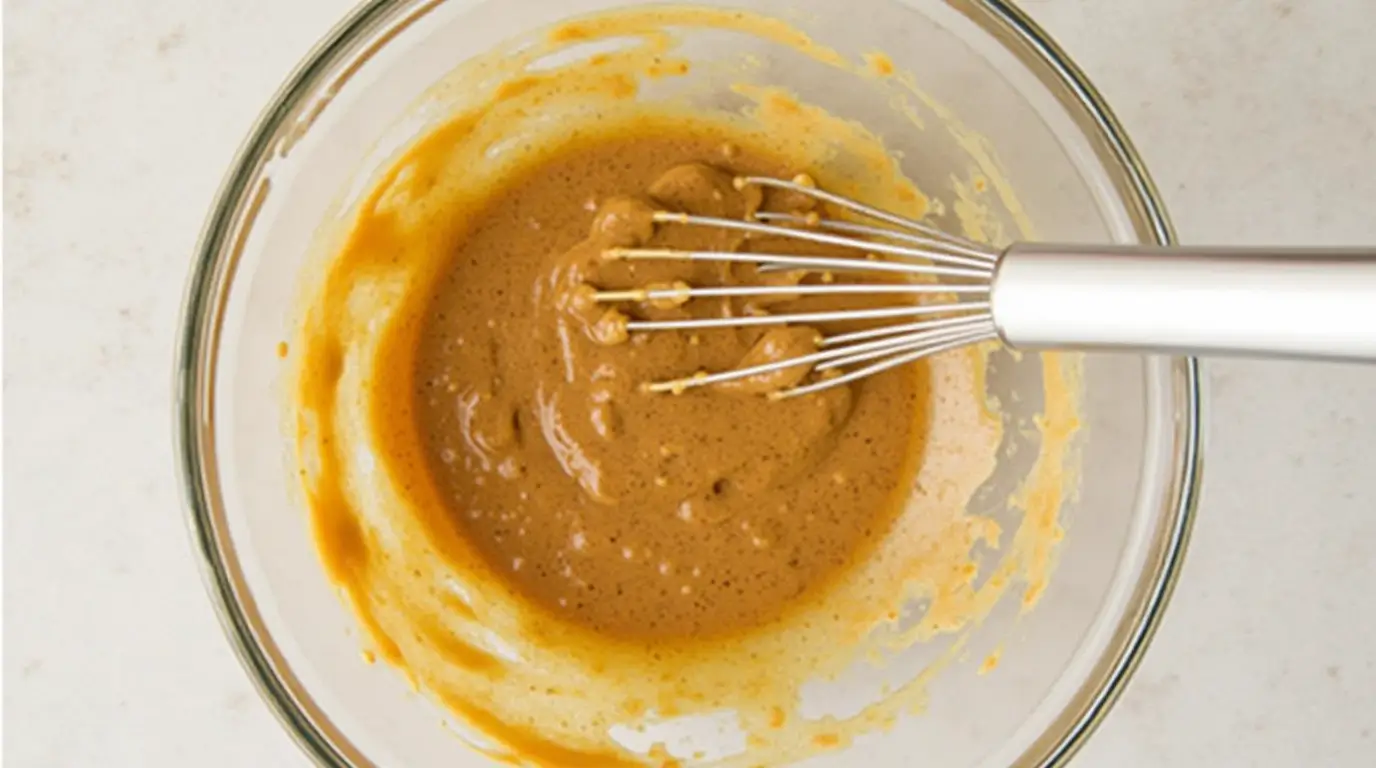
  2. Mix peanut butter, soy sauce, lime juice, sriracha, and a splash of water in a bowl. Taste it. Adjust until you go “oh damn that’s good.”
  3. Cook chicken in a pan until it’s no longer pink. Add peppers and garlic.
  4. Throw noodles and sauce in the pan. Stir until everything’s coated and happy.
  5. Top with all the crunchy/pretty things (peanuts! herbs! more lime!)

Real Talk Tips from Someone Who Messes This Up So You Don’t Have To

  • If your sauce seems too thick, add a splash of the noodle cooking water
  • No fresh ginger? Powder works in a pinch
  • Forgot to buy chicken? Tofu or shrimp work great too
  • If you burn the garlic (we’ve all been there), start that part over

The Best Part


This isn’t a ” healthy-ish ” recipe that tastes like punishment. It’s delicious, like “why would I order takeout when I can make this?” delicious. And it’s flexible enough that you can tweak it based on what’s already in your fridge.

Make it tonight. Thank yourself tomorrow when you’re eating the leftovers cold straight from the container. We don’t judge here.

Instructions for creamy peanut lime chicken with noodles​

peanut lime chicken with noodles​

Savory peanut sauce meets zesty lime and tender chicken in this 30-minute flavor bomb. Perfectly balanced with a spicy kick, crunchy peanuts, and fresh herbs, easier than takeout and way more satisfying. Weeknight dinner solved

Step 1: Cook the Noodles

best Creamy Peanut-Lime Chicken With Noodles

Boil noodles like the package says. Drain them. Easy.

Step 2: Prepare the Sauce

easy Peanut-Lime Chicken With Noodles recipe

Mix peanut butter, soy sauce, lime juice, sriracha, and a splash of water in a bowl. Taste it. Adjust until you go

Step 3: Cook the Chicken

creamy peanut-lime chicken with noodles​

Cook chicken in a pan until it’s no longer pink. Add peppers and garlic.

Step 4: Combine Everything

Thai-Inspired Creamy Peanut Chicken Noodles

Throw noodles and sauce in the pan. Stir until everything’s coated and happy.

Step 5: Garnish and Serve

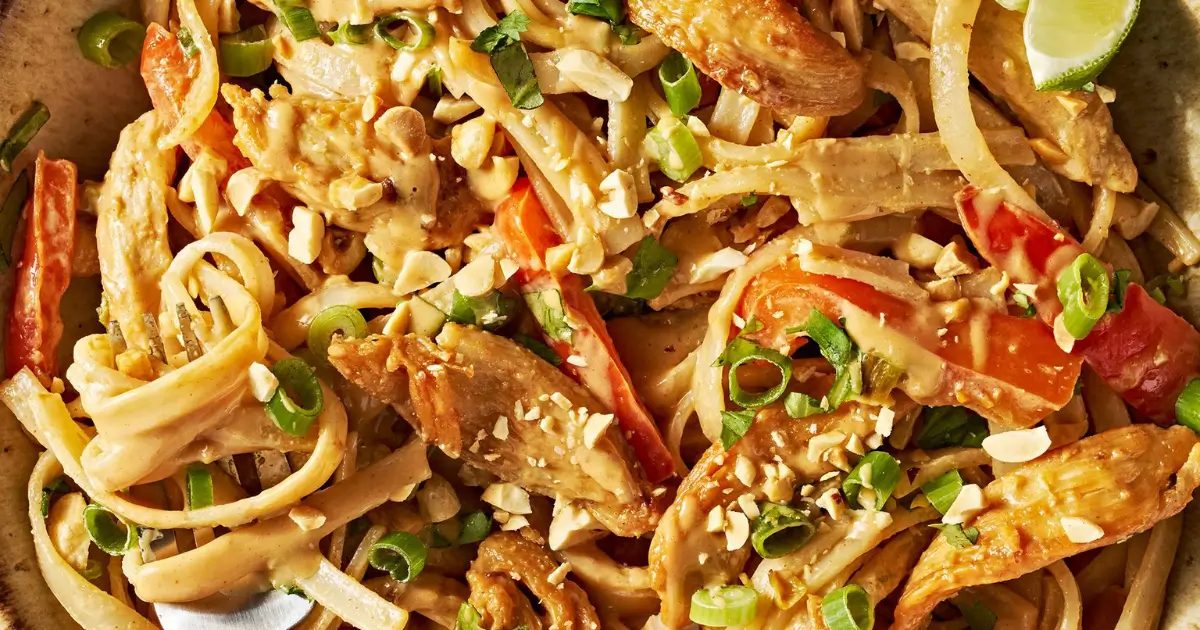
Plate the peanut lime chicken noodles and garnish with chopped peanuts, fresh cilantro, and a lime wedge for extra zest. Serve immediately and enjoy your flavorful dish!

Top with all the crunchy/pretty things (peanuts! herbs! more lime!)

FAQs: Get the Answers You Need

Does peanut butter taste good in noodles?

Peanut butter makes noodles rich, creamy, and packed with savory-sweet flavor—like a next-level upgrade to boring pasta. Combined with lime, chili, and soy, it’s the addictive sauce base in dishes like pad Thai or dan dan noodles. If you like satay or PB&J, you’ll love it here. Just think of it with a splash of hot water or broth so it coats every strand perfectly.

Why add peanut butter to noodles?

Yes! Peanut butter adds rich, creamy depth to noodles, balancing spicy/savory flavors. It’s the secret to restaurant-style sauces (like in pad Thai) and makes boring noodles irresistible with just 2-3 ingredients. Try it!

Can you eat chicken with noodles?

Yes! Chicken and noodles are a classic combo, whether in creamy peanut sauces, stir-fries, or soups. It’s a protein-packed, easy meal ready in 30 minutes. Try it in Asian-inspired dishes, pasta bakes, or quick ramen upgrades

What is peanut sauce good with?

Peanut sauce pairs perfectly with:
Noodles (Pad Thai, satay noodles, cold sesame noodles)
Grilled Meats (chicken satay, pork skewers, beef)
Veggies (spring rolls, stir-fried or raw veggies)
Rice & Bowls (Buddha bowls, fried rice, rice paper rolls)
Tofu/Tempeh (crispy or grilled)
Dipping (egg rolls, dumplings, fried wontons)
Bonus: Thin it for dressings or thicken for dipping

What should I pair with peanut butter?

Best Peanut Butter Pairings:
Sweet: Bananas, apples, oatmeal, toast, chocolate, yogurt
Savory: Stir-fries, noodles (like pad Thai), grilled chicken, spring rolls
Snacks: Celery, pretzels, crackers, smoothies
Dips/Sauces: Mix with soy sauce, lime, and garlic for an easy Asian-inspired sauce
Peanut butter adds creaminess and rich flavor to both sweet and savory dishes. For quick meals, thin it with water or broth to make a versatile sauce.

What country are peanut noodles from?

Peanut noodles originate from China, specifically as a variation of Sichuan-style cold noodles (Liang Mian) or Dan Dan Noodles, where peanut or sesame paste is used in the sauce. The dish gained global popularity through adaptations like Indonesian/Malaysian Satay Noodles and Thai Peanut Noodles (similar to Pad Thai).

How many calories are in peanut butter noodles?

Calories in Peanut Butter Noodles (Per Serving):
Basic Recipe (noodles + peanut sauce): 450–600 kcal
With Chicken/Veggies: 550–750 kcal
Restaurant Versions: Up to 900+ kcal (due to extra oil/sugar)
What Changes the Count:
Sauce: Peanut butter, oil, and sweeteners add the most calories.
Portion Size: Restaurants often serve 2–3x a standard portion.
Add-ons: Meat, tofu, or extra nuts increase calories.
Quick Estimate:
A homemade bowl with 2 oz noodles + 2 tbsp peanut sauce + veggies ≈ , 500 kcal.
For accuracy, track your specific ingredients using apps like MyFitnessPal.

Don’t miss out—follow us on social media for updates:

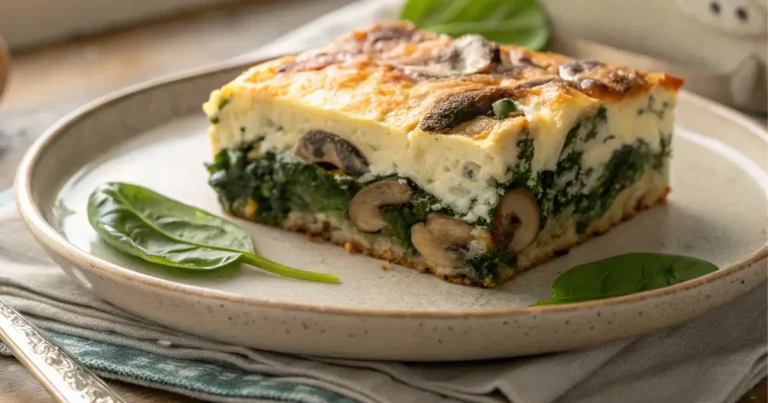
Egg bake with cottage cheese and spinach recipe

Raise your hand if you’ve ever stared into the fridge at 7 a.m., torn between “I should eat…

Elegant & Delicious: How to Make a Swedish Princess Torte Cake

Have you ever scrolled through Instagram and spotted that gorgeous green dome cake that looks like…

The Visual Evolution of Vintage Birthday Cakes: From Simple to Spectacular

Hey there, fellow bakers! Have you ever scrolled through Instagram drooling over those fancy cakes…

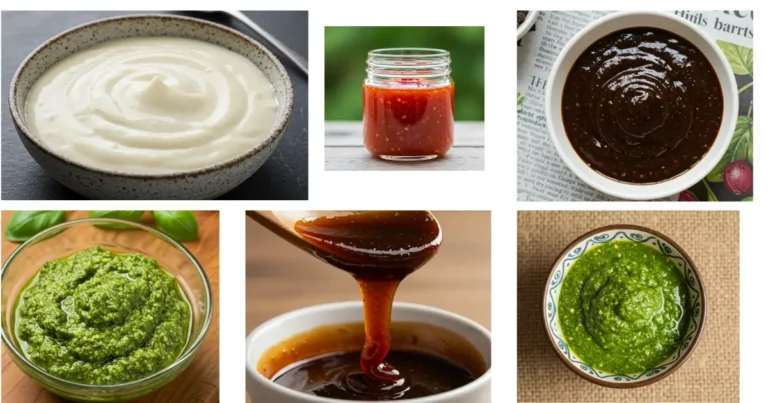
the best Easy Homemade Sauce Recipes

Forget the supermarket aisle! The secret to transforming everyday meals into extraordinary culinary…

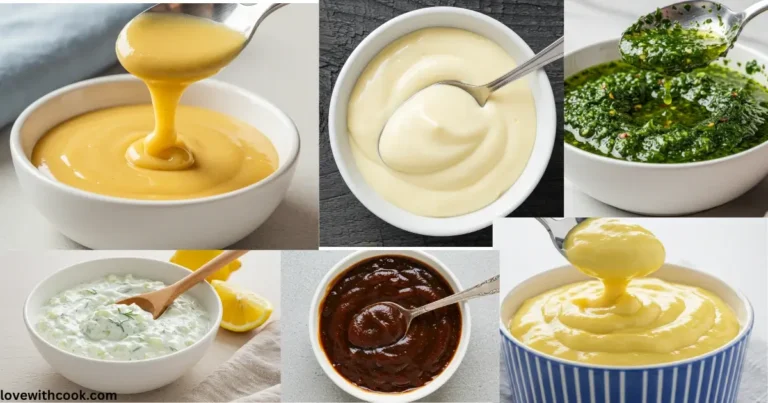
Good Dipping Sauce for French Fries – The Best Tasty Ideas

I’ve always been a huge fan of crispy French fries, and I believe the right dipping sauce can take…

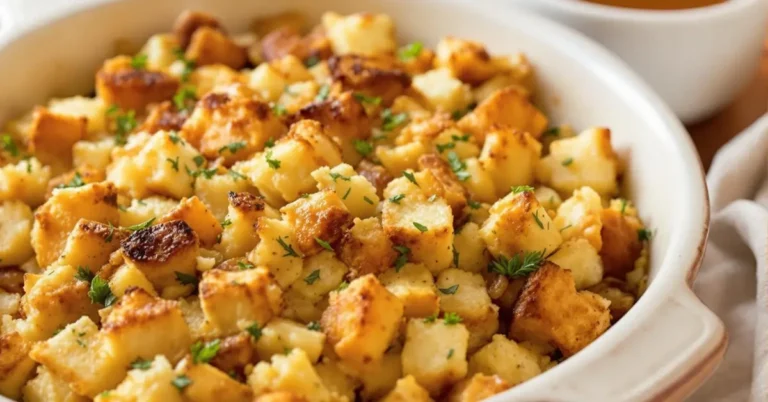
Best Garlic Bread Stuffing Recipe for Thanksgiving

As the scent of autumn leaves fills the air and families gather, the heart of Thanksgiving beats…

The Best Chicken with Coconut Lime Peanut Sauce Recipe

Discover an explosion of flavors with this unique take on peanut lime chicken. This dish—often…

Delicious Baked Scrambled Eggs for Breakfast: A Healthy and Easy Morning Recipe

Baked scrambled eggs are a blank canvas for your breakfast creativity! Add your favorite cheeses…

best Easy Scrambled Egg Toast with Cream Cheese

Are you tired of the same old boring breakfast routine? Are your taste buds begging for…

Orange Chicken Broccoli With Rice Stir Fry​

I get it. That neon-orange takeout box calls to you at 7 pm when you’re starving. But what if I told you this one-pan wonder tastes BETTER than delivery, skips the mystery grease, and gets done before the Uber Eats driver would’ve even arrived? (Chicken Fried Rice).

orange chicken broccoli with rice stir fry​, Chicken Fried Rice

Why This Recipe is My Weeknight Hero

  • The sauce: sticky-sweet with a sneaky Sriracha kick (adjust to your cowardice level)
  • The chicken is crispy outside and juicy inside (no deep fryer required!).
  • The broccoli still has actual crunch (unlike sad takeout mush)
  • The time: 30 minutes flat (faster than arguing over the menu)

How to Make Chicken Fried Rice

What You Need

(Pantry raid edition)

  • Chicken: Breast (for gym rats) or thighs (for flavor chasers)
  • Sauce squad: Orange juice (yes, from the carton!), soy sauce, brown sugar
  • Heat: Sriracha (1 tsp for “ooh”, 2 tsp for “ahh”, 3 tsp for “call the fire department”)
  • Broccoli: Fresh is best (frozen turns to sad green pudding)

Shortcuts That Won’t Get You Judged:

  • Pre-minced garlic/ginger (we’re tired, not chefs)
  • Bottled orange juice (just don’t use mimosa leftovers)

How To Make It (Between Kids Screaming & Emails Pinging)

  1. Whisk the magic sauce – Dump everything in a bowl (even that half-used soy sauce packet).
  2. Sear the chicken – Don’t touch it! Let it get crispy like it offended you.
  3. Broccoli time – Toss in florets until they’re bright green (not army fatigue green).
  4. Glaze glory – Pour sauce over everything and watch it turn shiny and irresistible.

Pro Tip: If your sauce looks too thin, add another cornstarch slurry (1 tsp cornstarch + 1 tsp water) and glare at it until it thickens.

Serving Ideas for Maximum Wow

  • Over rice: Jasmine, brown, or that questionable quinoa in your pantry
  • With flair: Toasted sesame seeds (fancy!) or crushed peanuts (lazy fancy)
  • For kids: Serve sauce on the side for “deconstructed orange chicken” (aka chicken nuggets)

Final Thought: This recipe is for anyone who’s ever stared into a lukewarm takeout box and thought, “I paid $18 for this?” Save the cash (and dignity) and make this instead.

Tag your recreations #FakeoutTakeout – I wanna see your saucy wins.

(P.S. The leftovers? Even better, the next day. Fight me.)

orange chicken broccoli with rice stir fry​

Perfect Chicken, Rice & Broccoli: Easy Balanced Meal Guide

Jasper wellspring
Why chicken, rice & broccoli is the ultimate healthy meal, complete nutrition, easy prep & flavorful twists. Get pro cooking tips & meal-prep hacks
Prep Time 10 minutes
Cook Time 20 minutes
Total Time 30 minutes
Course Main Course, Snack
Cuisine American, Chinese
Servings 4
Calories 369 kcal

Ingredients
  

Ingredients:

For the Chicken & Broccoli:

  • 1.5 lbs chicken breast or thighs cut into bite-sized pieces
  • 2 cups fresh broccoli florets
  • 2 tbsp vegetable oil
  • Salt & pepper to taste

For the Sauce (aka the real MVP):

  • ¾ cup orange juice yes, from the carton
  • 3 tbsp soy sauce
  • 2 tbsp brown sugar
  • 1 –3 tsp Sriracha adjust based on your bravery
  • 1 tsp cornstarch + 1 tsp water slurry for thickness
  • 1 tsp garlic pre-minced is fine
  • 1 tsp ginger fresh or from a tube—no judgment

Instructions
 

Instructions:

    Mix the Sauce:

    • In a small bowl, whisk together orange juice, soy sauce, brown sugar, Sriracha, garlic, and ginger. Set aside your glorious glaze.

    Sear the Chicken:

    • Heat oil in a large pan over medium-high heat. Add chicken pieces in a single layer and let them sit untouched until crispy and golden. Flip and cook through. Remove and set aside.

    Broccoli Time:

    • In the same pan, toss in the broccoli and stir-fry until bright green and still slightly crunchy—no soggy sadness allowed.

    Sauce It Up:

    • Add the chicken back to the pan, pour in the sauce, and stir to coat. Simmer for 3–5 minutes until the sauce begins to thicken.

    Thicken Like a Boss:

    • If the sauce is too thin, mix your cornstarch and water, pour it in, and let it bubble until glossy and thick enough to coat a spoon.

    Frequently Asked

    What is orange chicken​

    Orange Chicken is a popular Chinese-American dish featuring crispy fried chicken tossed in a sweet, tangy orange-flavored sauce. Key elements:
      Crispy chicken (usually thigh meat)
      Sticky orange sauce (zest, juice, sugar, vinegar)
      Signature citrusy-sweet flavor with optional spice

    How to make orange​

    How to Make Orange Chicken (Quick & Easy)
    Ingredients:
    1 lb chicken (thighs or breast), cubed
    ½ cup orange juice (fresh or bottled)
    2 tbsp soy sauce
    3 tbsp brown sugar
    1 tbsp rice vinegar
    1 tsp ginger (grated)
    2 garlic cloves (minced)
    1 tbsp cornstarch + 2 tbsp water (slurry)
    1 tsp Sriracha (optional for heat)
    Steps:
    Make Sauce: Whisk orange juice, soy sauce, sugar, vinegar, ginger, and garlic.
     Cook Chicken: Sear chicken in oil until golden (~5 min).
    Thicken Sauce: Pour the sauce into the pan, add the cornstarch slurry, and simmer until thick (~2 min).
     Toss & Serve: Coat chicken in sauce, top with sesame seeds.
    Done in 20 mins! Serve over rice.

    Is orange chicken spicy?​

    Orange Chicken is typically mildly sweet rather than spicy, but heat levels vary:
    American takeout versions = usually not spicy (focus on sweet-tangy orange flavor)
    Homemade recipes = often add Sriracha/chili flakes (1 tsp = subtle kick | 1 tbsp = noticeable heat)

    Is orange chicken Chinese​

    Orange Chicken is Chinese-American, not traditional Chinese cuisine.
     American Origin: Created in the 1980s in Hawaii by Chinese chefs adapting to local tastes
     Authentic Chinese Comparison: Similar to chenpi ji (tangerine peel chicken), but sweeter
     Key Differences:
    Uses orange zest/juice (rare in China)
    Deep-fried, sticky sauce (uncommon in traditional dishes)

    Can you put broccoli in Orange Chicken?

    Yes! Broccoli pairs perfectly with orange chicken – it adds freshness, texture, and balances the dish. Here’s how to do it right:
    Best Ways to Add Broccoli
    Stir-Fry Method
    Toss florets into the pan last 3-4 minutes to keep them crisp-tender.
    Steam-Sear Combo
    Blanch first, then quick-sear the chicken for charred edges.
    Meal-Prep Style
    Roast separately (400°F for 15 mins) and mix before serving.

    Should you cook broccoli before stir-frying?

    Yes, but only partially! For the crispiest, most flavorful broccoli in stir-fries:
    Best Methods
    Blanch First (2 mins in boiling water) → Crisp-tender base for stir-frying
    Quick Microwave (1 min with splash of water) → Fast prep
    Roast Briefly (400°F for 5 mins) → Deepens flavor
    Why? Raw broccoli takes too long to cook in a stir-fry, risking soggy chicken or burnt garlic.

    Why is chicken rice and broccoli a good meal?

    Chicken, Rice & Broccoli = The Ultimate Balanced Meal
    Why It Works:
    Complete Nutrition
    Chicken: Lean protein for muscle repair
    Rice: Easy-to-digest carbs for energy
    Broccoli: Fiber + vitamins (C, K, folate)
    Meal-Prep Superstar
    Stays fresh for days
    Easy to portion for weight goals
    Endless Customization
    Spice it (curry powder, chili flakes)
    Sauce it (teriyaki, garlic butter, lemon tahini)

    What should you not do when stir-frying?

    Top Stir-Fry Mistakes to Avoid (And How to Fix Them!)
    1. DON’T Crowd the Pan
    Why? Steams food instead of searing.
    Fix: Cook in batches (especially meat/veggies with high water content).
    2. Don’t Use Wet Ingredients
    Why? Causes splatter and prevents browning.
    Fix: Pat meat/veggies dry before cooking.
    3. DON’T Over-Stir
    Why? Prevents caramelization (those tasty brown bits!).
    Fix: Let ingredients sit 30-60 seconds between stirs.
    4. DON’T Use Low Heat
    Why? Results in soggy, greasy stir-fry.
    Fix: High heat + preheated pan = perfect sear.
    5. DON’T Add Sauce Too Early
    Why? Makes everything soggy.
    Fix: Toss in sauce last, then cook 1-2 mins just to coat.
    Bonus Pro Tips:
    Skip olive oil (low smoke point), use peanut/avocado oil.
    Prep everything first (once cooking starts, it’s FAST!).
    Fix these mistakes, and your stir-fry will beat takeout every time!

    Do I need to boil broccoli before cooking?

    No, you don’t have to boil broccoli first—but here’s when you should:
    Skip Boiling If:
     Stir-frying/Roasting → High heat cooks it fast with crispy edges
     Steaming → Just 3-5 mins in a steamer basket
    Boil First If:
     Meal prepping → Blanch 2 mins to stop overcooking later
     Soups/Casseroles → Softens texture evenly
     Freezing → Blanching preserves color/nutrients

    Don’t miss out—follow us on social media for updates:

    Chicken Fajita Salad: The 30-Minute Dinner

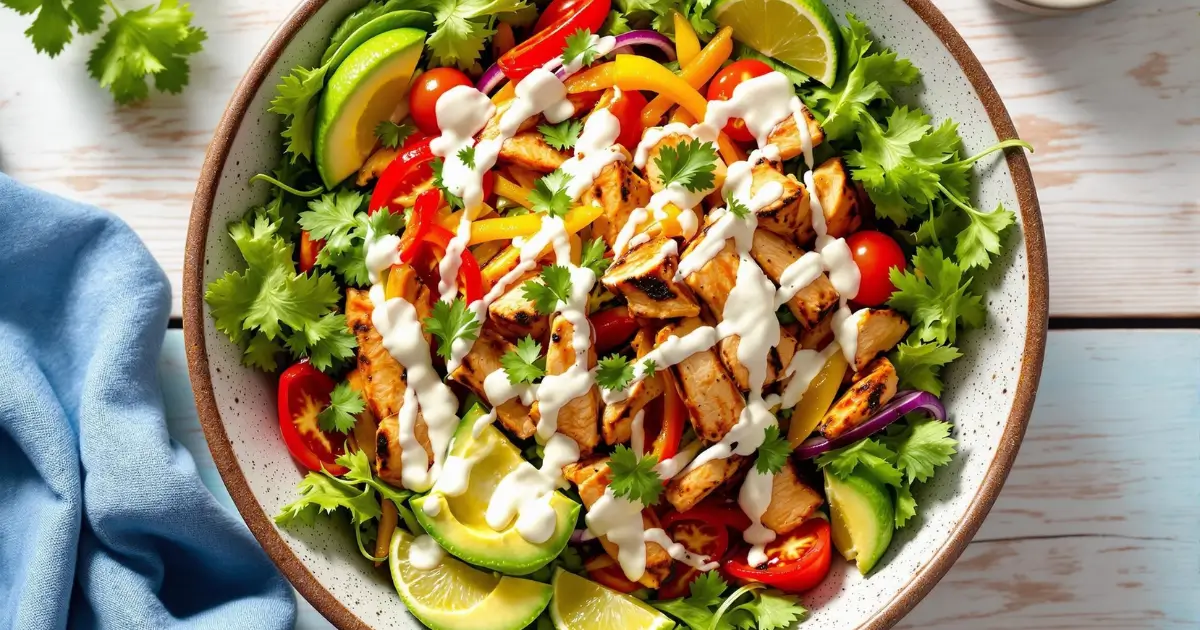
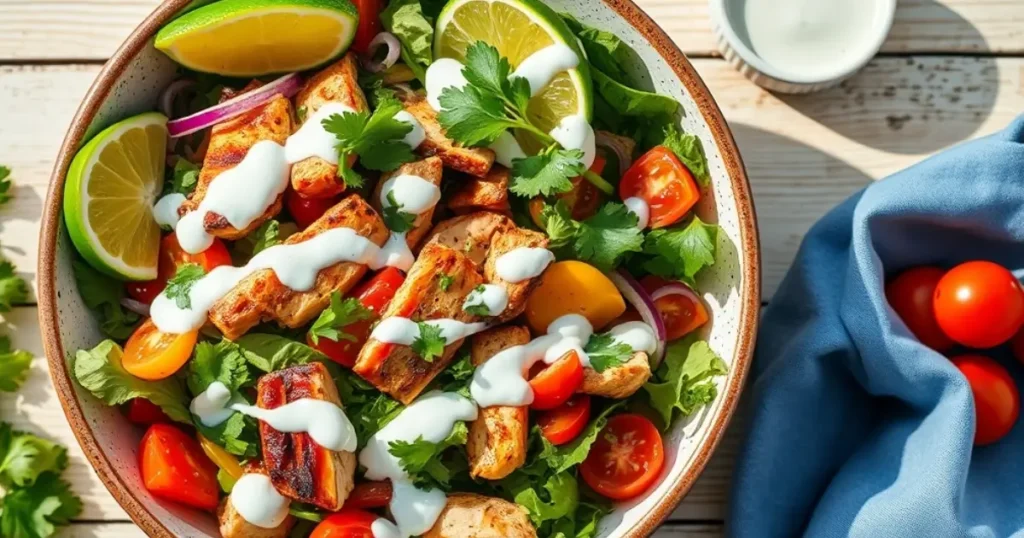
    Look, I wasn’t expecting my picky feline to approve my dinner, but here we are—J the Cat will faceplant into this bowl if I turn my back. Meanwhile, I’m thrilled to have a gluten-free Mexican salad that doesn’t taste like a sacrifice. (Chicken Fajita Salad)

    Chicken Fajita Salad

    Why This Salad Hits Different

    • Juicy chicken thighs: (because dry breast is a crime)
    • Zero marinating: (Who has time? Not this cat servant)
    • All the crunch: charred peppers, creamy avocado, crispy lettuce
    • Ranch dressing loophole: (makes veggies suddenly irresistible)

    How to make chicken fajita salad​

    What You Need

    (Serves 2 humans or 1 very determined cat)

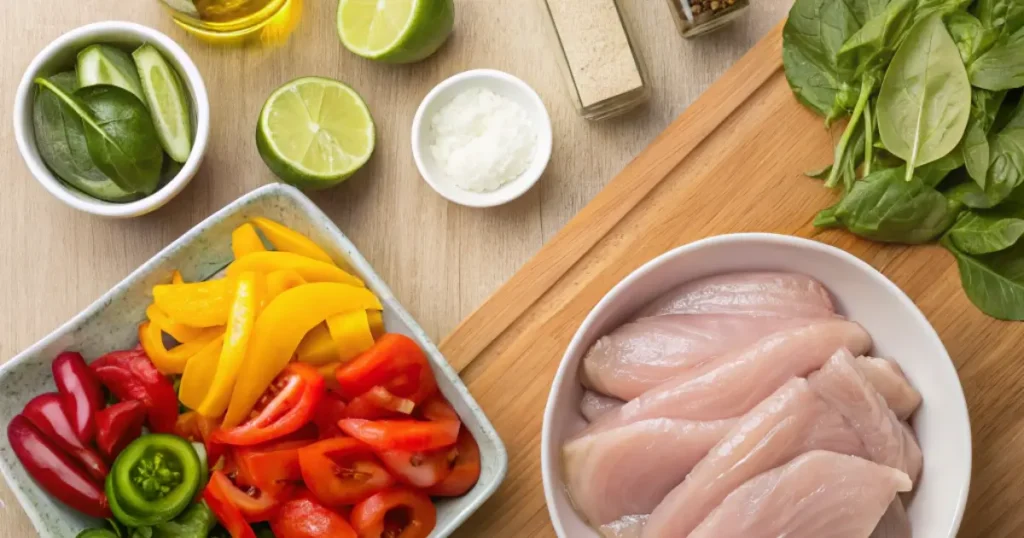
    • The Chicken: 2 thighs or 1 breast (sliced thin if using breast)
    • The Flavor: 1 tbsp fajita seasoning (homemade or stolen from a packet)
    • The Veg: 1 bell pepper (red/yellow for sweetness), ½ onion
    • The Fun: Avocado, cherry tomatoes, cilantro, lime
    • The Lifesaver: Bottled ranch (or whisk together mayo + lime juice in desperation)
    Chicken Fajita Salad

    How To Make It (Between Cat Interruptions)

    1. Season & Sear
    • Pat chicken dry, rub with seasoning like you’re giving it a massage.
    • Cook in screaming-hot skillet 3-4 mins per side (J will come running at the sizzle).
    1. Char the Veggies
    • Use the same pan (fewer dishes!) and toss in peppers and onion with a pinch of salt.
    • Leave them alone to get those sexy blackened bits.
    1. Assemble Like a Taco Bar
    • Pile greens in bowls (I use spinach to pretend it’s healthy).
    • Top with sliced chicken, veggies, avocado chunks, and tomatoes.
    • Drown in ranch (or drizzle artfully if you’re fancy).

    How many calories are in a chicken fajita salad

    Une salade fajita au poulet contient environ 228 à 640 calories par portion, selon la recette et les ingrédients utilisés.

    La valeur moyenne est d’environ 400-500 calories pour une portion standard.

    Les variations principales dépendent :

    • De la quantité de poulet
    • De la présence d’avocat, fromage ou crème sure
    • De l’utilisation ou non d’un bol de tortilla

    Serving Ideas for Maximum Joy

    • With: Frozen mango margaritas (because adulthood)
    • As Lettuce Tacos: When carbs feel like too much
    • For Cat Tax: Serve J plain chicken in his bowl (then watch him ignore it)

    Final Thought: This salad is fast enough for weeknights, fancy enough for guests, and bizarrely intriguing to feline overlords. Win-win-win.

    Made it? Tag #FajitaCatDad for solidarity.

    Chicken Fajita Salad

    easy chicken fajita salad​ recipe

    Jasper wellspring
    Easy Chicken Fajita Salad with avocado & ranch—gluten-free, ready in 30 mins! Perfect for summer dinners or Cinco de Mayo. Get the step-by-step recipe
    Prep Time 10 minutes
    Cook Time 15 minutes
    Total Time 25 minutes
    Course Salad
    Cuisine Tex-Mex
    Servings 2
    Calories 420 kcal

    Ingredients
      

    Ingredients:

    Chicken:

    • 2 boneless skinless chicken thighs or 1 breast, thinly sliced
    • 1 tbsp fajita seasoning store-bought or homemade

    Veggies:

    • 1 sweet bell pepper red or yellow, sliced
    • ½ white or yellow onion sliced
    • Pinch of kosher salt

    Greens + Toppings:

    • 2 cups spinach or mixed greens
    • ½ avocado diced
    • ½ cup cherry tomatoes halved
    • Handful of fresh cilantro chopped
    • 1 lime cut into wedges

    Dressing:

    • 2 –3 tbsp bottled ranch dressing or mix mayo + lime juice in a pinch

    Instructions
     

    Instructions:

      Season the Chicken:

      • Pat chicken dry and rub with fajita seasoning like it owes you money.
      • Sear to Sizzle
      • Heat a skillet over medium-high heat. Add oil, then sear chicken for 3–4 minutes per side until golden and cooked through. Remove and rest.

      Char the Veggies:

      • In the same skillet, toss in sliced peppers and onions. Add a pinch of salt and cook until charred and softened (don’t stir too often!).

      Assemble the Salad:

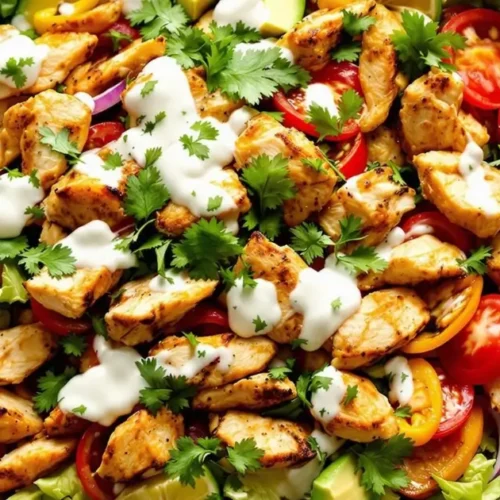
      • In serving bowls, layer your greens. Add sliced chicken, cooked veggies, avocado, tomatoes, and cilantro.

      Add the Sauce:

      • Drizzle with ranch dressing (or drench it, we’re not judging). Serve with lime wedges on the side.

      Notes

      • Make it vegetarian: Sub in grilled portobello mushrooms or tofu with the same seasoning.
      • For crunch: Add crushed tortilla chips or roasted pepitas on top.
      • Cat version: Serve plain cooked chicken in a separate bowl. No seasoning, no drama.
      • Meal prep tip: Keep all components separate in containers and dress just before serving.

      Frequently Asked Questions

      What are the ingredients of taco salad?

      Taco Salad Ingredients (Easy Version):
      Ground beef (or chicken/turkey)
      Lettuce (romaine or iceberg)
      Tomatoes
      Cheese (cheddar or Mexican blend)
      Beans (black or pinto)
      Crushed tortilla chips
      Avocado or guacamole
      Sour cream & salsa
      Shortcut: Use store-bought taco seasoning & ranch dressing.

      What can I use instead of lettuce in tacos?

      Best Lettuce Substitutes for Tacos:
      Cabbage (crunchy & sturdy)
      Spinach (tender & nutrient-packed)
      Kale (heartier texture)
      Zucchini ribbons (low-carb)
      Jicama slices (crisp & slightly sweet)
      Pro Tip: For taco salads, try chopped romaine or butter lettuce for better texture.

      What is the proper way to eat a taco salad?

      The Right Way to Eat Taco Salad:
      Mix gently: Combine ingredients without crushing chips.
      Scoop with chips: Use sturdy tortilla chips as edible utensils.
      Layer bites: Get a bit of each ingredient in every forkful.
      Dress last: Add salsa/sour cream just before eating to avoid sogginess.

      Is taco salad an American thing?

      Yes, taco salad is an Americanized dish inspired by Mexican flavors. While traditional Mexican cuisine features tacos, this deconstructed version—with lettuce, ground beef, and crunchy tortilla shells—was popularized in 1960s U.S. restaurants. Key differences from authentic Mexican food:
      Heavy use of lettuce (rare in Mexican salads)
      Common inclusions: Ranch dressing, cheddar cheese
      Often served in fried tortilla bowls (a U.S. twist)

      Roots: Combines Tex-Mex ingredients with American salad trends

      How are you supposed to eat a taco?

      How to Eat a Taco Like a Pro:
      Hold at 45°: Tilt slightly to prevent fillings from falling.
      Two-Bite Rule: Start from one end, not the middle.
      Push & Lift: Gently push toppings forward as you take each bite.
      Leak Prep: Keep a napkin under the taco’s “belly” to catch drips.

      Do you put lettuce on fajitas?​

      Traditional fajitas don’t include lettuce – they’re served sizzling with onions, peppers, and meat on tortillas. But in American-style fajita salads, lettuce is common.
        Authentic Mexican: No lettuce (just tortillas, meat, veggies)
        Tex-Mex twist: Often added for crunch in salads or bowls

      Don’t miss out—follow us on social media for updates:

      Lunch Break Bliss

      creamy peanut lime chicken with noodles​

      The Noodle Dish That Will Make You Excited to Cook on a Weeknight

      Let’s be real – most “quick and easy” dinner recipes lie to us. They promise…
      A homemade easy spicy pizza topped with pepperoni, jalapeños, and red pepper flakes for a fiery flavor.

      Spicy Pepperoni Pizza : Sicilian Style with Hot Tomato Sauce

      Look, I get it. You want that thick, crispy-bottomed, pepperoni-cupped pizza magic without a PhD…
      fried rice with frozen vegetables​

      Quick Fried Rice with Frozen Vegetables – Ready in 20 Minutes

      Look, I’m no superhero – but this fried rice with frozen vegetables​ makes me feel…
      orange chicken broccoli with rice stir fry​

      Orange Chicken Broccoli With Rice Stir Fry​

      I get it. That neon-orange takeout box calls to you at 7 pm when you’re…
      A bowl of tasty mashed potatoes vegetarian-style, made with milk and garnished with parsley and roasted garlic

      How to Make Tasty Mashed Potatoes Vegetarian for Any Meal

      If you’re craving a comforting and delicious side dish, Tasty Mashed Potatoes Vegetarian is the…
      Homemade Cranberry Sauce

      Homemade Cranberry Sauce

      The Allure of Homemade Cranberry Sauce Cranberry sauce is a beloved classic at American holiday…
      Fish Tacos

      Fish Tacos Recipe _ love with cook

      Fish tacos have become a staple in many kitchens and a favorite dish at restaurants…
      Chicken Fajita Salad

      Chicken Fajita Salad: The 30-Minute Dinner

      Look, I wasn’t expecting my picky feline to approve my dinner, but here we are—J…

      Quick Fried Rice with Frozen Vegetables – Ready in 20 Minutes

      Look, I’m no superhero – but this fried rice with frozen vegetables​ makes me feel like one on weeknights when my toddler’s hangry and the fridge looks empty. Here’s my real-mom, no-judgment guide to turning freezer scraps into something everyone will eat.

      fried rice recipe frozen vegetables​

      Why This Works When You’re Drowning

      Uses frozen veggies (who has time to chop?)
      Comes together faster than DoorDash
      Sneaks in nutrition while tasting like takeout
      Adjustable for babies, picky eaters, and adults

      Making fried rice with frozen vegetables​

      What You Need

      (Serves 2 tired parents + 1 messy toddler)

      • That half-empty bag of frozen veggies (corn/peas/carrots saves the day.)
      • Microwave rice pouch (we see you, Trader Joe’s)
      • Eggs (the ultimate protein cheat code)
      • Soy sauce (low-sodium if baby’s eating)
      • Sesame oil (just a splash – makes it fancy)

      Optional upgrades when you’re feeling fancy:

      • Leftover chicken or tofu
      • That sad ginger nub in your fridge door
      • Crushed peanuts for crunch

      How To Make It Without Losing It

      1. “Sauté” the veggies
      Dump frozen veggies straight into a hot pan (no thawing!). Add a glug of oil if you remember. Let them sizzle while you locate a clean spatula.

      2. Rice to the rescue
      Tear open that microwave rice pouch. Dump it in. Stir like you mean it.

      3. The egg trick
      Make a hole in the middle, crack an egg (or two) in, and scramble right there in the pan. Toddler screaming? Distract them by letting them stir.

      4. Flavor Magic
      Drizzle soy sauce until it looks “right.” Taste. Add more. Burn tongue. Regret nothing.

      Real Mom Tips

      For babies under 1: Skip soy sauce or use coconut aminos
      Toddler hack: Serve with a spoon (game changer for my picky eater)
      Hangry emergency: Microwave the veggies first to save 3 minutes
      Cleanup cheat: Use the same bowl you’ll eat from for mixing

      Why It’s Healthier Than Takeout

      • Half the salt (you control the soy sauce)
      • Actual veggies (frozen = just as nutritious)
      • No mystery oil slick at the bottom of the container

      Nutrition win: Using brown rice adds fiber to survive the toddler years.

      Nutritional Value of Vegetable Fried Rice

      A standard 1-cup (150g) serving of vegetable fried rice typically contains the following nutrition facts:

      NutrientAmount% Daily Value (DV)
      Calories220-280
      Total Fat8-12g12-18%
      – Saturated Fat1.5-2.5g8-12%
      Cholesterol0-30mg0-10%
      Sodium500-800mg22-35%
      Carbohydrates35-45g13-16%
      – Dietary Fiber2-4g8-16%
      – Sugar2-4g
      Protein5-8g10-16%
      Vitamin A15-20% DV
      Vitamin C10-15% DV
      Iron8-10% DV

      What Affects Nutrition?

      Rice Type – Brown rice adds more fiber & protein than white rice.
       Oil Used – Less oil = fewer calories (1 tbsp ≈ 120 extra calories).
       Veggie Mix – More carrots, peas, and broccoli = more vitamins.
       Soy Sauce – Low-sodium soy sauce cuts salt by 30-40%.
       Eggs or Tofu? – Adding scrambled eggs boosts protein (up to 12g/serving).

      Is Vegetable Fried Rice Healthy?

       Pros:

      • Good source of quick energy (carbs)
      • Contains vitamins A & C from veggies
      • Low in saturated fat (if cooked lightly in oil)

       Cons:

      • Can be high in sodium (especially takeout versions)
      • White rice lacks fiber compared to brown rice
      • Restaurant versions often use more oil & salt

      How to Make It Healthier

      1. Swap white rice for brown or cauliflower rice (cuts carbs, adds fiber).
      2. Use less oil – A non-stick pan works great!
      3. Load up on veggies – Bell peppers, mushrooms, and snap peas add nutrients.
      4. Choose low-sodium soy sauce – Or use coconut aminos for less salt.
      5. Add protein – Tofu, edamame, or shrimp make it more filling.

      What to serve with chicken fried rice​

      The Perfect Partners for Chicken Fried Rice: 12 Can’t-Miss Combos

      Let’s face it – chicken fried rice is edible magic. But even wizards need a trusty wand (or, in this case, the perfect sidekick). Here’s how to take your fried rice from “meh” to “more please!” with sides that add crunch, freshness, and extra yum.

      1. The Dynamic Duos

      • Egg drop soup – The Batman to your fried rice, Robin
      • Steamy pork dumplings – Little flavor pockets of joy
      • Crispy spring rolls – For that satisfying crunch factor
      • Garlicky green beans – Your veggie quota, but make it tasty

      2. The Flavor Boosters

      • Spicy kimchi (trust us on this one)
      • Sweet chili cucumbers (just slice, splash, and serve)
      • Teriyaki-glazed anything (chicken, tofu, even pineapple)

      3. The Lazy Genius Picks
      ✓ Bagged Asian salad (doctor it up with sesame oil)
      ✓ Frozen edamame (5 minutes to salty goodness)
      ✓ Takeout egg rolls (because some days you just can’t)

      4. Next-Level Moves

      • Turn leftovers into fried rice tacos (thank us later)
      • Add crispy fried shallots like they’re going out of style
      • Drizzle with sriracha mayo in fancy zigzags

      Pro Tip: The perfect meal needs balance. If your fried rice is:

      • Super savory → pair with something tangy (like pickled veggies)
      • Extra spicy → cool it down with cucumber salad
      • On the bland side → amp it up with chili oil dumplings

      What’s your fried rice soulmate? A humble egg roll or something more adventurous?

      When Life Gives You…

      • Leftovers? Breakfast fried rice with a fried egg on top
      • Extra time? Add garlic and ginger from the tube in your fridge
      • A vegetarian kid? Toss in edamame for protein

      Bottom line: This isn’t gourmet. It’s real-life dinner magic – imperfect, adaptable, and guaranteed to get food on the table before the meltdowns begin.

      Pro tip: Always keep frozen stir-fry veggies and microwave rice in stock. Your future exhausted self will thank you.

      Tag me when you make it! #FrozenVeggieHack #MomDinnerWin

      fried rice with frozen vegetables​

      frozen vegetable fried rice​

      Jasper wellspring
      A 15-minute weeknight dinner using frozen vegetables and microwave rice. Quick, healthy, and picky-eater approved!
      Prep Time 3 minutes
      Cook Time 12 minutes
      Total Time 15 minutes
      Course Main Course, Side Dish
      Cuisine American, International
      Servings 3
      Calories 300 kcal

      Ingredients
        

      Ingredients:

      • 1 bag frozen mixed vegetables like corn, peas, and carrots
      • 1 pouch microwaveable rice white or brown
      • 2 eggs
      • 2 tablespoons soy sauce low-sodium if preferred
      • 1 teaspoon sesame oil

      Optional Add-Ins:

      • Leftover chicken or tofu
      • Crushed peanuts
      • Minced garlic or ginger

      Instructions
       

      Instructions:

      • Heat a large pan over medium heat and add the frozen vegetables. No need to thaw.
      • Microwave the rice pouch according to the package instructions, then add it to the pan. Stir well.
      • Push the veggies and rice to one side, crack in the eggs, and scramble them in the empty space.
      • Mix the scrambled eggs into the rice and veggies.
      • Add soy sauce and sesame oil. Stir everything together and cook for 1–2 more minutes.
      • Serve hot. Enjoy!

      Notes

      • For babies under 1, skip soy sauce or use coconut aminos.
      • Brown rice adds fiber and a nutty flavor.
      • Keep frozen veggies and microwave rice stocked for easy dinners.

      Leftover Magic

      Best Roaster Oven Turkey Recipe

      How to Make the Best Chicken Fried Rice at Home

      Fish Tacos Recipe _ love with cook

      Delicious Peanut Lime Chicken Noodles Recipe You’ll Love

      Frequently Asked Questions (FAQs)

      1. Is fried rice with veggies healthy?

        Yes, veggie fried rice can be healthy if made right! Use brown rice, minimal oil, and load up on colorful veggies. Skip the excess soy sauce to control sodium. Healthier than takeout when homemade.

      2. What is the secret ingredient in fried rice?

        The secret ingredient in great fried rice is… day-old rice!
        Here’s why:
        Cold rice fries better (less mushy)
        Dries out slightly for perfect texture
        Absorbs flavors without getting soggy
        Runner-ups:
         Sesame oil (just a drizzle at the end)
         MSG (just a pinch – it’s what takeout uses!)

      3. Can I use frozen vegetables for fried rice?

        Yes! Frozen veggies work perfectly in fried rice – they’re fast, nutritious, and prevent food waste. Here’s how to nail it:
        Pro Tips for Best Results:
        No Need to Thaw – Toss straight into the wok (prevents mushiness)
        High Heat is Key – Cook on max heat to evaporate ice crystals fast
        Pat Dry First (if thawed) – Extra moisture makes rice soggy
        Best Frozen Veg Picks:
         –Classic Mix (peas/carrots/corn)
        – Stir-Fry Blend (broccoli/peppers/water chestnuts)
        – Edamame (for protein boost)
        Bonus Hack:
        • Microwave frozen veggies 1 min first for extra-quick cooking

      4. What is the right way to cook rice?

        Here’s the ultimate guide to cooking perfect rice every time, whether you’re using a pot, rice cooker, or Instant Pot:
        The Golden Rules of Rice Cooking
        Rinse First
        Always rinse white rice (2-3 times) until the water runs clear to remove excess starch
        Exception: Don’t rinse risotto or sticky rice
        Water Ratio
        White rice: 1:1.5 ratio (1 cup rice to 1.5 cups water)
        Brown rice: 1:2 ratio
        Basmati: 1:1.25 ratio for fluffier grains
        Cooking Methods
        Stovetop:
        Bring to boil → cover → simmer 15 min (white) / 40 min (brown) → rest 10 min
        Rice Cooker:
        Just press “Cook” (foolproof!)
        Instant Pot:
        1:1 ratio → High Pressure 3 min (white) / 22 min (brown) → 10 min natural release
        Pro Secrets
        Add 1 tsp oil/butter to prevent sticking
        Don’t peek while cooking (steam escape = ruined rice)
        Fluff with a fork after resting (never stir while hot)
        Types & Their Perfect Cook Times
        Rice Type
        Water Ratio
        Cook Time
        Jasmine
        1:1.25
        12 min
        Basmati
        1:1.5
        15 min
        Sushi
        1:1
        20 min
        Wild
        1:3
        45 min


        Troubleshooting
        Mushy rice? Too much water → reduce by ¼ cup next time
        Burnt bottom? Lower heat + add 1 tsp lemon juice
        Undercooked? Add 2 tbsp water, and steam 5 more minutes

        Fun Fact: The “knuckle method” (water level to first knuckle) works because it naturally adjusts for pot size!

      5. Should frozen vegetables be thawed before stir-frying?

        No – toss them in frozen! Here’s why:
        The Frozen Veggie Stir-Fry Hack
        No Thawing Needed
        Straight from freezer to wok
        Prevents soggy texture (thawing releases water)
        High Heat = Best Results
        Crank burner to max
        Ice evaporates fast → veggies stay crisp
        Smart Tweaks
        For extra-crunchy veggies: Microwave 1 min first to remove ice crystals
        For dense veggies (broccoli/cauliflower): Add 1-2 mins of cook time
        Best Frozen Picks for Stir-Fry:
        Mixed peppers
        Snap peas
        Corn/peas/carrots blend
        Edamame
        Pro Tip:
        Pat thawed veggies bone-dry with paper towels if you must thaw (e.g., for tempura)


      6. How do you keep frozen vegetables from getting soggy in stir-fry?

        Keep Frozen Veggies Crisp in Stir-Fry with These 5 Tricks:
        Skip the Thaw → Toss straight into a screaming-hot wok/pan (ice evaporates instantly)
        Dry Them Fast → Microwave 60 sec first if thawed, then pat bone-dry
        Oil Smart → Use high-smoke point oils (peanut/avocado) and wait until shimmering
        Work in Batches → Don’t overcrowd the pan (steam = sogginess)
        Sauce Last → Toss with sauce off the heat to prevent liquid absorption
        Best Veggies for Crunch:
        • Sugar snap peas
        • Water chestnuts (canned, drained)
        • Broccoli florets (frozen works!)

      7. How to make stir-fry veggies not soggy?

        Crispy Stir-Fry Veggies Every Time: 6 Can’t-Fail Tricks
        Blast the Heat
        Use max heat on your strongest burner
        Wok/pan should smoke slightly before adding oil
        Prep Like a Pro
        Fresh veggies: Cut uniform sizes (no thick chunks)
        Frozen veggies: Use straight from the freezer (no thawing!)
        Oil Wisely
        High smoke-point oils only (peanut, avocado, or grapeseed)
        Wait until the oil shimmers before adding veggies
        The Golden Rule
        Don’t overcrowd – cook in batches if needed
        Constant tossing = even cooking
        Sauce Strategy
        Mix sauces beforehand (no on-the-spot measuring)
        Add only during the last 30 seconds
        Crunch Boosters
        Splash of rice vinegar while cooking
        Finish with toasted sesame seeds or crushed peanuts
        Veggies That Stay Crunchiest:
        ✓ Snap peas
        ✓ Water chestnuts
        ✓ Broccoli florets
        ✓ Baby corn

      Don’t miss out—follow us on social media for updates:

      Spicy Pepperoni Pizza : Sicilian Style with Hot Tomato Sauce

      Look, I get it. You want that thick, crispy-bottomed, pepperoni-cupped pizza magic without a PhD in dough hydrology. This is the cheat code. (easy spicy pizza recipe)

      Spicy Pizza
      Delicious, homemade, easy spicy pizza with a zesty kick, perfect for spice lovers.

      Why This Works for Normal Humans

      • No kneading. A food processor does the work (or just let time do it overnight).
      • Dump-and-go sauce. No fancy reductions—just garlic, tomatoes, and vibes.
      • Pepperoni that behaves. Natural casing = those little crispy cups you’re obsessed with.

      Dough: The 5-Minute Miracle

      (Makes enough for a half-sheet pan)

      Throw in a food processor:(easy spicy pizza recipe)

      • 4 cups flour
      • 1½ cups warm water
      • 2 tsp salt
      • 1 packet of yeast
      • 2 tbsp olive oil

      Pulse until it looks like Play-Doh. Plop it into an oiled sheet pan, stretch roughly, and leave it alone for 2 hours (or overnight in the fridge).

      No processor? Stir ingredients in a bowl, cover, and ignore for 18 hours. Boom: no-knead dough.

      Sauce: Shortcut Edition

      In a pan over low heat:

      • ¼ cup olive oil + 9 chopped garlic cloves (sizzle 1 min)
      • Add 1 tsp red pepper flakes + 1 tsp dried oregano
      • Dump in a 28-oz can of good crushed tomatoes
      • Simmer 10 minutes while you pour a drink

      Assembly: The 3-Layer Trick

      1. Cheese first – Cover dough with sliced mozzarella (8 oz).
      2. Sauce second – Spread 2 cups over cheese (this keeps the crust crispy).
      3. Pepperoni third – 6 oz natural-casing pep, spaced just shy of overlapping.

      Bake: Set It and (Mostly) Forget It

      • Oven at 550°F (max your oven goes)
      • Bake on the bottom rack for 15 min
      • Done when pepperoni looks like tiny edible satellite dishes

      Eat Like You Mean It

      • Let it cool 5 min (or don’t, I’m not your mom).
      • Cut into squares—Sicilian-style is supposed to be messy.
      • Cold leftovers are a feature, not a bug.

      Pro Move: Freeze half before baking. Future-you will send past-you a thank-you note.

      No food snobbery. No fuss. Just stupid good pizza. You’re welcome.

      Leftover Magic

      Pasta with Shrimp and Pistachio Pesto for Date Night 

      6 Easy Fruit Platter Ideas for Beginners

      Best Roaster Oven Turkey Recipe

      Sicilian Pizza With Pepperoni

      spicy pepperoni pizza recipe

      Jasper wellspring
      Extra spicy pepperoni pizza—loaded with crispy pepperoni cups & fiery tomato sauce. Better than takeout
      Prep Time 15 minutes
      Cook Time 15 minutes
      1 hour
      Total Time 1 hour 30 minutes
      Course Appetizer, Main Course, Side Dish, Snack
      Cuisine American
      Servings 8
      Calories 403 kcal

      Ingredients
        

      Ingredients:

      For the Dough:

      • 4 cups all-purpose flour
      • cups warm water
      • 2 teaspoons salt
      • teaspoons active dry yeast 1 packet
      • 2 tablespoons olive oil

      For the Sauce:

      • ¼ cup olive oil
      • 9 garlic cloves chopped
      • 1 teaspoon red pepper flakes
      • 1 teaspoon dried oregano
      • 1 28 oz can crushed tomatoes (high quality)

      Toppings:

      • 8 oz sliced low-moisture mozzarella cheese
      • 2 cups prepared tomato sauce above
      • 6 oz natural-casing pepperoni for curling & crisping

      Instructions
       

      Instructions:

        Dough (Food Processor Method):

        • In a food processor, combine flour, warm water, salt, yeast, and olive oil.
        • Pulse until a dough ball forms and looks like Play-Doh.
        • Transfer to an oiled half-sheet pan and stretch gently to fit most of the pan.
          Sicilian Pizza With Pepperoni
        • Cover and let rise for 2 hours at room temp or refrigerate overnight.

        Alternative No-Knead Dough Method:

        • Mix all dough ingredients in a large bowl.
        • Cover loosely and let rest at room temp for 12–18 hours.
        • Proceed with pan-stretching and rising before topping.

        Sauce:

        • In a small saucepan over low heat, warm olive oil and sauté garlic for 1 minute.
        • Stir in red pepper flakes and oregano.
        • Pour in crushed tomatoes, stir, and simmer for 10 minutes. Remove from heat.

        Assemble the Pizza:

        • Preheat oven to 550°F (or as hot as it goes).
        • Layer mozzarella slices directly onto the risen dough.
        • Spoon sauce evenly over the cheese (don’t overdo it).
          Sicilian Pizza With Pepperoni
        • Top with natural-casing pepperoni, spaced close together but not fully overlapping.

        Bake:

        • Place pan on the bottom rack and bake for 15 minutes, or until crust is golden, cheese is bubbling, and pepperoni edges are crisp and curled.

        To Serve:

        • Let rest for 5 minutes before slicing into squares.
        • Serve hot—or enjoy leftovers cold (they’re even better the next day).

        Notes

        Storage and Freezer Tips

        • Refrigerate: Leftovers can be stored in an airtight container for up to 4 days.
        • Freeze Before Baking: Freeze assembled, unbaked pizza for future easy meals. Bake straight from frozen, adding a few extra minutes.

         Pro Tips

        • Use a natural-casing pepperoni brand to get that iconic cup-and-char effect.
        • Don’t skip the olive oil in the pan—it’s key to that golden, crispy crust.
        • Mozzarella under the sauce = a dry, chewy base that doesn’t sog out.

        Frequently Asked

        What is in spicy pepperoni?

        Spicy pepperoni contains pork, beef, salt, spices (like paprika and chili flakes), garlic, and preservatives (sodium nitrite). The heat comes from red pepper, cayenne, or crushed chili peppers.

        How to spice up pepperoni pizza?

        Drizzle hot honey, add pickled jalapeños, sprinkle red pepper flakes, or upgrade to spicy pepperoni for instant heat. For gourmet flair, try chili oil or Calabrian chiles after baking!
        5 Easy Ways to Spice Up Your Pizza:
        Before Baking:
        Swap regular pepperoni for spicy or cup-and-char (curls into crispy, oily cups)
        Add thin-sliced serranos or fresh habaneros under the cheese
        After Baking:
        Drizzle garlic-chili oil or sriracha mayo
        Top with quick-pickled onions (tossed in vinegar + red pepper flakes)
        Finish with grated Pecorino Romano (naturally spicy, sharp cheese)

        Which pizza is very spicy?

        The “Hellfire” pizza (with ghost peppers, habaneros, and spicy salami) or “Diablo” pizza (featuring Calabrian chiles, cayenne-infused sauce, and pepperoncini) rank among the spiciest. Some pizzerias even offer “Death Wish” pizzas with Carolina Reaper toppings!
        5 Legendarily Spicy Pizzas:
         The Atomic : (Buffalo Wild Wings) – Scorpion pepper sauce + jalapeños
         El Diablo: (Blaze Pizza) – Spicy red sauce, chorizo, and chopped serranos
         Vicious Circles: (Hell’s Kitchen, Minneapolis) – Ghost pepper cheese blend + Thai chilies
         The Hottie: (Home Slice, Austin) – Pickled jalapeños + cayenne honey drizzle
         The Challenge Pizza: (various) – Must finish the entire Reaper-topped pie to win
        Pro Tip: Always ask for gloves—capsaicin sticks to fingers! Pair with cooling ranch or yogurt dip.

        Is spicy pizza a thing?

        Yes! Spicy pizza is a booming trend, with pizzerias offering ghost pepper-infused sauces, chili oil drizzles, and fiery toppings like jalapeños, nduja sausage, or Carolina Reaper slices. Some even have “heat challenge” pizzas for daredevils.

        What is the world’s spiciest pizza?

        The World’s Hottest Pizza: “The Widower” (180+ Scoville Units)
         Record Holder: Hell’s Fire Pizza (UK) uses a Carolina Reaper puree base, topped with:
        Ghost pepper salami
        Fresh habaneros
        Trinidad Scorpion chili flakes
        Infused chili oil

        How to make hot and spicy pizza?

        To make hot and spicy pizza, use spicy tomato sauce (mixed with chili flakes), pepper jack cheesespicy pepperonijalapeños, and finish with chili oil drizzle. Bake at 475°F (245°C) for 12–15 minutes for crispy, fiery perfection.

        Don’t miss out—follow us on social media for updates: